
Tools
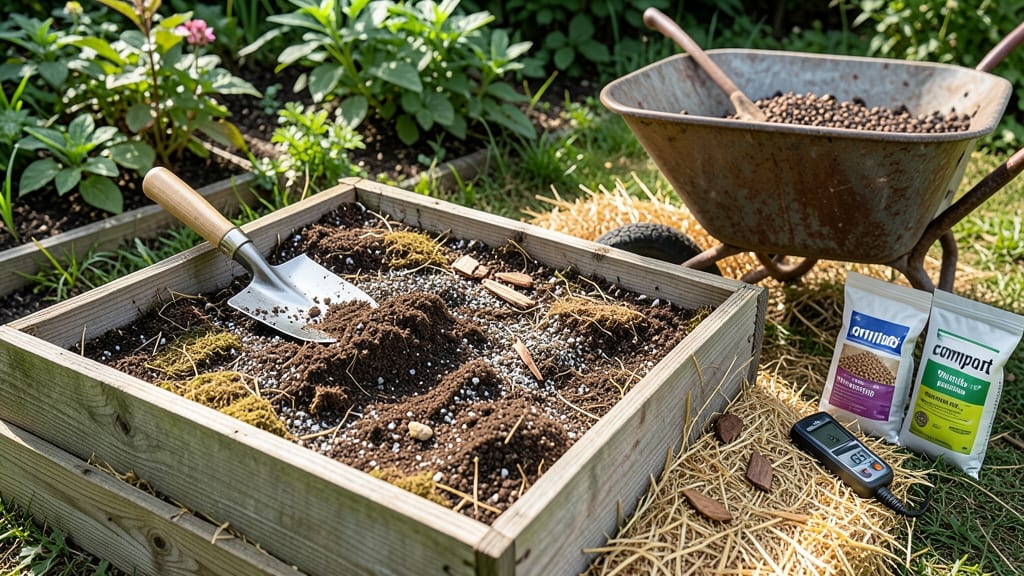
A raised garden bed soil mixture that drains well yet holds moisture is the secret to plants that thrive from day one. ✨ I learned the hard way that store-bought bags alone won't cut it—my tomatoes kept drowning while my peppers struggled to root.
The right blend gives roots room to breathe while feeding them exactly what they need. Start with one-third compost for nutrients, one-third garden soil for structure, and one-third perlite or coarse sand for drainage. For heavy feeders like tomatoes, add a handful of worm castings or a slow-release fertilizer.
Layering matters too: begin with 2 inches of coarse material at the bottom, then alternate soil and compost in 4-inch layers. What you'll end up with is a loose, crumbly mix that warms faster in spring and stays workable all season.
No more soggy roots or nutrient-starved plants—just consistent growth and fewer headaches. The best part? This mix lasts 2-3 seasons before needing a top-dressing of compost. Works for vegetables, herbs, and flowers alike.
Here's how to mix it right without overcomplicating things—no fancy equipment needed, just a wheelbarrow and a shovel.
📚 In This Guide
- What you need
- Instructions
- Tips and common mistakes
- Wrapping up and next steps
What you need
- ● Topsoil: 30-50% of the mix (aim for high-quality, organic topsoil with good nutrient content). Quantity: 2-3 cubic feet per square foot of bed depth.
- ● Compost: 20-30% of the mix (well-aged, screened compost for even distribution). Quantity: 1 cubic foot per 2 square feet of bed.
- ● Peat Moss or Coco Coir: 10-20% of the mix (improves moisture retention and aeration). Quantity: ½ cubic foot per square foot of bed.
- ● Perlite or Pumice: 10% of the mix (boosts drainage and root aeration). Quantity: ¼ cubic foot per square foot of bed.
- ○ Coarse Sand or Grit: 10% of the mix (optional but highly recommended for heavy clay soils). Quantity: ¼ cubic foot per square foot of bed.
- ● Garden Gloves (to protect your hands from rough materials).
- ● Wheelbarrow or Large Container (for mixing ingredients).
- ● Shovel or Spade (for layering and blending).
- ● Rake or Hoe (to smooth and level the mixture).
- ○ pH Test Kit (optional but helpful to check soil acidity before planting).
- ● Wooden or Metal Raised Bed Frame (pre-assembled or DIY).
- ○ Landscape Fabric (optional, to line the bed and prevent weeds).
- ● 🌡️ Test Your Soil: If unsure about your topsoil’s quality, mix in 1-2 cups of balanced fertilizer (like 10-10-10) per cubic foot.
- ● ✨ Customize for Plants: Heavy feeders (like tomatoes) love extra compost, while succulents thrive with more sand/perlite.
- ● 🔄 Replenish Annually: Add a 1-inch layer of compost each spring to maintain fertility.
Step-by-Step guide to building a layered raised garden bed soil mix
This proven soil blend ensures perfect drainage, aeration, and nutrient retention for thriving plants.
🪴 Step 1: Gather and Arrange Base Materials in Layers
Start with a 4-inch layer of coarse gravel at the bottom of your raised bed. This isn't just for drainage—it prevents root rot by keeping excess water away from plant roots. I like to use 1-inch diameter river rocks because they allow water to flow freely while staying in place. Spread them evenly across the bottom, then compact lightly with your hands or a board.
Next, add a 2-inch layer of decomposed hardwood mulch on top of the gravel. This layer acts as a natural filter, preventing fine soil from clogging the drainage layer below. The mulch also introduces beneficial fungi and microbes that will colonize your soil mix. Don't skip this step—it's what keeps your bed from becoming waterlogged over time.
🌱 Step 2: Build the Nutrient-Rich Middle Layer
For the next 6-inch layer, blend equal parts of topsoil and compost. I use 1/3 topsoil (from a reliable source) and 2/3 compost (well-aged, not fresh manure). This ratio gives plants immediate nutrients while maintaining good structure. Mix these thoroughly—you want a crumbly texture that holds moisture but doesn't compact easily.
Here's the thing—if your topsoil is heavy clay or sandy, adjust the mix. For clay-heavy soil, add 10% perlite to improve aeration. For sandy soil, incorporate 10% peat moss to help retain moisture. You'll know you've got the right balance when a handful of the mix holds together when squeezed but crumbles easily when released.
💧 Step 3: Top With Finishing Soil for Planting
Finish with a 2-inch layer of high-quality potting mix on the surface. This top layer is crucial because it's where seeds will germinate and young roots will establish. I prefer a mix that contains peat moss, perlite, and vermiculite—it's light, sterile, and perfect for seed starting. Spread this evenly across the bed and rake lightly to create a smooth, level surface.
Don't overlook this top layer. It's where most of your plant's initial growth happens, and using a lighter mix here prevents compaction that can strangle roots. You'll see the difference immediately when planting—seeds will sprout faster and seedlings will establish stronger root systems.
✂️ Step 4: Condition and Test the Soil Before Planting
Water the entire bed thoroughly until water runs freely from the drainage holes at the bottom. This step is critical—it helps settle the layers and removes any air pockets that could hinder root growth. Let it drain completely, then add another 1-inch layer of compost on top. Work this into the surface soil with a rake or your hands.
Test your soil's readiness by pressing your finger into the top 2 inches. It should feel moist but not soggy—like a well-wrung sponge. If it's too dry, water lightly again. If it's too wet, add more coarse sand or perlite to improve drainage. The ideal soil should hold moisture without feeling compacted or waterlogged.
☀️ Step 5: Maintain Soil Health Through the Growing Season
After planting, add a 1-inch layer of organic mulch (like straw or shredded leaves) to the surface. This keeps moisture levels consistent and prevents soil from heating up too quickly. I like to refresh this mulch layer every 4-6 weeks during the growing season, especially after heavy rains or when plants show signs of stress.
Here's where many gardeners go wrong—they think once the bed is built, they're done. But healthy soil is a living ecosystem. Every 3-4 months, work in a 1/2-inch layer of compost to replenish nutrients. You'll notice plants growing stronger and more vigorously, with deeper green leaves and better resistance to pests and diseases.
Tips & tricks for perfect raised garden bed soil mix
Building the ideal raised bed soil mix isn't just about throwing ingredients together—it's about creating a living ecosystem that supports plant health from the ground up.
Layering Technique: When adding your 4-inch gravel base in Step 1, consider using slightly larger river rocks (up to 1.5 inches) if your bed has deep drainage needs. The larger gaps between rocks improve water flow, especially in heavy clay soils. For shallower beds or container gardens, you can reduce the gravel layer to 3 inches while maintaining proper drainage. The key is ensuring water can pass through without clogging—this prevents the dreaded "soggy bottom" that stunts root growth.
Compost Quality Check: In Step 2, when blending your 6-inch nutrient layer, take a moment to inspect your compost. It should smell earthy (like a forest floor) and crumble easily between your fingers. If it's still chunky with recognizable food scraps, it needs more time to decompose. For faster results, pre-compost these chunks in a separate bin for 2-3 weeks before using. The 2/3 compost to 1/3 topsoil ratio is perfect for most vegetables, but for heavy feeders like tomatoes or peppers, consider adding 10% worm castings to this layer for an extra nutrient boost.
Testing Soil Texture: After completing Step 4's moisture test, there's one more texture check I always do: the "squeeze test." Take a handful of your finished topsoil layer and press firmly. It should hold its shape when squeezed but break apart easily when you release pressure—like a damp sponge. If it forms a hard clod, you need more perlite or coarse sand. If it falls apart completely, add a bit more peat moss or compost to improve moisture retention. This texture ensures roots can penetrate easily while maintaining proper aeration.
Pro Tips for Raised Garden Bed Soil Mixture
- Building the ideal raised bed soil mix isn't just about throwing ingredients together—it's about creating a living ec...
- Layering Technique: When adding your 4-inch gravel base in Step 1, consider using slightly larger river rocks (up to ...
- Compost Quality Check: In Step 2, when blending your 6-inch nutrient layer, take a moment to inspect your compost. It...
Frequently asked questions
Got questions about creating the perfect raised garden bed soil mixture? You’re not alone! Here are answers to the most common queries to help you get growing with confidence.
What’s the best ratio of soil, compost, and perlite for a raised bed?
A balanced mix typically uses 60% topsoil, 30% compost, and 10% perlite or coarse sand for drainage. Adjust based on your plants—heavy feeders (like tomatoes) may need more compost, while succulents thrive with extra perlite.
How long should I let the soil settle before planting?
Give your raised bed 1–2 weeks to settle after mixing. This allows moisture to distribute evenly and helps break down any clumps. For faster results, lightly water the bed before planting to encourage soil compaction.
Can I skip expensive store-bought soil and use yard waste instead?
Use leaf mold, grass clippings (aged), or shredded bark as organic matter, but avoid fresh grass or weeds (they can mat and attract pests). Mix with 1/3 perlite or vermiculite to improve aeration and drainage.
What if my raised bed drains too fast or stays soggy?
For fast drainage, add coarse sand or hydroponic clay pebbles to the bottom layer. For waterlogged soil, improve aeration with composted bark or coconut coir. Test drainage by pouring water—it should absorb slowly but not pool.
Do I need to replenish the soil every year?
Top off with 2–3 inches of compost annually to replenish nutrients. After 2–3 years, consider a full refresh by removing old soil (if heavily depleted) and adding a new mix. Mulch helps preserve moisture and reduce erosion.
Wrapping up and next steps
Creating the perfect raised garden bed soil mixture is all about balancing nutrients, drainage, and root health—giving your plants the ideal foundation to thrive! 🌱 By layering compost, topsoil, and organic matter, you’ll craft a rich, well-draining environment that supports strong growth and bountiful harvests.
Whether you’re a seasoned gardener or just starting, this layered approach makes gardening easier and more rewarding.
Now that you’re armed with the right knowledge, it’s time to roll up your sleeves and get growing! Start by prepping your bed, layering your materials, and watch your plants flourish. Happy planting—your future harvests will thank you! 🌿