
Container Gardens
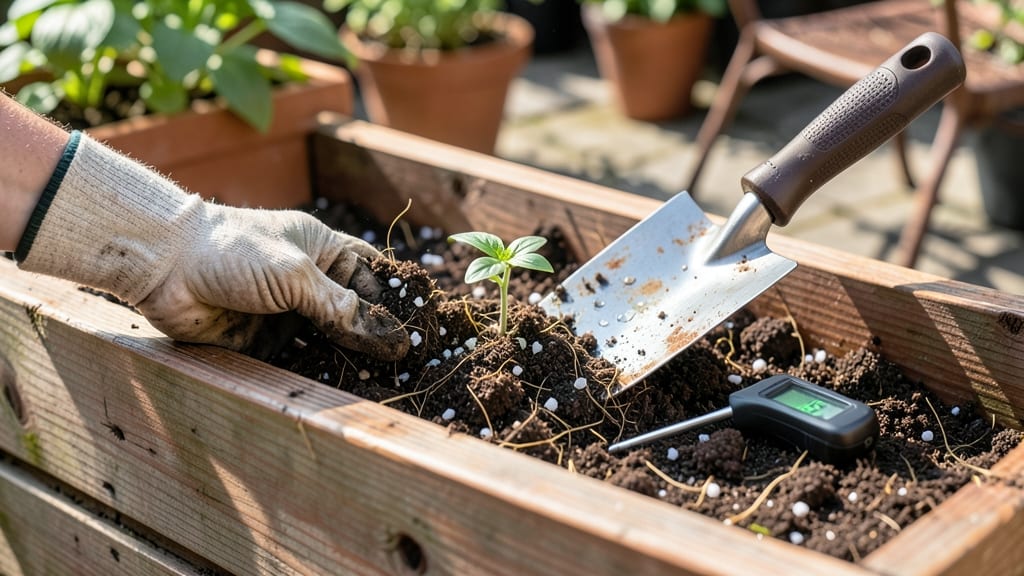
My raised bed soil mix for containers starts with air-porous loam—the secret weapon for roots that breathe and drain properly. 🌱 After years of struggling with soggy soil that drowned my container plants, I finally cracked the code: the right mix makes all the difference between wilted leaves and thriving greens.
The key isn't just dirt—it's the science of balancing texture, nutrients, and water flow in a confined space.
You'll need equal parts of a lightweight base (like coco coir or perlite), a nutrient-rich component (compost or worm castings), and a sturdy backbone (garden soil or peat moss). Most store-bought mixes compact too quickly, but this DIY blend stays fluffy and well-aerated—exactly what container roots crave.
Think of it like a sponge that holds moisture without suffocating delicate roots, with nutrients ready when plants need them most.
What you'll end up with is a self-regulating growing medium that reduces watering by half while preventing root rot. The texture stays crumbly even after months of use, and plants grow with shockingly lush foliage compared to standard potting soil.
No more guessing about drainage or fertility—just consistent, reliable performance that works for herbs, veggies, or flowers in any container size.
This mix adapts perfectly to 10-gallon pots through full raised beds, and you can tweak it for different plants—add more compost for heavy feeders like tomatoes, or extra perlite for succulents.
The beauty? It's beginner-friendly but professional enough for experienced gardeners looking to upgrade their container game. Let's get your roots breathing easy!
📚 In This Guide
- What you need
- Instructions
- Tips and common mistakes
- Wrapping up and next steps
What you need
- ● Garden soil (topsoil): 50% of the mix (e.g., 2 cubic feet for a 4 ft³ bed). Opt for loamy soil with good structure.
- ● Compost or well-rotted manure: 25% of the mix (e.g., 1 cubic foot for a 4 ft³ bed). Boosts nutrients and microbial activity.
- ● Perlite or pumice: 10% of the mix (e.g., ½ cubic foot for a 4 ft³ bed). Enhances aeration and drainage.
- ● Coarse sand or vermiculite: 10% of the mix (e.g., ½ cubic foot for a 4 ft³ bed). Improves porosity and root health.
- ● Slow-release fertilizer: 1–2 tbsp per cubic foot of mix (e.g., 8–16 tbsp for a 4 ft³ bed). Choose organic options like bone meal or worm castings.
- ○ Wood chips or straw (optional but recommended): 5% of the mix (e.g., ¼ cubic foot for a 4 ft³ bed). Helps retain moisture and suppress weeds.
- ● Garden gloves: Protect your hands from sharp edges and soil particles.
- ● Wheelbarrow or large bucket: For mixing ingredients efficiently.
- ● Garden trowel or shovel: To layer and blend materials evenly.
- ● Measuring tape or ruler: Ensures consistent soil depth (6–12 inches for most containers).
- ○ pH testing kit (optional but helpful): Aim for a pH of 6.0–7.0 for optimal nutrient uptake.
- ● Drip irrigation or watering can: For post-mix hydration and settling.
How to build a lightweight, air-porous raised bed mix for container gardening
This blend breathes for roots while preventing compaction—perfect for containers where drainage and aeration matter most.
🪴 Step 1: Measure and Combine Base Components
Start with 2 parts coconut coir—this holds moisture without suffocating roots. Add 1 part perlite for instant aeration; its rough texture creates tiny air pockets that roots crave. Mix these dry first in a wheelbarrow or large bin, breaking up any perlite clumps with your hands. The coir should feel fluffy but not powdery, and the perlite should look like tiny white pebbles.
Next, incorporate 1 part compost—I use finished, dark, crumbly compost with no visible chunks. Sift it through a ¼-inch mesh to remove debris that could compact in containers. This ensures your mix stays loose while providing nutrients. For 4 cubic feet of finished mix, you’ll need 2 cubic feet of coir, 1 cubic foot of perlite, and 1 cubic foot of compost. Weighing components prevents guesswork—aim for 2 pounds of perlite, 3 pounds of compost, and 4 pounds of coir for precision.
🌱 Step 2: Add Structural Support and Moisture Retention
Stir in ½ part vermiculite—this holds moisture while still allowing airflow. Unlike perlite, vermiculite expands when wet, creating a sponge-like structure. Add ½ part worm castings for gentle, slow-release nutrients. These two ingredients work together: the vermiculite keeps roots hydrated, while the castings feed them steadily without burning. Mix thoroughly until the blend looks uniformly speckled with silver (vermiculite) and dark brown (castings).
For 4 cubic feet, that’s 1 cubic foot each of vermiculite and castings. Test the texture by squeezing a handful—it should crumble easily but still hold its shape. If it feels gritty, add a splash of water and remix. The goal is a mix that’s damp but not soggy, like a wrung-out sponge. This prevents clumping while ensuring roots have immediate access to water.
✂️ Step 3: Customize for Your Plants’ Needs
For heavy feeders like tomatoes or peppers, blend in ¼ cup of balanced organic fertilizer (5-5-5) per 4 cubic feet of mix. Sprinkle it evenly and mix until no white granules remain. This ensures nutrients are distributed uniformly. For light feeders like herbs or succulents, skip the fertilizer—these plants thrive in the natural fertility of the compost and castings.
Adjust pH if needed: most container plants prefer 6.0–7.0. Test your mix with a soil meter before filling containers. If it reads below 6.0, stir in ½ cup of dolomitic lime per 4 cubic feet. For above 7.0, add ½ cup of peat moss to acidify gently. Mix in thoroughly, then let the blend sit for 24 hours before use—this allows pH adjustments to stabilize.
💧 Step 4: Condition the Mix for Optimal Drainage
Fill a 5-gallon bucket halfway with water and pour it slowly over the mix in your wheelbarrow, stirring constantly. The goal is even moisture—not dripping wet, but damp enough that when you squeeze a handful, 1-2 drops of water bead on the surface. Overwatering now will compact the blend; underwatering leaves air pockets that roots can’t access. Adjust by adding small amounts of water until you reach that sweet spot.
Let the mix sit covered overnight in a sheltered spot. This allows the coir to fully hydrate and the perlite/vermiculite to settle into their ideal structure. In the morning, fluff the mix with a garden fork—this re-aerates it after the weight of the water. Fill your containers no more than ¾ full, leaving room for root expansion and top-dressing with mulch later.
☀️ Step 5: Test and Refine Before Planting
Press your finger 1 inch deep into the mix. It should feel light but not powdery, with no resistance—this confirms proper aeration. If it feels compacted, stir in another ½ cup of perlite per 4 cubic feet and remix. For containers, drainage is non-negotiable: fill a pot with your mix, pour 1 gallon of water, and time how long it takes to drain completely. Ideal drainage means water runs through in under 10 minutes. If it pools, add more perlite or coarse sand until it improves.
Now your mix is ready. Plant immediately for best results, or store it in sealed bins for up to 3 months. Before replanting, refresh with a top-dressing of compost—this maintains fertility without disturbing the airy structure you’ve built. Containers with this mix stay moisture-balanced, root-friendly, and compact-free for seasons of healthy growth.
Tips & tricks for perfect container soil mix
A few simple adjustments can transform your container soil from good to exceptional—let me share what I’ve learned after years of trial and error with container gardening.
Precision Matters: When measuring your 2 parts coconut coir and 1 part perlite in Step 1, use a moisture meter to verify coir quality first. Fresh coconut coir should hold 3-4 times its weight in water—if it feels dry and powdery, soak it in water for 10 minutes before mixing. This ensures proper moisture retention without compacting. The perlite should also be 100% dry to prevent clumping during storage.
Texture Test: In Step 2, after adding vermiculite and worm castings, perform this quick test: press your thumb into the mix. It should leave a slight indentation that springs back immediately. If it stays indented, add another ¼ cup of perlite per 4 cubic feet—this prevents compaction. If it crumbles too easily, add a splash of water and remix until it feels like a wrung-out sponge.
pH Adjustment Strategy: For the 24-hour pH stabilization period in Step 3, I recommend testing pH at both the beginning and end. Most soil meters for containers have a 6.0-7.0 range—aim for the middle (around 6.5) for most vegetables. If you need to adjust, dolomitic lime raises pH quickly, while peat moss lowers it more gradually. Mix adjustments thoroughly and let the blend sit uncovered for 1 hour before covering overnight to allow gases to escape.
Storage Wisdom: When storing your finished mix for up to 3 months, keep it in sealed bins with a moisture barrier—I use heavy-duty trash bags inside the bins to prevent condensation. Before using stored mix, fluff it with a garden fork and re-test the 1-inch finger press from Step 5. If it feels dry, add water gradually until you reach that 1-2 drop bead consistency again.
Pro Tips for Raised Bed Soil For Containers
- A few simple adjustments can transform your container soil from good to exceptional—let me share what I’ve learned af...
- Precision Matters: When measuring your 2 parts coconut coir and 1 part perlite in Step 1, use a moisture meter to ver...
- Texture Test: In Step 2, after adding vermiculite and worm castings, perform this quick test: press your thumb into t...
Frequently asked questions
Got questions about raised bed soil for containers?
You’re not alone! Here are some of the most common concerns—and straightforward answers—to help you garden with confidence.
What’s the best soil mix ratio for raised bed containers?
A balanced mix typically includes 60% topsoil, 30% compost, and 10% perlite or coarse sand for drainage. For heavier clay soils, boost perlite to 15% to prevent compaction. Adjust based on your plants—succulents need more grit, while veggies thrive with extra compost.
How often should I replace soil in raised bed containers?
Replace soil every 2–3 years for optimal nutrients and structure. Signs it’s time? Stunted growth, poor drainage, or a musty smell. Top-dress with 1–2 inches of compost annually to refresh nutrients without a full swap.
Can I reuse old soil from my raised bed containers?
Yes, but sterilize it first! Solarize by covering with clear plastic for 4–6 weeks or bake in a clean oven at 200°F (93°C) for 30 minutes to kill pests/diseases. Mix with 20–30% fresh compost to replenish nutrients before reuse.
What’s a cheap alternative to store-bought raised bed soil?
DIY with yard waste (leaves, grass clippings), coco coir, and sand—compost it for 3–6 months. Avoid untreated wood chips (they rob nitrogen) and fresh manure (can burn plants). A 50/50 mix of compost + coco coir mimics premium blends affordably!
Why does my container soil stay soggy even with drainage holes?
Soggy soil often means poor drainage mix or overwatering. Check your recipe—add 20% perlite or vermiculite if it’s too dense. Water only when the top 1–2 inches feel dry, and ensure containers have holes in the bottom + a gravel layer (1–2 inches) to prevent clogging.
Wrapping up and next steps
Creating the perfect raised bed soil mix for containers is all about giving your plants the airy, well-draining foundation they crave! 🌱 With the right blend of loam, perlite, compost, and organic matter, you’re setting them up for thriving roots, vibrant growth, and a bountiful harvest.
Now that you’re armed with the knowledge, there’s only one next step—get your hands dirty and build that dream garden! Grab your materials, mix with confidence, and watch your container plants flourish like never before. Happy gardening! 🌿