
How To
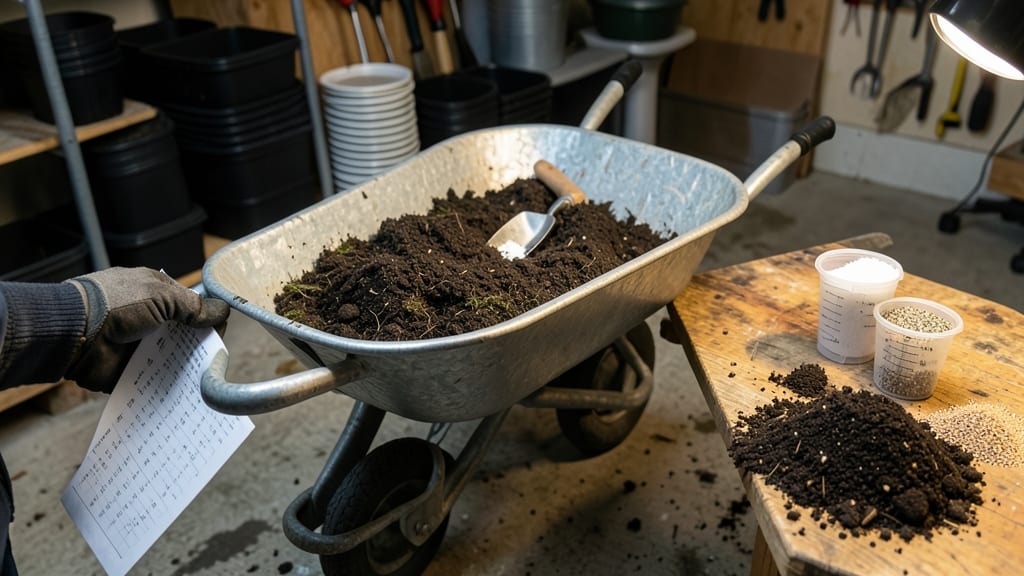
Your potting soil mixture ratio is the secret weapon behind every thriving houseplant or container garden—and science proves the right proportions make all the difference. 🌱 I learned this the hard way when my fiddle-leaf fig turned into a sad, root-bound mess because the soil mix was all wrong.
The key isn’t just dumping dirt in a pot; it’s balancing moisture retention, aeration, and nutrients so roots breathe and plants grow strong.
Most store-bought mixes work for average plants, but if you’re growing succulents, herbs, or heavy feeders like tomatoes, you’ll need to tweak the formula. A basic ratio starts with 40% organic matter (like compost or coconut coir), 30% perlite or vermiculite for aeration, and 30% sand or pumice for drainage.
For succulents, bump the sand to 50%—they hate soggy roots. Herbs like basil thrive with a lighter mix, while veggies need extra compost for nutrients.
Once you mix it right, you’ll notice plants staying lush and upright instead of wilting or leaning. Roots spread evenly, water drains properly, and you avoid the dreaded "soggy bottom" that kills containers.
The best part? You can customize this for any pot size—whether it’s a tiny herb container or a half-barrel tomato planter. Just adjust the quantities while keeping the proportions the same.
Pro tip: Test your mix by squeezing a handful—it should hold shape but crumble easily. If it stays clumpy, add more perlite; if it falls apart, mix in extra compost. A little science upfront saves you from replanting later. Ready to mix your first batch?
📚 In This Guide
- What you need
- Instructions
- Tips and common mistakes
- Wrapping up and next steps
What you need
- ● Peat moss or coco coir (2 parts) – Retains moisture and provides aeration. Opt for sphagnum peat moss or coco coir (eco-friendly alternative).
- ● Perlite (1 part) – Lightweight volcanic rock that improves drainage. Use expanded perlite (½–¼ inch granules).
- ● Vermiculite (1 part) – Hydrated mica mineral that holds moisture and nutrients. Choose grade 3 or 4 vermiculite.
- ● Compost or worm castings (1 part) – Adds organic matter and beneficial microbes. Use well-aged compost or high-quality worm castings.
- ○ Sand (optional, ½ part) – Only for heavy soils; use coarse horticultural sand (not construction sand).
- ● A large mixing container (5-gallon bucket, wheelbarrow, or clean plastic tote).
- ● A garden trowel or shovel for blending.
- ○ A fine-mesh sieve or screen (optional, to remove debris).
- ● Gloves and a dust mask (for handling perlite/vermiculite).
- ○ pH testing kit (optional, to check soil acidity after mixing).
Step-by-step guide to mixing the perfect potting soil
Here's my foolproof method for creating a balanced mix that keeps roots happy and drainage just right.
🌱 Step 1: Understand the Base Components
Start with 50% peat moss or coconut coir as your moisture-retentive base. This holds water while still allowing airflow—think of it as the plant's water reservoir. I like coconut coir because it's more sustainable and drains slightly better than peat. Measure out exactly half of your total mix volume for this component.
Next, add 25% perlite or vermiculite for aeration. Perlite creates those tiny air pockets roots need to breathe, while vermiculite holds moisture better. I prefer perlite for most plants because it prevents compaction better. Sift it in gently—you'll see it lighten the mix considerably as you go.
🌿 Step 2: Add Organic Matter for Nutrition
For 20% compost or well-aged manure, use only finished compost—fresh manure burns roots. This provides slow-release nutrients that feed plants over weeks. I like to use worm castings for delicate seedlings because they're gentler than regular compost. Mix this in thoroughly so it's evenly distributed throughout the lighter components.
Add 5% horticultural charcoal last—this improves drainage and prevents bacterial buildup. Think of it as nature's water filter for your soil. Sprinkle it lightly over the entire mix and stir gently to avoid creating pockets where it might clump.
✂️ Step 3: Customize for Plant Type
For succulents and cacti, increase perlite to 40% total mix and reduce peat to 35%. These plants need maximum drainage to prevent root rot. I like to add a handful of coarse sand (not fine beach sand) to further improve drainage for these thirsty plants.
For heavy feeders like tomatoes or peppers, boost the compost to 30% and add 5% worm castings for extra nitrogen. These plants will devour nutrients quickly, so you want to give them a head start. Mix everything thoroughly until you can't see any distinct layers—this ensures even moisture and nutrient distribution.
💧 Step 4: Test Your Mixture
Fill a container with your mix and pour water until it drains from the bottom. Good potting soil should drain completely in 10-15 minutes but still hold moisture when squeezed gently. If water pools on top, add more perlite. If it drains too quickly, add a bit more peat or compost.
Run your finger through the mix—it should feel light but not powdery, with small air pockets visible. This texture gives roots both support and breathing room. Store your mix in a sealed container until ready to use, but mix fresh before planting to maintain optimal aeration.
☀️ Step 5: Maintain Long-Term Health
After planting, water thoroughly until water runs from the bottom. Let the top inch dry between waterings—this prevents fungal issues while keeping roots hydrated. I like to top-dress with a thin layer of fresh compost every 3 months to replenish nutrients without disturbing roots.
For container plants, refresh the mix annually by removing the top 2 inches and replacing with fresh potting soil. This prevents nutrient depletion and improves aeration at the surface where new roots form. Your plants will show you they're thriving with steady growth and vibrant foliage.
Tips & tricks for perfect potting soil mixes
Mixing the right potting soil blend makes all the difference for your plants—here's how to get it right every time.
Mixing Technique: Use a large, shallow container for blending components to avoid compacting the mix. I like to start with the heaviest ingredients (peat moss or coconut coir) at the bottom, then layer lighter components like perlite on top. This prevents the perlite from sinking to the bottom where it won't help drainage. Stir gently with a garden trowel or clean hands to maintain those crucial air pockets.
Ingredient Quality: Never use garden soil from your yard—it compacts too easily and can harbor pests. For coconut coir, choose the shredded variety over blocks, as it breaks down more evenly. When selecting compost, look for dark, crumbly material with no strong odor. The 5% horticultural charcoal should be finely ground to distribute evenly without clumping.
Drainage Test: The 10-15 minute drainage test is your best quality check. If water pools on top after pouring, you need more perlite—aim for 30% perlite if you're still seeing surface water. For plants that need even better drainage (like succulents), increase perlite to 40% as mentioned in Step 3, but reduce the peat moss to 35% to maintain some moisture retention.
Storage Wisdom: Store your finished mix in a sealed container with a loose lid to allow some airflow. I use 5-gallon buckets with airtight lids for large batches. If storing for longer than 3 months, add an extra 1% horticultural charcoal to prevent bacterial growth. Remember to mix fresh before planting—even good soil loses its structure over time.
Pro Tips for Potting Soil Mixture Ratio
- Mixing the right potting soil blend makes all the difference for your plants—here's how to get it right every time.
- Mixing Technique: Use a large, shallow container for blending components to avoid compacting the mix. I like to start...
- Ingredient Quality: Never use garden soil from your yard—it compacts too easily and can harbor pests. For coconut coi...
Frequently asked questions
Got questions about crafting the perfect potting soil mix? You’re not alone! Here are some of the most common queries—plus science-backed answers to help your plants thrive.
What’s the best potting soil mixture ratio for most houseplants?
A 1:1 ratio of potting mix to perlite or vermiculite (e.g., 50% potting soil, 50% amendment) works for most houseplants. For succulents or cacti, bump it to 60% potting mix, 40% coarse sand or pumice to prevent root rot. Always adjust based on your plant’s drainage needs!
How long does a homemade potting soil mix last before it degrades?
Homemade mixes typically last 6–12 months if stored dry in a sealed container. Over time, organic matter breaks down, losing nutrients and structure. Refresh annually or top-dress with compost to revive it. Pro tip: Label your mix with the date!
Can I use garden soil instead of potting mix in my containers?
Not ideal!
Garden soil compacts easily, drains poorly, and can harbor pests or diseases. If you’re in a pinch, amend it heavily—mix 1 part garden soil : 2 parts potting mix + perlite—but avoid it for long-term container gardening.
What can I do if my potting mix smells bad after watering?
A foul odor usually means overwatering or poor drainage. Let the soil dry out completely, then fluff the mix with a fork to improve airflow. If the smell persists, your mix may be too dense—add 20% coconut coir or orchid bark to lighten it up.
Are there any plants that need a special potting soil ratio?
Orchids
thrive in 60% bark/fir chips, 30% perlite, 10% charcoal. African violets prefer 50% peat moss, 30% perlite, 20% vermiculite. Always check your plant’s care guide—some, like carnivorous plants, need sterile, peat-heavy mixes!
Wrapping up and next steps
Mastering the potting soil mixture ratio is your secret weapon for lush, healthy plants—whether you're a seasoned gardener or just starting out! 🌱 The right blend of ingredients ensures proper drainage, aeration, and nutrient retention, setting your green friends up for success.
Now that you’ve got the science-backed proportions, it’s time to get hands-on and experiment with confidence.
Your next step? Grab a trowel, mix with care, and watch your plants thrive! Try different ratios for your specific plants, keep a journal, and refine your blend over time. Happy planting! 🌟