
Trees
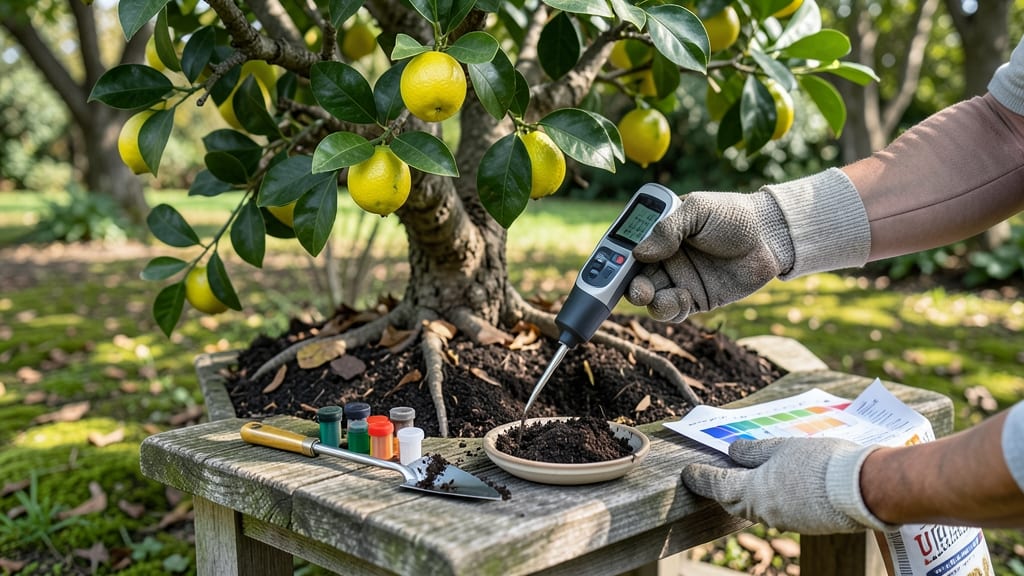
Testing your soil before planting fruit trees is the difference between a bountiful harvest and years of struggling with stunted growth. 🌳 I learned this the hard way—my first peach tree spent three seasons fighting poor soil, and the branches never filled out.
The right pH and nutrients aren’t just technical details; they’re the foundation for strong roots, vibrant foliage, and fruit that tastes like summer.
You’ll need a basic soil test kit (or lab analysis for deeper insights) and a small shovel to collect samples from multiple spots around where your tree will go. Test in early spring before planting or late fall to plan amendments for next year.
Most fruit trees thrive in slightly acidic soil (pH 6.0–7.0), but apples prefer the lower end (5.5–6.5), while peaches and plums do better at 6.0–7.0. Once you get your results, focus on fixing what’s missing—whether it’s organic matter for drainage, potassium for fruit sweetness, or zinc for leaf health.
A simple fix like compost or wood ash (for alkaline adjustments) can turn struggling trees into productive powerhouses. My second peach tree, planted after testing, produced 50% more fruit its first year. This works for any fruit tree—citrus, berries, or stone fruits—just adjust amendments based on your soil’s specific needs.
Let’s get those roots thriving!
📚 In This Guide
- What you need
- Instructions
- Tips and common mistakes
- Wrapping up and next steps
What you need
- ● Soil sampling kit (or a clean, stainless-steel trowel/spade for digging)
- ● Disposable gloves (to keep your hands clean and samples uncontaminated)
- ● Plastic bags or airtight containers (1–2 quart-sized, labeled for each sample)
- ● Soil testing kit (DIY kits like Luster Leaf or MySoil for pH/nutrients) or a lab submission kit (from local extension offices or services like UMass Soil Test)
- ● Measuring tape or ruler (to mark sampling depth: 6–8 inches deep)
- ● Permanent marker (for labeling bags/containers)
- ● Map or sketch of your orchard (to note sample locations)
- ● Soil sieve or mesh screen (to remove rocks/debris before testing)
- ● pH test strips (quick pre-check for extreme pH levels)
- ● Moisture meter (to test soil dampness before sampling)
- ● Camera (to document soil color/texture for reference)
- ● Notebook (to log observations like tree health, location notes, or past amendments)
Step-by-Step guide to testing soil for fruit trees
Here's how I prepare soil for fruit trees—using precise testing to unlock the best harvests.
🌱 Step 1: Collect Soil Samples Strategically
Grab a clean trowel and dig 4-6 core samples from 6-12 inches deep around where your fruit tree will go. Space them 10-15 feet apart in a zigzag pattern—this captures the full area the tree's roots will occupy. Avoid surface soil or spots near old plant debris, as these can skew results.
Combine samples in a clean bucket, breaking up any clumps with your hands. You want a uniform mix that represents the entire planting zone. If your yard has varied soil types (like sandy patches or clay areas), test each separately. I always label samples with location and date—mixing up results is a rookie mistake I’ve seen too often.
🧪 Step 2: Send Samples to a Lab or Use a Home Test Kit
For professional accuracy, mail samples to a certified soil testing lab (extension offices often offer this service for $15-30). Include details like intended use (fruit tree cultivation) and request a full analysis: pH, nitrogen (N), phosphorus (P), potassium (K), calcium, magnesium, organic matter, and micronutrients. Labs provide tailored amendments, which saves guesswork.
For quick results, use a home test kit (like LaMotte or MySoil) that measures pH, nitrogen, phosphorus, and potassium. Follow kit instructions precisely—moisten samples to the consistency of a damp sponge before testing. Home kits give instant feedback but lack micronutrient details. I rely on them for routine checks but always confirm critical plantings with lab tests.
📊 Step 3: Interpret Results for Fruit Tree Needs
Fruit trees thrive in slightly acidic to neutral soil (pH 6.0–7.0). If your test shows pH below 6.0, add pelletized lime (follow lab recommendations for exact amounts). For pH above 7.0, incorporate elemental sulfur or peat moss to lower pH gradually. Never adjust pH more than 1 point per season—sharp changes shock roots.
Check nutrient levels against fruit tree requirements:
- Nitrogen (N): Medium to high (encourages leafy growth but avoid excess—it delays fruiting).
- Phosphorus (P): Moderate (critical for root development and flower formation).
- Potassium (K): High (boosts disease resistance and fruit quality).
Adjust with balanced fertilizer (10-10-10 or 5-10-10) or organic amendments like composted manure or bone meal.
🌿 Step 4: Amend Soil Based on Findings
Spread organic matter (like compost or well-rotted manure) across the planting area to a depth of 3-4 inches. Work it into the top 6 inches of soil using a broadfork or tiller. This improves drainage, water retention, and microbial activity—all critical for fruit trees. For sandy soils, add peat moss or coconut coir to retain moisture; for clay soils, mix in perlite or coarse sand to loosen texture.
If micronutrient deficiencies appear (like zinc or iron deficiency), apply chelated micronutrients or Epsom salt (for magnesium). I avoid over-amending—fruit trees are sensitive to salt buildup from excess fertilizers. Always water deeply after amending to help nutrients settle into the root zone.
⏰ Step 5: Retest Before Planting and Monitor Seasonally
After 4-6 weeks of amending, retest soil to confirm changes. pH adjustments take time, so don’t rush planting. For new plantings, aim to test soil 6 months before transplanting—this gives amendments time to integrate. Once your tree is established, test soil annually in early spring to monitor nutrient trends and adjust fertilizers as needed.
Watch for visual cues that align with test results:
- Yellow leaves (often iron or nitrogen deficiency).
- Purple stems (usually phosphorus deficiency).
- Wilting despite watering (could indicate potassium or calcium issues).
Keep a garden journal to track soil changes and tree responses—this helps refine your approach over time.
Tips & tricks for perfect soil testing for fruit trees
Took me years of trial-and-error to learn these game-changers for accurate soil analysis that actually translates to better fruit yields.
Sampling Precision: When collecting those 4-6 core samples in Step 1, use a clean trowel for each sample to prevent cross-contamination between layers. I've seen gardeners mix in surface debris that skews pH readings—always dig to 12 inches deep and avoid areas with old plant matter. For large yards, map your sampling locations with stakes to ensure consistent spacing in that zigzag pattern.
Kit Calibration: If using a home test kit in Step 2, run a control test first with known soil samples (available from kit manufacturers). I once got inconsistent pH readings until I discovered my kit needed calibration—this simple step prevents false results that could lead to incorrect amendments. For lab tests, include a note about your specific fruit tree varieties, as some (like blueberries) require different pH targets than apples or peaches.
Amendment Timing: The 4-6 week waiting period after amending in Step 5 is non-negotiable for pH adjustments. I learned this the hard way by planting too soon after adding lime—my peach tree struggled with nutrient uptake for its first growing season. For micronutrient deficiencies, apply chelated nutrients in early spring when roots are most active, but always follow the 1-point-per-season pH adjustment rule to avoid shocking the tree.
Visual Cue Training: Start documenting those visual cues from Step 5 now—keep a small notebook by your fruit trees to record leaf color changes alongside your soil test results. I've noticed my apple trees develop subtle yellowing between veins during nitrogen deficiency long before the leaves fully yellow. This visual journal becomes your early warning system for future soil tests.
Pro Tips for Soil Testing For Fruit Trees
- Took me years of trial-and-error to learn these game-changers for accurate soil analysis that actually translates to ...
- Sampling Precision: When collecting those 4-6 core samples in Step 1, use a clean trowel for each sample to prevent c...
- Kit Calibration: If using a home test kit in Step 2, run a control test first with known soil samples (available from...
Frequently asked questions
Got questions about soil testing for your fruit trees?
Here are answers to the most common ones—so you can grow healthier trees and sweeter harvests!
How often should I test my fruit tree soil?
Test your soil every 2–3 years for established trees, or annually if you’ve just planted new ones. Young trees or those struggling with poor growth benefit from more frequent checks (every 1–2 years). Adjust testing if you amend soil often or notice nutrient deficiencies.
Can I test soil without a lab kit?
Yes! DIY kits (like pH strips or home testers) give quick results, but lab tests are more accurate. For fruit trees, labs analyze pH, nitrogen, phosphorus, potassium, and micronutrients—critical for diagnosing hidden issues. If budget is tight, start with a pH test (affordable and easy) before investing in full lab work.
When is the best time to test soil for fruit trees?
Test in early spring (before planting) or fall (after harvest) for ideal timing. Avoid testing after heavy rain or fertilizer applications—wait 4–6 weeks for accurate readings. Soil moisture should be consistent (not soggy or bone-dry) when collecting samples.
My soil test shows low pH—how do I fix it for fruit trees?
Most fruit trees thrive in slightly acidic to neutral soil (pH 6.0–7.0). To raise pH, add lime (follow package rates); for lower pH, use sulfur or peat moss. Re-test in 2–3 months and adjust gradually—quick fixes can harm roots. Pro tip: Test soil depth (6–12 inches) for precise amendments!
Are cheap soil test kits reliable for fruit trees?
Budget kits (like MySoil or Luster Leaf) work for basic pH checks, but for fruit trees, lab tests (e.g., from local universities or ag extensions) are worth the cost. They detect micronutrient deficiencies (like zinc or boron) that cheap kits miss—critical for fruit quality and tree health.
Wrapping up and next steps
Soil testing for fruit trees is your secret weapon for thriving orchards and bountiful harvests! 🌱 By understanding your soil’s pH and nutrient levels, you’re not just guessing—you’re making data-driven decisions that ensure your trees get exactly what they need to flourish. Now’s the time to act: grab that soil sample, send it off for testing, and let the results guide your next steps—whether it’s adjusting pH, amending nutrients, or fine-tuning your care routine.
Your fruit trees (and future harvests) will thank you! 🍎✨ Ready to dig deeper? Start with a test today and watch your orchard transform!