
Vegetables
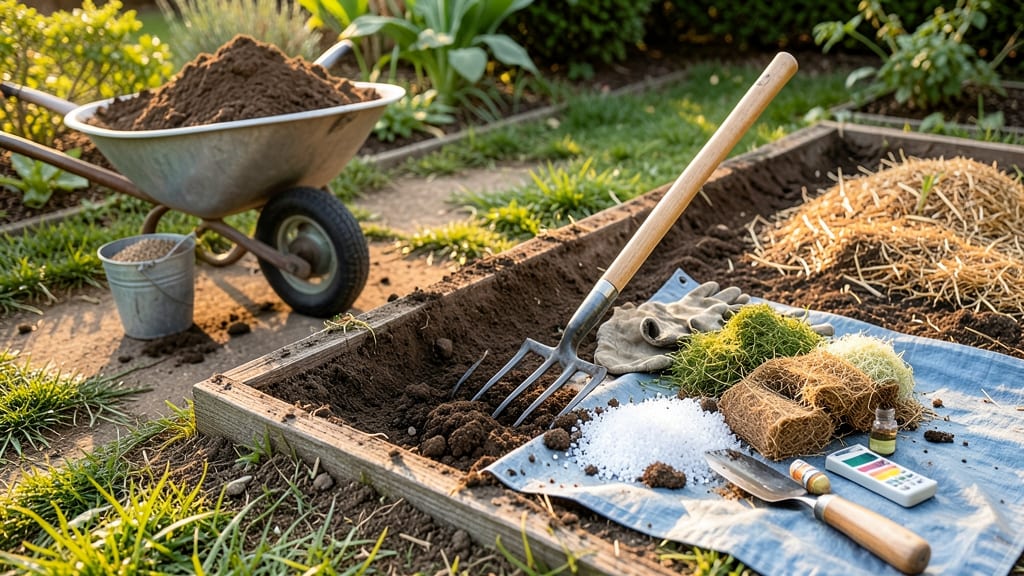
How to prepare soil for planting vegetables isn’t just about dirt—it’s the secret to harvests that make your neighbors jealous. 🌱 I’ve spent years turning compacted clay into a fluffy, nutrient-rich bed where carrots grow straight and tomatoes burst with flavor, and the key is in the layers. Start with a soil test to know what’s missing, then mix in 2-3 inches of compost and 1 inch of coarse sand for drainage. Heavy clay? Add peanut hulls or perlite to break it up. The goal is a mix that holds moisture but drains fast enough to keep roots happy—not soggy. You’ll see the difference immediately: seeds germinate faster, plants establish roots deeper, and even finicky crops like peppers thrive. The texture should feel like a well-worn sponge—light enough to crumble but still hold shape when squeezed. Works for raised beds, in-ground plots, or even container gardens. Here’s how to get it right the first time—no more struggling with poor soil again.
📚 In This Guide
- What you need
- Instructions
- Tips and common mistakes
- Wrapping up and next steps
What you need
- ● Garden fork or broadfork – For aerating and loosening compacted soil (1-2 units, depending on plot size).
- ● Garden trowel or spade – For digging, mixing, and amending small areas (1 per person).
- ● Garden rake – To level soil and remove debris (1 medium-sized rake).
- ● Wheelbarrow or large bucket – For hauling soil, compost, and amendments (1-2, depending on volume).
- ● Gloves (heavy-duty) – To protect your hands from thorns, dirt, and sharp tools (1 pair).
- ○ Soil testing kit (optional but helpful) – To check pH and nutrient levels before planting (1 kit).
- ● Compost – The backbone of healthy soil! Aim for 2-3 inches spread evenly across your plot (quantity depends on garden size; ~1 cubic yard per 100 sq ft).
- ● Well-rotted manure – Adds nutrients and improves soil structure (e.g., cow, horse, or chicken manure; avoid fresh manure). Use ~1-2 inches mixed into the top 6-12 inches of soil.
- ● Peat moss or coconut coir – Improves moisture retention and aeration (1-2 bags, depending on plot size).
- ● Perlite or vermiculite – Enhances drainage and aeration (1-2 bags for larger gardens).
- ● Sand (coarse) – Helps break up clay soil (1-2 bags if needed; test first!).
- ● Balanced fertilizer (10-10-10 or organic option) – Adds essential nutrients (follow package rates, typically ½ lb per 100 sq ft).
- ● Lime (if soil is acidic) – Adjusts pH (use a soil test to determine quantity; typically 1-2 lbs per 100 sq ft).
- ● Mulch (straw, wood chips, or leaves) – Retains moisture and suppresses weeds (2-3 inches once plants are established).
- ● Biochar – Boosts soil fertility and water retention (mix in sparingly, ~5-10% of soil volume).
- ● Mycorrhizal fungi – Enhances root growth and nutrient uptake (follow product instructions).
- ● Compost tea – A nutrient-rich liquid fertilizer (brew at home or buy pre-made).
- ● Soil moisture meter – Ensures you’re watering just right (especially for containers).
Step-by-Step guide to preparing soil for vegetable planting
Here's how I transform dense, lifeless soil into a nutrient-rich, well-draining foundation for vegetables.
🌱 Step 1: Test and Clear the Soil
Start by removing any weeds, rocks, or debris from your planting area. I like to use a sturdy garden fork to loosen the top 6-8 inches of soil—this breaks up compaction without turning the entire plot. Look for signs of pests like cutworms or grubs; if you spot them, treat with organic neem oil or diatomaceous earth before proceeding.
Grab a handful of soil and squeeze it. If it forms a tight clump that doesn't crumble easily, your soil is too dense. Vegetables need loose, airy soil that allows roots to spread freely. This is where the magic begins—your goal is to create a layered loam that holds moisture but never stays soggy.
🌿 Step 2: Amend With Organic Matter
Spread a 2-3 inch layer of well-aged compost or leaf mold over the loosened soil. I prefer compost because it adds essential nutrients while improving soil structure. For sandy soil, mix in 1 inch of peat moss to help retain moisture, while clay-heavy soil benefits from 1 inch of coarse sand or perlite to create air pockets.
Work the amendments into the top 6 inches of soil using a broadfork or tiller. Avoid over-mixing—you want to preserve the natural soil layers while incorporating just enough organic matter to create a crumbly, dark loam. Think of it like fluffing a pillow: you're adding softness without destroying the foundation.
💧 Step 3: Balance pH and Nutrients
Most vegetables thrive in soil with a pH between 6.0 and 7.0. Test your soil's pH using a home kit or send a sample to your local extension office for professional analysis. If the pH is too low (acidic), sprinkle lime evenly over the plot and work it into the top 2 inches of soil. For high pH (alkaline), add sulfur or peat moss.
Add a balanced organic fertilizer like 5-5-5 or a vegetable-specific blend at a rate of 1 pound per 100 square feet. I like to work it into the soil during the final mixing—this ensures nutrients are available when roots begin to grow. Water the amended soil lightly to help settle everything in place.
☀️ Step 4: Create the Ideal Planting Surface
Rake the soil until it's smooth and free of large clumps. The surface should look dark, crumbly, and slightly moist—like a well-tended garden bed. Press down lightly with your hands to create a firm but not compacted base. This prevents seedlings from sinking too deeply when planted.
For raised beds, add a 1-inch layer of coarse sand along the bottom to improve drainage. Then layer with 2 inches of compost, followed by 4 inches of topsoil, and finish with 2 inches of finished compost on top. This creates the perfect layered loam that vegetables love.
⏰ Step 5: Condition Before Planting
Let the amended soil sit for 1-2 weeks before planting. This allows microbes to break down organic matter and creates a stable environment for roots. During this time, keep the soil lightly moist—enough to encourage microbial activity but not soggy. You'll know it's ready when the surface feels like a well-wrung sponge: damp but not wet.
Before planting, run your fingers through the soil. It should feel light, airy, and full of tiny crumbles. If it sticks to your hands or feels gummy, add more organic matter or sand and let it condition longer. Perfect soil for vegetables is like a good loaf of bread: it holds together just enough to support roots but crumbles easily when handled.
Tips & tricks for perfect vegetable soil preparation
A few subtle adjustments can transform your soil from mediocre to exceptional—here’s how to nail the details that make all the difference.
Tool Selection Matters: That sturdy garden fork in Step 1 isn’t just for show—it’s the key to breaking compaction without disrupting the soil structure. For stubborn clay, swap it for a broadfork after loosening with a shovel. The goal is to create vertical channels for roots, not pulverize everything. Think of it like fluffing a mattress: you want to loosen without destroying the layers.
Layering for Drainage: When building your raised bed layers in Step 4, the sand layer at the bottom isn’t just for show—it’s your drainage insurance. For especially heavy clay soils, consider doubling it to 2 inches of coarse sand. The top compost layer should be the darkest and most crumbly; if it feels gritty, you’ve mixed too much sand into the upper layers. Remember: roots need both air and water, but never both at once.
pH Testing Shortcut: Those home pH test kits can be finicky, so here’s my trick: after testing, compare your soil’s reaction to a known neutral substance (like baking soda). If your soil feels slippery when wet after adding lime, you’ve likely overshot the 6.0-7.0 range. For precise adjustments, split your plot into sections and treat them separately—this way, you can fine-tune without overcorrecting.
Conditioning Check: The 1-2 week conditioning period in Step 5 is your quality control window. If you’re short on time, you can plant after just 7 days, but expect slightly slower initial growth. The real test? Press your finger into the soil—it should spring back with just a faint indentation, like pressing into a well-made cake. If it leaves a deep impression, keep conditioning.
Pro Tips for Prepare Soil For Planting Vegetables
- A few subtle adjustments can transform your soil from mediocre to exceptional—here’s how to nail the details that mak...
- Tool Selection Matters: That sturdy garden fork in Step 1 isn’t just for show—it’s the key to breaking compaction wit...
- Layering for Drainage: When building your raised bed layers in Step 4, the sand layer at the bottom isn’t just for sh...
Frequently asked questions
Got questions about prepping your soil for a thriving vegetable garden? You’re not alone! Here are some of the most common queries—and straightforward answers—to help you get growing with confidence.
How long before planting should I prepare my soil?
Ideally, start soil prep 4–6 weeks before planting. This gives organic matter (like compost or aged manure) time to break down and improve texture. For heavy clay or sandy soil, aim for 8–12 weeks—patience pays off with better root development! Test your soil’s pH too; amendments like lime (for acidity) or sulfur (for alkalinity) need time to adjust.
Can I use regular garden soil straight from the bag?
Not ideal! Store-bought soil often lacks the organic matter, microbes, and structure vegetables crave. Mix it with 50% compost or aged manure and 20% perlite/sand for better drainage and aeration. For raised beds, blend 1/3 compost, 1/3 topsoil, and 1/3 coconut coir or peat moss for a nutrient-rich base.
What if my soil is too clay-heavy or too sandy?
| Problem Soil | Fix It With |
|---|---|
| Clay (sticky, slow-draining) | Add organic matter (compost, leaf mold) + coarse sand or perlite (1 part amendment to 3 parts soil). Till in gypsum (1 lb per 10 sq ft) to break up compacted layers. |
| Sandy (dries out fast, poor nutrients) | Blend in peat moss or coconut coir (holds moisture) + well-rotted manure. Top with mulch (straw, wood chips) to retain humidity. |
Test drainage by digging a 12-inch hole, filling it with water, and timing how long it takes to drain. If it’s more than 6 hours, your soil needs sand or grit.
Will tilling kill beneficial worms and microbes?
Deep tilling can disrupt soil life, but shallow, gentle aeration (with a broadfork or hand fork) preserves microbes and earthworms. For no-till gardens, top-dress with compost and use a transplanter to create small holes for seeds. Worms will migrate upward naturally over time!
How often should I test my soil’s pH?
Test once every 1–2 years for established gardens, or before planting new crops if you notice stunted growth. Most vegetables thrive in pH 6.0–7.0. Use a home test kit ($10–$20) or send a sample to a local extension office for precise results. Adjust with lime (raise pH) or sulfur (lower pH)—apply 3–6 months before planting.
Wrapping up and next steps
Preparing your soil for vegetable gardening is the foundation of a thriving harvest—rich, well-drained, and nutrient-packed soil sets the stage for healthy plants and bountiful yields. 🌱 By balancing organic matter, adjusting pH, and ensuring proper aeration, you’re giving your veggies the best possible start.
Now that you’re armed with the know-how, it’s time to roll up your sleeves and transform your garden into a powerhouse of productivity!
Ready to dig in? Start by testing a small patch of your soil, then gradually apply your improvements. Watch your garden—and your confidence—grow! 🌿