
How To
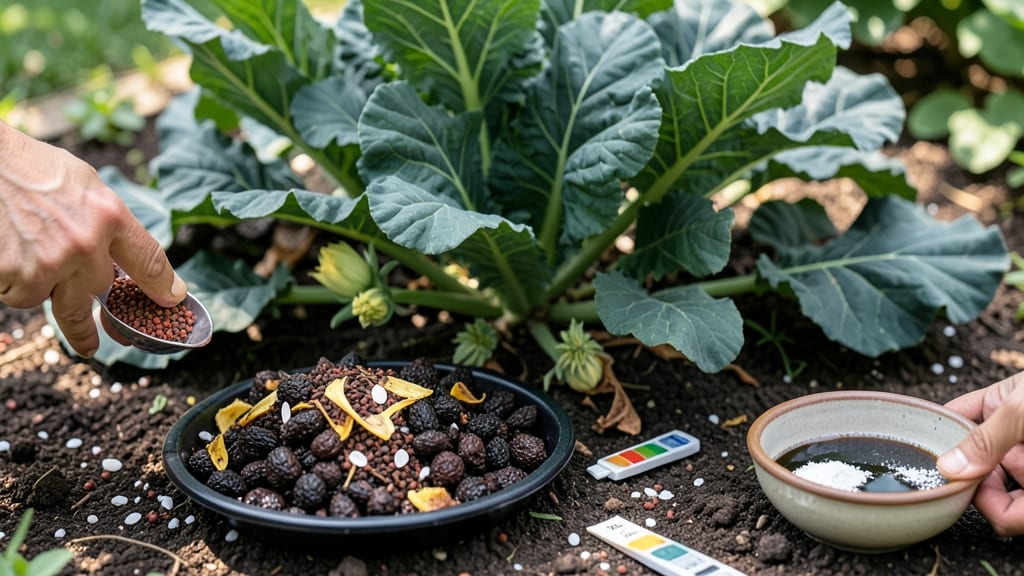
Your plants are starving—but not for the nutrients you're feeding them. 🌱 The real secret to increasing soil micronutrients methods lies in what you don’t see: the hidden layers of organic matter, microbial activity, and slow-release minerals that most fertilizers skip.
I’ve spent years watching my garden’s health transform once I stopped chasing quick fixes and started building soil the way nature intended.
The first step is simple but often overlooked: stop tilling. Every time you turn the soil, you kill the tiny organisms that break down organic matter into micronutrients like zinc, copper, and manganese. Instead, add compost, worm castings, and leaf mold—these are the powerhouses of micronutrient availability.
Even a thin layer of well-aged compost on the surface feeds the soil food web, which in turn makes nutrients accessible to your plants.
You’ll notice the difference within 4-6 weeks: leaves stop yellowing between veins, flowers stay vibrant longer, and your plants resist pests better. The key is patience—micronutrients aren’t about instant gratification but about creating a living, breathing soil ecosystem that keeps giving back.
Think of it like a savings account for your garden: small, consistent deposits pay off in the long run.
For stubborn deficiencies, a targeted organic amendment like kelp meal (for potassium and trace minerals) or eggshell powder (for calcium and magnesium) can give plants a quick boost. But the real magic happens when you combine these methods with mulching—keeping the soil covered reduces leaching and encourages microbial growth.
Start small, test your soil annually, and watch your garden’s vitality compound over time.
📚 In This Guide
- What you need
- Instructions
- Tips and common mistakes
- Wrapping up and next steps
What you need
- ● Organic Matter: Compost (2–3 inches per layer, aged and well-decomposed)
- ● Worm castings (1–2 cups per square foot for micronutrient-rich boost)
- ● Leaf mold or well-rotted manure (5–10 lbs per 10 sq ft)
- ● Micronutrient Sources: Rock phosphate (1–2 lbs per 100 sq ft, for phosphorus)
- ● Greensand or kelp meal (1–2 cups per 10 sq ft, for potassium & trace minerals)
- ● Epsom salt (magnesium sulfate, 1 tbsp per sq ft, sparingly)
- ● Azomite or basalt dust (1–2 lbs per 100 sq ft, for 70+ micronutrients)
- ● Tools: Garden fork or broadfork (for aeration and layering)
- ● Garden trowel or spade (for precision placement)
- ● Gloves (to protect your hands from grit and sharp edges)
- ● Watering can or hose with a gentle spray nozzle
- ● Biochar (1–2 lbs per 10 sq ft, improves nutrient retention)
- ● Mulch (straw, wood chips, or grass clippings to retain moisture)
- ● pH test kit (to monitor soil acidity/alkalinity before adding amendments)
- ● Cover crops (clover, alfalfa, or vetch to fix nitrogen and prevent erosion)
Step-by-Step methods to boost soil micronutrients organically
Here's how I transform depleted soil into a nutrient powerhouse—layer by layer, season after season.
🌱 Step 1: Conduct a Soil Test First
Before adding anything, grab a soil test kit to identify which micronutrients are deficient—zinc, iron, manganese, or copper often show up low in urban or over-farmed soils. I use a simple home test kit that checks pH and basic nutrient levels, then cross-reference with my plants' symptoms (yellowing leaves between veins? Likely iron deficiency). This ensures I don't waste time adding what's already abundant.
Dig a 6-inch-deep sample from multiple spots in your garden, mix them together, and follow the kit instructions. Most micronutrient deficiencies appear when soil pH strays from the ideal 6.0-7.0 range—too alkaline locks out iron and manganese, while too acidic leaches zinc and copper. If your test shows imbalances, adjust pH first before adding micronutrients.
🌿 Step 2: Apply Organic Matter as the Foundation
Spread 2-3 inches of compost evenly across garden beds, then lightly till it into the top 6 inches of soil. I prefer well-aged compost because it releases nutrients gradually while improving soil structure. For faster results, mix in 1 inch of worm castings—they're packed with bioavailable micronutrients like zinc and copper. Avoid fresh manure; it can burn plants and tie up nutrients.
Water the area thoroughly after amending. You'll see darker, fluffier soil that holds moisture better—this is your signal the organic matter is integrating. For container gardens, mix 1 part compost with 3 parts potting soil before planting. The goal is to create a nutrient-rich canvas where other amendments will work most effectively.
💧 Step 3: Introduce Micronutrient-Rich Amendments
For iron and manganese deficiencies, sprinkle 1/2 cup of crushed eggshells per 10 square feet and till lightly into the top inch. The calcium in eggshells helps balance pH while the grinding process releases trace minerals. For zinc and copper, I use 1 tablespoon of azomite (a volcanic mineral) per 25 square feet, broadcasting it and lightly raking in. Both amendments take 4-6 weeks to fully integrate, so apply them 2-3 months before planting for best results.
For immediate uptake, make a foliar spray with 1 teaspoon of liquid seaweed extract mixed in 1 gallon of water. Spray on leaves in the early morning or late afternoon to prevent evaporation. You'll notice new growth appearing 7-10 days later—that's your confirmation the micronutrients are working. Avoid overapplying; too much of even beneficial minerals can become toxic.
☀️ Step 4: Plant Micronutrient-Accumulators
Interplant comfrey, dandelions, or stinging nettle—these are micronutrient superstars that pull trace minerals from deep soil layers. Let them grow for 8-12 weeks, then chop and drop them directly onto beds or compost them. I harvest comfrey leaves in late summer when micronutrient concentrations peak. For containers, grow Swiss chard or amaranth—they're heavy feeders that signal when soil is deficient.
Watch for color changes: deep green leaves mean micronutrients are available, while pale or yellowing indicates you need to repeat Step 3. These accumulator plants also improve soil biology, creating a feedback loop where beneficial microbes release more micronutrients over time. Rotate them annually to prevent nutrient depletion in their root zones.
⏰ Step 5: Maintain with Seasonal Top-Dressing
Every spring and fall, spread 1/4 inch of kelp meal across beds and lightly scratch it into the soil surface. Kelp contains all essential micronutrients in bioavailable forms, plus it stimulates root growth. For vegetable gardens, mix 1 tablespoon of greensand (a potassium-rich mineral) per 10 square feet before planting. Both amendments work best when applied 2-3 weeks before seeding to give roots time to access them.
Monitor soil moisture—micronutrients leach quickly in sandy soils or during heavy rains. Mulch with straw or wood chips to slow water runoff and maintain steady nutrient release. You'll know your efforts are paying off when plants show darker leaves, stronger stems, and higher yields—especially for micronutrient-hungry crops like tomatoes, peppers, and brassicas.
Tips & tricks for perfect soil micronutrient boosting
Transforming depleted soil into a nutrient-rich ecosystem takes patience and precision—here's how to maximize every step of the process.
Soil Test Accuracy: When conducting your 6-inch soil sample in Step 1, avoid testing areas near recent fertilizer applications or compost piles, as these can skew results. I like to collect samples from at least 5 different spots across the garden and mix them thoroughly. For container gardens, sample from multiple pots to get an accurate reading. The pH test is especially critical—if your soil tests outside the 6.0-7.0 range, consider adding elemental sulfur (for alkaline soils) or wood ash (for acidic soils) before proceeding with micronutrient amendments. This adjustment creates the perfect environment for micronutrient uptake.
Compost Layering Technique: In Step 2, don't just spread the 2-3 inches of compost1 inch of worm castings on top, then lightly till everything together. This layering ensures micronutrients from the worm castings are protected while gradually released. For urban gardens with limited space, you can reduce the compost layer to 1.5 inches and still achieve excellent results, though you'll need to apply it more frequently. The key is maintaining that 6-inch depth of amended soil where roots actively grow.
Micronutrient Application Timing: The 4-6 week integration period mentioned in Step 3 is non-negotiable for mineral amendments like crushed eggshells and azomite. To accelerate this process slightly, I recommend lightly watering the amended soil immediately after application—this helps minerals dissolve and become available to soil microbes. For the foliar spray in Step 3, use a fine mist setting on your sprayer to ensure even coverage without damaging leaves. Apply when humidity is low to prevent fungal issues, and always spray undersides of leaves where most nutrient uptake occurs.
Accumulator Plant Strategy: In Step 4, when planting comfrey or dandelions, position them strategically near your most nutrient-hungry crops. These plants create a "nutrient pump" effect, pulling minerals from deep soil layers and concentrating them in their leaves. After 8-12 weeks, chop the leaves and place them directly on planting beds (this is called "chop and drop"), or compost them first if you're concerned about weed seeds. For containers, Swiss chard makes an excellent indicator plant—its leaf color changes dramatically when micronutrient levels fluctuate, giving you real-time feedback on your soil's health.
Pro Tips for Increase Soil Micronutrients Methods
- Transforming depleted soil into a nutrient-rich ecosystem takes patience and precision—here's how to maximize every s...
- Soil Test Accuracy: When conducting your 6-inch soil sample in Step 1, avoid testing areas near recent fertilizer app...
- Compost Layering Technique: In Step 2, don't just spread the 2-3 inches of compost1 inch of worm castings on top, the...
Frequently asked questions
How often should I add micronutrients to my soil?
For most plants, apply micronutrient-rich materials like compost, worm castings, or organic amendments every 3–6 months during the growing season. Heavy feeders (e.g., tomatoes, peppers) may need more frequent boosts—every 2–3 months. Test soil annually to adjust timing based on deficiencies.
Can I increase micronutrients quickly for an urgent harvest?
Yes! Use liquid micronutrient fertilizers (like seaweed extract or fish emulsion) for fast absorption, or sprinkle egg shells (crushed) or banana peels for calcium and potassium. Pair with mycorrhizal fungi to enhance root uptake. Results appear in 2–4 weeks, but long-term soil health still requires organic layering.
Are homemade methods as effective as store-bought supplements?
Homemade options like compost tea, wood ash (for potassium), or coffee grounds (for nitrogen + micronutrients) work wonders. Store-bought supplements (e.g., greensand for iron) offer precision but cost more. Combine both for balanced, budget-friendly results—just monitor plant responses to adjust ratios.
Will adding micronutrients attract pests or disrupt my soil pH?
Not if balanced properly! Overdoing synthetic supplements can attract pests (e.g., salt buildup from fertilizers), but organic methods won’t. Test pH before adding amendments—most micronutrients thrive in 6.0–7.0 range. Use lime (to raise pH) or sulfur (to lower) if needed, and avoid over-fertilizing.
How do I know if my soil’s micronutrient levels are improving?
Watch for healthier foliage, stronger stems, and vibrant flowers/fruit. Yellowing leaves (chlorosis) often signal iron/zinc deficiency, while purple stems indicate phosphorus. Conduct a DIY soil test (kits available online) or send a sample to a lab for precise data. Healthy soil = happy plants!
Wrapping up and next steps
Boosting soil micronutrients doesn’t have to be complicated—just consistent! By layering organic matter, using compost teas, and adopting crop rotation, you’re not just feeding plants—you’re building a thriving ecosystem. Small, intentional steps today lead to big rewards in plant health and yield tomorrow.
Ready to take the next step? Start with one method this season—whether it’s adding worm castings or testing your soil—and watch your garden flourish! 🌱✨