
How To
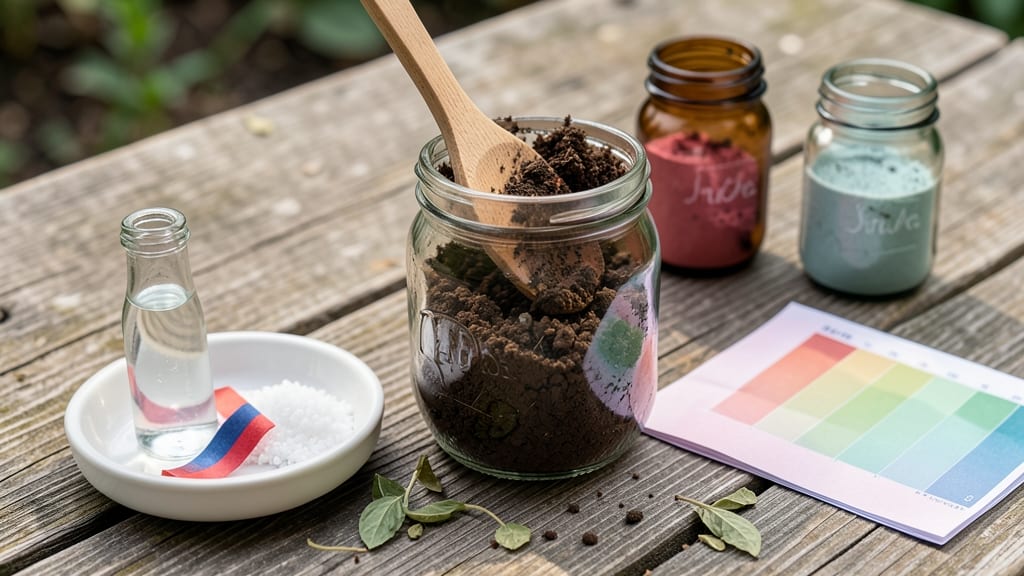
Testing your soil's pH at home reveals why your tomatoes refuse to ripen or your blueberries stay tiny. 🌱 A simple DIY pH test kit gives you the clarity you need to fix soil issues before they ruin your garden—no lab fees or guesswork required.
You’ll need just three things: a basic pH test kit (around $10), distilled water, and a clean spoon. The kit includes a color chart that turns your soil test into a straightforward answer—no chemistry degree needed.
Most kits even come with a scoop to collect samples from multiple spots in your garden.
Once you know your soil’s pH, you’ll spot problems early—like yellowing leaves from too much acidity or stunted growth from alkaline soil. The fix is simple: add lime to lower acidity or sulfur to raise it, both naturally and affordably.
Your plants will thank you with stronger roots and bigger harvests.
This method works for any garden bed, container, or raised bed. Whether you’re troubleshooting a struggling vegetable patch or prepping for a new planting season, the results guide every amendment decision you make.
📚 In This Guide
- What you need
- Instructions
- Tips and common mistakes
- Wrapping up and next steps
What you need
- ● Distilled water – 1 cup (240 mL) (tap water can skew results due to mineral content)
- ● Soil sample – 2-3 tablespoons (fresh, dry, and free of debris)
- ● White vinegar (acetic acid) – ½ cup (120 mL) (for acidity test)
- ● Baking soda (sodium bicarbonate) – 1 tablespoon (for alkalinity test)
- ● Two small containers or jars (clean, labeled “Acid” and “Base”)
- ● Two clear cups or test tubes (for mixing samples)
- ○ pH color chart (printable or DIY—see optional section)
- ● Spoon or small trowel (for scooping soil)
- ● Paper towels or coffee filters (to strain excess liquid)
- ● Litmus paper strips – For a quick double-check (available at garden centers or online).
- ● pH test kit (store-bought) – Compare your DIY results with a pre-made kit for accuracy.
- ● Notebook & pen – To log pH levels and track soil adjustments over time.
- ● Plastic gloves – Keep your hands clean while handling vinegar or baking soda.
Step-by-Step instructions for testing soil pH at home
Here's the simple method I use to get accurate pH readings—no fancy equipment needed.
🪴 Step 1: Gather Your DIY Testing Kit
You'll need 1 tablespoon of distilled vinegar, 1 tablespoon of baking soda, and 2 clear glasses. Label one glass "Acid" and the other "Base" so you don't mix them up. This combo works because vinegar reacts with alkaline soil while baking soda reacts with acidic soil—both create visible bubbles.
Fill each glass halfway with 1 cup of your garden soil (collected from 2-3 inches deep). The soil should be dry for accurate results. If it's damp, spread it on a tray to dry overnight. I always test multiple spots in my garden since pH can vary by location.
💧 Step 2: Perform the Vinegar Test for Alkaline Soil
Pour the vinegar into the glass with soil and watch closely. If the soil is alkaline (pH 7.3-14), you'll see immediate fizzing and bubbling within 5-10 seconds. The reaction happens because alkaline soil contains calcium carbonate, which reacts with the vinegar's acidity.
If no bubbles appear after 30 seconds, your soil isn't alkaline—move to the next test. The intensity of bubbling tells you how alkaline it is: light fizz means slightly alkaline (pH 7.3-8.0), while vigorous bubbling indicates strongly alkaline soil (pH 8.1+). I've seen tomato plants in my garden thrive after adjusting alkaline soil with sulfur.
🌿 Step 3: Perform the Baking Soda Test for Acidic Soil
Now add the baking soda to the second glass of soil. If your soil is acidic (pH 0-6.5), you'll notice effervescence within 5-15 minutes. Acidic soil contains aluminum and iron compounds that react with the baking soda. The longer you wait, the more bubbles mean stronger acidity.
If no reaction occurs after 15 minutes, your soil is neutral or alkaline. For acidic soil, the bubbles start small but grow more vigorous over time. I once tested my blueberry bushes and saw this exact reaction—it confirmed why they weren't fruiting well before I added lime.
☀️ Step 4: Compare Results to the Color Chart
While you wait for the baking soda test, mix 1 teaspoon of each soil sample with 1 tablespoon of water in separate small containers. Add 5 drops of red cabbage juice indicator (made by boiling chopped red cabbage in water for 10 minutes, then straining). The color changes instantly:
Purple indicates neutral pH (6.5-7.3), pink means acidic (below 6.5), and green/yellow shows alkaline (above 7.3). I keep a small bottle of cabbage juice in my gardening shed—it lasts about 2 weeks in the fridge. This visual method gives you a quick double-check against the vinegar/baking soda tests.
⏰ Step 5: Adjust Soil Based on Your Findings
For acidic soil (pH below 6.5), add dolomitic lime at a rate of 50 pounds per 100 square feet for severe cases, or 20 pounds for moderate correction. Work it into the top 6 inches of soil and water thoroughly. For alkaline soil (pH above 7.3), mix in elemental sulfur at 1 pound per 100 square feet and water well.
Retest after 2-3 months since adjustments take time. I mark my test spots with small flags so I remember where I made changes. The goal is 6.0-7.0 for most vegetables, 4.5-5.5 for blueberries, and 6.5-7.5 for roses. Your plants will show you're on the right track with healthier leaves and better growth within a few weeks.
Tips & tricks for perfect DIY soil pH testing
These simple tricks will help you get the most accurate results from your at-home soil pH test—no guesswork required.
Timing is Everything: For the baking soda test in Step 3, set a timer for the full 15 minutes even if you see bubbles early. Acidic soil reactions often start slowly but become more vigorous. I've seen reactions peak at 12 minutes in some cases, so don't stop too soon—wait for the full time to confirm results.
Soil Preparation Matters: When collecting your 1 cup of soil in Step 1, avoid surface soil that might have been affected by mulch or fertilizers. Dig down to 2-3 inches where plant roots actually grow. I like to collect samples from multiple spots in my garden since pH can vary dramatically between locations—especially if you have different plant types growing nearby.
Double-Check Your Indicators: The red cabbage juice in Step 4 is your secret weapon for verification. Make sure you're using fresh juice—it loses potency after 2 weeks. For extra clarity, strain the juice through a fine mesh sieve to remove any pulp that could cloud your results. I keep a small bottle in my gardening shed and label it with the date I made it.
Pro Tips for Do It Yourself Soil Ph Test
- These simple tricks will help you get the most accurate results from your at-home soil pH test—no guesswork required.
- Timing is Everything: For the baking soda test in Step 3, set a timer for the full 15 minutes even if you see bubbles...
- Soil Preparation Matters: When collecting your 1 cup of soil in Step 1, avoid surface soil that might have been affec...
Frequently asked questions
Got questions about testing your soil’s pH at home? You’re not alone—here’s what we hear most often, answered clearly and simply!
How accurate are DIY soil pH test kits compared to lab tests?
DIY kits are highly accurate for general gardening (within 0.5–1.0 pH points). Lab tests are precise but costly and slow. For most home gardeners, kits are perfect—just follow instructions carefully and calibrate if needed. Pro tip: Test multiple soil spots for consistency!
How long does it take to get results with a DIY kit?
Most kits give results in 5–15 minutes—just mix soil with water, wait for color change, and compare to the chart. Some liquid tests take longer (up to 30 mins), but they’re still faster than lab results. Patience pays off!
Are there cheaper alternatives to buying a kit?
Yes! Use vinegar or baking soda as rough tests:
- Vinegar: Sprinkle on dry soil. Fizzing = alkaline (high pH).
- Baking soda: Mix with water, add soil. Fizzing = acidic (low pH).
What if my test results are inconsistent?
Inconsistencies often mean uneven soil or user error. Try these fixes:
- Test 3–5 samples from different areas.
- Use sterile tools (clean spoons/spatulas) to avoid contamination.
- Check moisture levels—some kits require damp soil.
How often should I test my soil’s pH?
Test annually for established gardens or before planting new crops. pH changes slowly, but factors like rain, fertilizers, or compost can shift it. Vegetable gardens need checks every 6–12 months—most plants thrive at 6.0–7.0 pH.
Can I adjust my soil’s pH after testing?
Use:
- Lime (for acidic soil)—sprinkle and water in.
- Sulfur (for alkaline soil)—apply and till into top 6 inches.
- Organic matter (compost/peat moss)—helps buffer pH naturally.
Wrapping up and next steps
Testing your soil’s pH at home is easier—and more rewarding—than you think! With just a few simple steps and a color chart, you’ll unlock the secrets to healthier plants and thriving gardens. Now that you’re equipped with the knowledge, why wait? Grab your kit, roll up your sleeves, and give your soil the care it deserves—your green thumb will thank you! 🌱
Next step: Once you’ve tested your soil, adjust it with amendments like lime (to raise pH) or sulfur (to lower it) and watch your plants flourish! 🌿