
How To
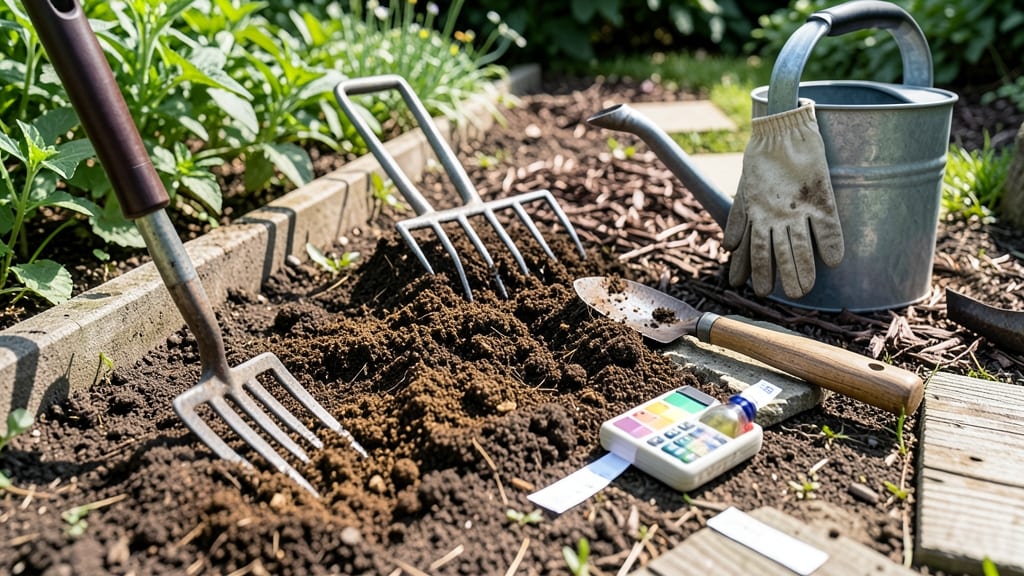
Proper soil preparation is the foundation of every successful garden—roots need space to breathe, water to flow, and nutrients to thrive. 🌱 I’ve learned that skipping this step means struggling with poor growth, even with the best plants.
The science is simple: loose, well-amended soil equals stronger roots and bigger harvests.
Start by testing your soil’s pH and texture—clay feels dense, sandy drains too fast, and loamy is the gold standard. Amend with compost, aged manure, or peat moss to improve structure, then till or loosen the top 6-12 inches for in-ground beds.
For containers, mix equal parts potting soil and organic matter to ensure drainage and aeration.
After loosening, level the bed and remove rocks or debris. A quick watering helps settle the soil while revealing any drainage issues. The goal is a crumbly texture that holds moisture without becoming soggy—roots should glide through it, not fight for space.
This method works for vegetables, flowers, and even lawns. Whether you’re prepping a raised bed or repurposing a tired patch of ground, these steps cut down on future problems and set your plants up for success from day one.
📚 In This Guide
- What you need
- Instructions
- Tips and common mistakes
- Wrapping up and next steps
What you need
- ● Garden Fork or Broadfork: 1-2 units (for deep tilling, 12–18" tines, sturdy steel). Pro tip: A broadfork is gentler on soil structure! 💡
- ● Hand Trowel: 1 unit (stainless steel, 6–8" blade for precision work).
- ● Rake (Bow or Leaf Rake): 1 unit (bow rake for debris, leaf rake for fine grading).
- ● Garden Hoe: 1 unit (stiff handle, 8–12" head for weeding/loosening).
- ● Compost or Organic Matter: 2–3 cubic feet per 100 sq ft (aged manure, leaf mold, or worm castings).
- ○ Soil Amendment (Optional but Recommended): Sandy Soil: Peat moss or coconut coir (1 part amendment to 2 parts soil).
- ● Clay Soil: Perlite or coarse sand (10–20% by volume).
- ● Poor Drainage: Gypsum (5–10 lbs per 100 sq ft).
- ● Water Source: Hose with adjustable nozzle or watering can.
- ● Gloves & Knee Pads: 1 pair each (nitrile gloves for grip, gel pads for comfort).
- ● Soil Test Kit: 1 unit (DIY kit or lab submission for pH/nutrient analysis). ✨ Why? Tailor amendments to your soil’s needs!
- ● Mulch (Straw or Wood Chips): 2–3 inches (preserves moisture, suppresses weeds).
- ● Wheelbarrow: 1 unit (5–6 cubic ft capacity for hauling amendments).
- ● Soil Thermometer: 1 unit (checks temperature for seed planting—ideal: 60–70°F).
- ● Lime or Sulfur: Adjust based on test results (for pH correction).
Step-by-step instructions for science-backed soil loosening
Here's how I transform dense soil into fluffy root-friendly real estate—no fancy tools required.
🌱 Step 1: Test Soil Texture and Moisture
Grab a handful of dry soil and squeeze it. If it crumbles easily, you've got sandy soil that needs organic matter. If it holds shape like a brick, you're dealing with clay that needs aeration. I like to do this test in multiple spots—soil texture can vary wildly even in small gardens.
Next, dig down 4-6 inches and check moisture. Stick your finger in—if it feels damp but not soggy, you're golden. Too dry? Water the area 2-3 days before working the soil. Too wet? Wait until it's dry enough to form a loose ball when squeezed. Working wet soil compacts it further, and you'll regret that later.
🪴 Step 2: Remove Debris and Loosen Top 6 Inches
Use a garden fork or broadfork to slice through the soil vertically at 6-inch intervals. The goal is to break up compaction without turning the entire garden into a mess. I angle the fork slightly to create vertical slices that let roots penetrate deeper later.
Pull out any weeds, rocks, or old plant debris—this isn't just about aesthetics. Weeds steal nutrients, and buried debris can harbor pests. If you hit a stubborn root, don't yank it out—just slice it cleanly with your fork. The less you disturb the soil structure, the better roots will establish.
💧 Step 3: Amend With Organic Matter
Spread 2-3 inches of compost or well-rotted manure evenly over the loosened area. This isn't just fertilizer—it's the glue that binds soil particles together while improving drainage and water retention. I like to work it into the top 2 inches of soil using a rake or my hands.
For heavy clay, mix in sand or perlite (about 10% of the soil volume) to improve drainage. For sandy soil, add peat moss or coconut coir to help retain moisture. The key is balance—you want soil that holds water but doesn't stay soggy. A good rule of thumb: your amended soil should feel like a damp sponge when squeezed.
☀️ Step 4: Lightly Rake and Level
Use a stiff rake to break up any large clumps and create a smooth, even surface. You're not aiming for a perfect lawn—just a texture that lets water penetrate easily and roots spread without resistance. I like to rake in one direction first, then perpendicular to create a fine, crumbly texture.
Check your work by pressing your foot gently into the soil. If it holds your weight without sinking or caking, you've done it right. If it feels too firm, go back and loosen another inch or two. The goal is soil that feels like a well-aerated bed—light, airy, and ready for roots to explore.
⏰ Step 5: Water and Wait Before Planting
Give the soil a deep watering to help settle the amendments and encourage microbial activity. You want the soil to be moist but not waterlogged—think of it like wringing out a damp sponge. This step is crucial because it lets the organic matter start breaking down and integrating with the native soil.
Wait 3-5 days before planting. This gives the soil time to stabilize and for any remaining clumps to break down naturally. If you plant too soon, you risk disturbing the loose structure when you insert seeds or transplants. Patience here pays off—your plants will thank you with stronger roots and better growth.
Tips & tricks for perfect soil preparation
Real talk: transforming tough soil into root-friendly real estate takes more than just brute force. These little tweaks make all the difference between soil that feels like concrete and soil that feels like a fluffy pillow for your plants.
Tool Selection: That garden fork isn't just any fork—it's your secret weapon. I've tried cheap ones that bend like noodles, but a sturdy broadfork with wide tines (like the kind used in biointensive gardening) makes those vertical slices effortless. The wider the tines, the less you have to pry and the more you can loosen in one go. And here's what nobody tells you: if you're working really compacted clay, rent a broadfork attachment for your tractor or even a simple soil aerator tool from your local hardware store. It's worth the investment for the back-saving effort.
Moisture Timing: The 2-3 days before working soil isn't just arbitrary—it's about hitting that Goldilocks zone of moisture. Too dry and you'll be fighting like a fish out of water; too wet and you'll create a muddy mess. I test by grabbing a handful and squeezing—if it holds together but crumbles when you poke it, you're ready. Pro tip: if your soil is bone dry, water it the night before and let it soak in overnight. That gives you a head start on moisture penetration without turning your garden into a swamp.
Amendment Strategy: When you're mixing in that 2-3 inches of compost, don't just dump it and walk away. Work it into the top 2 inches like you're giving the soil a deep tissue massage. For clay-heavy areas, I like to mix in perlite first—it creates little air pockets that break up the density. Then I add compost on top. Think of it like layering a cake: the perlite is your crumb layer, the compost is your moist filling, and your native soil is the sturdy base. This combo gives you the perfect balance of aeration and moisture retention.
Post-Rake Inspection: After you've raked, do this quick check: press your foot down firmly. If it feels like you're standing on a marshmallow (but not sinking), you're good to go. If it feels like concrete, go back and loosen another inch. The key is creating that crumbly texture where water can penetrate but not pool. I've learned this the hard way—once I planted directly after raking and ended up with plants that looked like they were drowning in their own roots because the soil compacted again after watering.
Pro Tips for Soil Preparation Steps
- Real talk: transforming tough soil into root-friendly real estate takes more than just brute force. These little twea...
- Tool Selection: That garden fork isn't just any fork—it's your secret weapon. I've tried cheap ones that bend like no...
- Moisture Timing: The 2-3 days before working soil isn't just arbitrary—it's about hitting that Goldilocks zone of moi...
Frequently asked questions
Got questions about soil prep? You’re not alone! Here are answers to the most common concerns—whether you're a beginner or a seasoned gardener looking to refine your technique.
How deep should I loosen the soil?
For most plants, aim to loosen soil to a depth of 12–18 inches. This depth ensures roots can spread freely without hitting compacted layers. For heavy clay or rocky soil, deeper loosening (up to 24 inches) may be needed. Use a broadfork or tiller for efficiency—just avoid overworking the soil to preserve its structure.
When is the best time to prepare soil?
The ideal time depends on your climate and plants. In temperate zones, prepare soil in early spring (4–6 weeks before planting) or fall (2–3 months before) to let nature break down clumps. In warm climates, focus on late winter or early fall to avoid summer heat stress. Always check for moisture—dry soil is harder to work.
Can I skip tilling and use other methods?
Tilling isn’t always necessary. Try these gentler alternatives:
- Hand-digging: Use a spade or broadfork to break up soil manually (great for small gardens).
- Sheet mulching: Layer compost, cardboard, and mulch to improve soil over time (no-till friendly!).
- Cover crops: Plant clover or vetch in fall/winter to loosen soil naturally with roots.
Why does my soil look clumpy even after tilling?
Clumpy soil often means it’s too dry or lacks organic matter. Fix it by:
- Watering the area before tilling to soften compacted layers.
- Adding compost or aged manure (1–2 inches) to improve structure.
- Using a soil conditioner like gypsum (for clay) or peat moss (for sandy soil).
What’s the deal with soil temperature for prep?
Soil temperature matters! Most plants thrive when soil is at least 60°F (15°C). Use a soil thermometer to check depth (4–6 inches). If it’s too cold, wait or use black plastic mulch to warm it faster. For cool-season crops (like lettuce), soil can be as low as 40°F (4°C). Always test before planting.
Wrapping up and next steps
Mastering soil preparation steps is your secret weapon for thriving plants—whether you're nurturing a backyard garden or a small urban plot! 🌱 By following science-backed techniques like loosening compacted soil, amending with organic matter, and balancing pH, you’re giving roots the perfect foundation to grow strong and healthy.
Remember, patience and consistency pay off in lush, vibrant growth.
Ready to take the next step? Grab your tools, roll up your sleeves, and transform your soil today—your future harvests will thank you! 🌿 For extra confidence, test your soil’s health with a simple DIY kit or consult a local extension office for tailored advice.