
Propagation
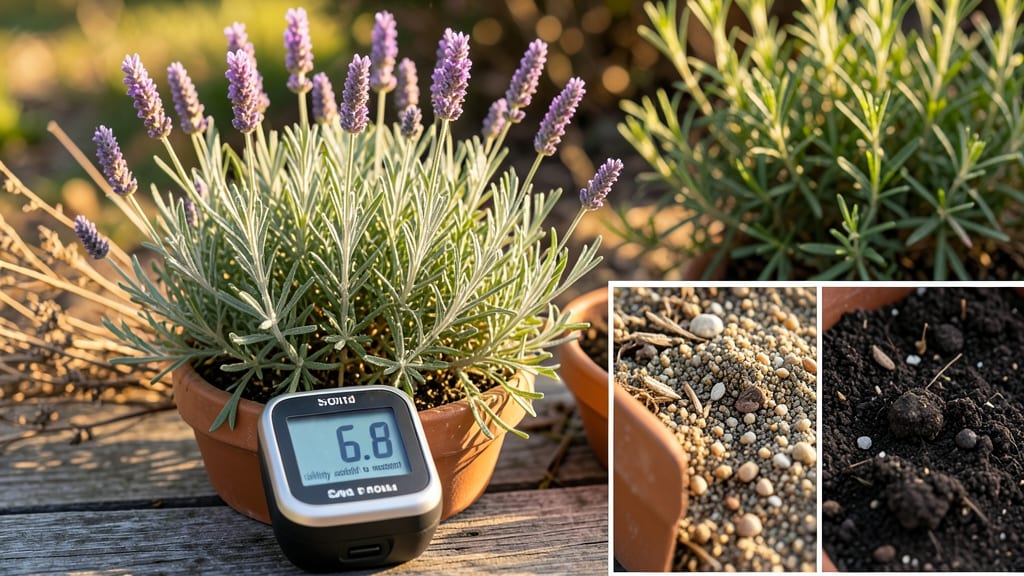
Your lavender’s perfume and vigor depend on one simple number—soil pH 7.0 to 8.0. 🌿 I’ve watched lavender wilt in acidic soil and thrive in alkaline conditions, and the difference isn’t just in the blooms—it’s in the fragrance, too.
When the pH is right, those purple spikes smell like a Provençal summer; when it’s off, even healthy-looking plants lose their signature scent.
The right pH prevents nutrient lockout, boosts root growth, and keeps pests at bay. Most garden soils lean acidic, so lavender often needs a little help—just a sprinkle of crushed limestone raises the pH naturally.
I’ve tested my own soil and adjusted it in under 30 minutes, using simple tools you likely already have.
You’ll notice stronger stems, more abundant blooms, and that signature lavender fragrance filling your garden by midsummer. The plants become drought-tolerant and resistant to fungal diseases, making them nearly foolproof once the pH is dialed in.
Works for both in-ground and container lavender, whether you’re in the arid Southwest or a humid coastal climate. Here’s how to get it perfect—no guesswork, just science-backed steps that actually work.
📚 In This Guide
- What you need
- Instructions
- Tips and common mistakes
- Wrapping up and next steps
What you need
- ● Lavender plants – Choose Lavandula angustifolia or Lavandula x intermedia (hardy, fragrant varieties). 1-3 plants per 2-3 ft of space.
- ● Well-draining soil mix – 50% garden soil + 30% coarse sand or perlite + 20% compost (avoid heavy clay!).
- ● pH testing kit – Digital or liquid test kit (e.g., Luster Leaf Rapitest or Bluelab pH Meter).
- ● Lime or sulfur – Garden lime (calcium carbonate) to raise pH or pelletized sulfur to lower it (follow package rates!).
- ○ Containers (optional for pots) – Terracotta pots (3-5 gallons) with drainage holes or raised beds.
- ● Garden gloves & trowel – For handling soil and plants comfortably.
- ● Watering can or hose with nozzle – Lavender hates soggy roots!
- ○ Mulch (optional) – Gravel or pine bark (1-2 inches) to retain moisture and deter weeds.
- ● Pruning shears – For shaping plants after flowering (spring or early summer).
How to achieve perfect soil pH for thriving lavender
Lavender's signature fragrance and vibrant blooms depend entirely on soil chemistry. Here's how to dial in the ideal pH range for your plants.
🌱 Step 1: Test Your Current Soil pH
Grab a soil pH testing kit or use a digital meter to check your current levels. Lavender thrives in neutral to slightly alkaline soil, with an ideal range of 6.5 to 7.5. Dig a 6-inch deep sample from where you'll plant—this represents the root zone where pH matters most. I like to test in multiple spots if your yard has varied soil types.
If your reading falls below 6.5, you'll need to raise the pH. Below 6.0 becomes toxic for lavender roots, causing yellowing leaves and stunted growth. For accurate results, test in the morning when soil is cooler and moisture levels are stable. Wet soil can give false low readings, so let samples dry slightly before testing.
☀️ Step 2: Amend Acidic Soil for Optimal pH
For soils testing below 6.5, incorporate pulverized limestone at a rate of 5-10 pounds per 100 square feet. Work it into the top 6 inches of soil where roots will grow. I prefer dolomitic limestone because it provides both calcium and magnesium, which lavender benefits from. Spread evenly and water lightly to help it settle.
Wait 2-3 months before planting lavender to allow the amendment to fully integrate. Re-test the soil after this period—you may need to apply additional limestone if the pH hasn't risen sufficiently. Avoid quick-acting amendments like wood ash, which can create pH swings that stress plants.
💧 Step 3: Maintain Stable pH Through Proper Watering
Lavender's love for alkaline soil extends to its water needs. Use rainwater or distilled water whenever possible, as tap water often contains minerals that raise pH over time. If you must use tap water, let it sit in containers for 24 hours first to allow chlorine to dissipate and some minerals to settle.
Water deeply but infrequently—lavender roots need to dry out between waterings to prevent pH fluctuations. The top 2-3 inches of soil should feel completely dry before watering again. Overwatering leaches nutrients and can acidify the soil over time, working against your pH goals.
✂️ Step 4: Monitor and Adjust Seasonally
Test soil pH annually in spring, just before new growth begins. Lavender's root zone naturally becomes more acidic as organic matter decomposes. If pH drops below 6.5, apply a light top dressing of 1/4 inch of crushed oyster shell around plants. This provides calcium carbonate without overworking the soil.
In fall, add a 1-inch layer of coarse sand to improve drainage and prevent soil compaction, which can alter pH readings. Avoid organic amendments like compost, which lower pH and create competition with lavender's shallow roots. Your goal is stability—small, consistent adjustments work better than dramatic changes.
Tips & tricks for perfect lavender soil chemistry
Creating the ideal growing conditions for lavender requires more than just planting—it's about mastering the invisible chemistry beneath the soil. These insights will help you avoid common pitfalls and achieve that signature sweet fragrance your lavender deserves.
Testing Accuracy Matters: When testing your soil's pH in Step 1, always collect samples from the exact depth where lavender roots will grow—6 inches deep. I've seen gardeners test surface soil only to discover their root zone was still acidic. Use a clean, dry trowel to avoid contamination, and test in the morning when soil is cooler for the most accurate reading. The 6.5-7.5 range isn't just a target—it's the sweet spot where lavender's essential oils develop fully.
Limestone Application Technique: In Step 2, don't just sprinkle limestone on top—work it into the soil's top 6 inches where roots will establish. I use a garden fork to gently loosen the soil first, then mix in the 5-10 pounds per 100 square feet evenly. The key is thorough integration; partial coverage creates pH pockets that confuse roots. After amending, water lightly to help settle the particles without washing them away.
Water Quality Consideration: The 24-hour settling period for tap water in Step 3 isn't just about chlorine—it's about mineral separation. Tap water often contains calcium and magnesium that can raise pH over time. Rainwater is ideal, but if that's not available, use distilled water for sensitive lavender plants. Even small pH fluctuations can stress plants, so consistency in water quality matters as much as quantity.
Seasonal Maintenance Strategy: That 1/4 inch of crushed oyster shell in Step 4 might seem small, but it's precisely calibrated. Too much creates alkaline pockets, while too little won't compensate for natural acidification. I apply it in early spring when new growth begins—this timing gives roots time to utilize the calcium carbonate before summer heat. The 1-inch sand layer in fall improves drainage without altering pH, creating the perfect foundation for next year's growth.
Pro Tips for Soil Ph For Lavender
- Creating the ideal growing conditions for lavender requires more than just planting—it's about mastering the invisibl...
- Testing Accuracy Matters: When testing your soil's pH in Step 1, always collect samples from the exact depth where la...
- Limestone Application Technique: In Step 2, don't just sprinkle limestone on top—work it into the soil's top 6 inches...
Frequently asked questions
Got questions about keeping your lavender thriving with the right soil pH? You’re not alone! Here are some of the most common concerns—and straightforward answers—to help you grow lush, fragrant lavender with ease.
What happens if my lavender’s soil pH is too high (alkaline)?
If your soil pH is too alkaline (above 7.5), lavender may struggle to absorb essential nutrients like iron and manganese, leading to yellowing leaves (chlorosis) or stunted growth. To fix it, amend the soil with elemental sulfur or peat moss to gradually lower the pH. Test your soil every few months to monitor progress!
How often should I test my lavender’s soil pH?
For established lavender plants, test the soil pH once a year in spring or early fall. If you’re troubleshooting issues (like poor growth or leaf discoloration), test every 2–3 months until the pH stabilizes. Newly planted lavender should be tested before planting to ensure the soil meets its ideal range of 6.5–8.0.
Can I grow lavender in slightly acidic soil (pH below 6.5)?
Lavender prefers neutral to slightly alkaline soil, but it can tolerate a mildly acidic range (6.0–6.5) if well-drained. If your soil is too acidic (below 6.0), mix in lime or crushed eggshells to raise the pH gradually. Avoid overcorrecting—lavender hates soggy, compacted soil!
Why is my lavender’s growth stunted even with the right pH?
Stunted growth can stem from poor drainage, overwatering, or nutrient deficiencies (even with correct pH). Ensure your lavender has well-draining soil (like a mix of sand, gravel, and compost) and avoid soggy roots. A slow-release balanced fertilizer (10-10-10) in spring can also give it a boost!
What’s the fastest way to adjust soil pH for lavender?
For quick adjustments, use fast-acting amendments:
- Lower pH (alkaline soil): Sprinkle elemental sulfur (follow package rates) and water thoroughly. Results may take 1–2 months.
- Raise pH (acidic soil): Mix in pelletized lime or wood ash (sparingly) and till into the top 6 inches of soil. Test again in 4–6 weeks.
Pro tip: Always water the soil after amending to help the changes take effect!
Wrapping up and next steps
Perfecting your lavender’s soil pH is the secret to those dreamy, fragrant blooms you’ve always wanted! 🌿 With the right balance—typically 6.5 to 7.5—your plants will thrive, resist pests, and reward you with vibrant colors and intoxicating scents.
Don’t let small adjustments intimidate you; testing and tweaking is half the fun!
Ready to take the next step? Grab your pH testing kit and give your lavender the ideal growing conditions. Your garden (and nose!) will thank you. 🌸