
How To
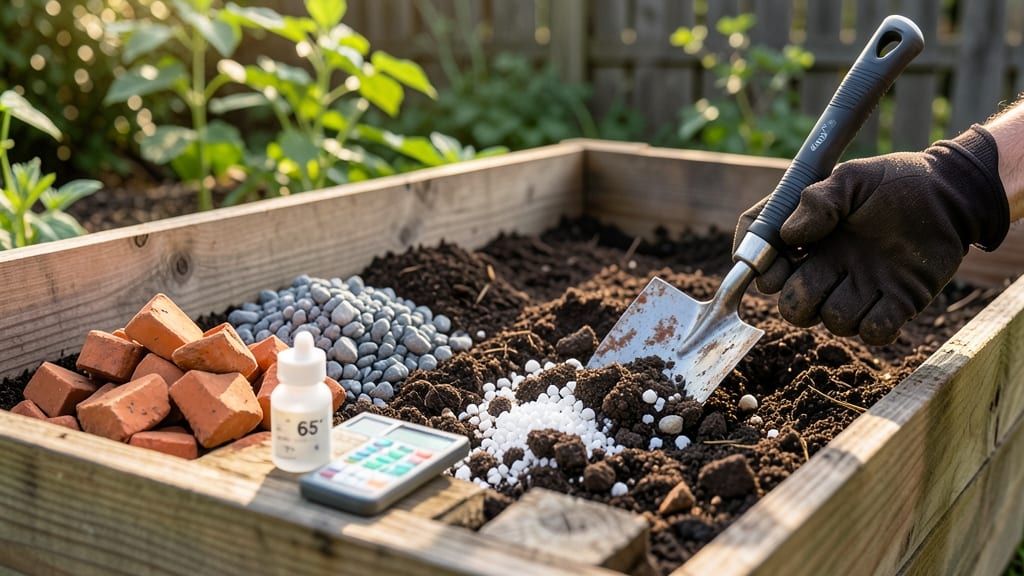
To amend soil for drainage, heavy clay needs a structural makeover—until you create air-pocket magic with the right amendments. 🌱 I’ve turned my clay-heavy yard from a soggy swamp into a thriving garden by learning which materials break up compaction without stealing nutrients.
The secret isn’t just adding sand (that’s a myth) but balancing texture, organic matter, and microbial life to let water drain and stay available for roots.
Start with a soil test to spot the problem—if water pools after rain or plants wilt despite frequent watering, you’ve got drainage issues. You’ll need coarse sand, perlite, compost, and gypsum (for clay), but the real game-changer is leaf mold or coconut coir for long-term structure.
Even my stubborn clay soil now drains in 24 hours after heavy rain, and my tomatoes? They’re finally happy.
By the end, you’ll have a root-friendly loam that holds moisture without suffocating plants—think of it as giving roots a breath of fresh air. The best part? This works for vegetables, perennials, and even lawns, and you’ll see the difference in just one growing season.
No more root rot, no more wilting—just plants that thrive.
For clay-heavy areas, double-check your amendments—too much sand can create the opposite problem. And if you’re in a dry climate, focus on water retention (compost + mulch) rather than just drainage. The goal is balance, not just fast-draining soil. Let’s get those roots breathing easy!
📚 In This Guide
- What you need
- Instructions
- Tips and common mistakes
- Wrapping up and next steps
What you need
- ● Organic Matter (Required): Compost (2–3 inches per 12" of soil depth) – Breakdowns nutrients while improving aeration
- ● Peat moss or coconut coir (1–2 parts per 3 parts soil) – Holds moisture without compacting
- ● Leaf mold (1 part per 2 parts soil) – Lightweight and drains beautifully
- ● Amendments for Structure: Perlite (1–2 cups per square foot) – Creates air pockets (pH-neutral!)
- ● Coarse sand (1 part per 3 parts soil) – Use builder’s sand, not fine beach sand
- ○ Vermiculite (optional, 1 part per 4 parts soil) – Retains moisture for thirsty plants
- ● Tools of the Trade: Garden fork or tiller – Loosens compacted soil to 12" deep
- ● Garden gloves – Because nobody enjoys blistered hands 😅
- ● Wheelbarrow or large bucket – For mixing amendments (5–10 gallons capacity)
- ○ Soil pH test kit (optional) – Ensures amendments won’t alter acidity drastically
- ● Watering can or hose – For post-amendment hydration
- ● Test soil drainage: Dig a 12" hole, fill with water. If it drains in amendments are a must.
- ● Remove weeds/debris – Fresh soil starts with a clean slate!
- ● Choose the right time: Amend in spring or fall (avoid freezing temps).
- ● Know your plants: Heavy clay? Add more sand. Sandy soil? Boost organic matter.
Step-by-Step guide to improving soil drainage
Here's how I transform heavy, waterlogged soil into a root-friendly loam that breathes and drains.
🌱 Step 1: Test Your Soil's Current Drainage
Dig a 6-inch deep hole and fill it with water. If it drains completely in under an hour, your soil is already well-aerated. If it takes longer or leaves standing water, you'll need amendments. I press my finger into the soil—if it feels compacted or leaves a lasting imprint, that's your first clue you need air pockets.
Grab a handful of moist soil and squeeze it. If it holds its shape like clay, it's too dense. If it crumbles easily, you're in good shape. For borderline cases, do the "percolation test": pour water into the hole and time how long it takes to drain. Less than 10 minutes is ideal; anything over 30 minutes signals poor drainage.
🪴 Step 2: Choose the Right Amendments for Your Soil Type
For clay-heavy soil, I mix in 2-3 inches of coarse sand or garden compost to break up compaction. Sandy soil needs peat moss or coconut coir to retain moisture and nutrients. I always work in 1-2 inch layers, mixing each amendment into the top 6-12 inches of soil with a broadfork or tiller.
Don't use regular playground sand—it compacts over time. Instead, opt for horticultural sand or perlite, which stay loose. For extreme cases, I combine both: 50% compost and 50% perlite by volume. This creates a balanced loam that drains well but still holds moisture for roots.
☀️ Step 3: Loosen the Soil Without Overworking It
Use a broadfork to aerate the soil to a depth of 8-12 inches. This tool's tines break up compacted layers without turning the soil like a tiller would. I work in 12-inch squares, inserting the fork 6 inches apart and rocking it gently to create vertical channels for water and roots.
For smaller areas, a digging fork works just as well. The goal is to create 10-20% more air space in the soil. You'll know you've done enough when the soil feels light and crumbly rather than dense. Avoid tilling if the ground is wet—this creates a hardpan that's even worse for drainage.
💧 Step 4: Incorporate Organic Matter for Long-Term Structure
Spread a 1-inch layer of compost or well-rotted manure over the amended soil. This feeds beneficial microbes that break down organic matter into humus, which improves soil structure over time. I mix it in gently with my hands or a rake, being careful not to bring up weeds from lower layers.
For immediate results, I add 1 part compost to 3 parts existing soil. This ratio prevents nutrient overload while still improving drainage. Water the area lightly after mixing to help the amendments settle into place. You'll see worms and other soil organisms return within a few weeks—that's your sign the soil is becoming healthier.
⏰ Step 5: Maintain Your Amended Soil
After amending, I mulch with 2-3 inches of organic mulch like wood chips or straw. This prevents rain from compacting the soil and helps maintain moisture levels. Re-test drainage every 6-12 months, especially after heavy rains or construction activity nearby that might compact the soil again.
For container gardens, I blend 30% perlite or vermiculite into potting mix to prevent waterlogging. The key is consistency—check your soil's moisture by sticking your finger 1 inch deep. If it feels damp but not soggy, you're doing it right. Over time, your soil will develop better structure naturally, reducing the need for frequent amendments.
Tips & tricks for perfect soil amendments
Transforming dense soil into a root-friendly loam takes more than just adding materials—here's what I've learned after years of trial and error.
Soil Test Precision: The percolation test in Step 1 isn't just about timing—it's about consistency. Use a clear container to measure the water level before and after, and measure the exact time it takes to drain. The 10-minute benchmark isn't arbitrary: it represents the ideal balance between drainage and moisture retention for most plants. If your soil drains faster than 10 minutes, you'll need to add moisture-retaining amendments like coconut coir.
Layering Technique: When working with the 1-2 inch layers in Step 2, think of it like building a lasagna—each layer needs to bond properly. Start with the coarsest material (like horticultural sand) at the bottom, then add finer materials (compost or peat moss) on top. This creates a gradient that mimics natural soil profiles. For clay-heavy soils, I find that alternating 1 inch of compost with ½ inch of perlite gives the best results.
Aeration Depth: The 8-12 inch depth recommendation in Step 3 might seem ambitious, but here's why it works: most plant roots grow in the top 12 inches of soil. By aerating this deep, you're creating a continuous pathway for both water and oxygen. For smaller gardens, use a digging fork to create vertical channels every 6 inches—this mimics the effect of a broadfork but with less effort. The key is consistency: aim for 10-20% more air space, not just a few scattered holes.
Organic Matter Integration: The 1-inch layer of compost in Step 4 should be worked in gently—think "marbling" rather than "stirring." Use a rake or your hands to distribute it evenly, focusing on the top 6 inches where most roots will grow. For immediate results, I recommend mixing the compost with your existing soil at a 1:3 ratio—this creates micro-pores that improve drainage while still retaining moisture. The 30% perlite recommendation for containers is non-negotiable: without it, your potting mix will compact and suffocate roots.
Pro Tips for Amend Soil For Drainage
- Transforming dense soil into a root-friendly loam takes more than just adding materials—here's what I've learned afte...
- Soil Test Precision: The percolation test in Step 1 isn't just about timing—it's about consistency. Use a clear conta...
- Layering Technique: When working with the 1-2 inch layers in Step 2, think of it like building a lasagna—each layer n...
Frequently asked questions
Got questions about amending soil for better drainage?
You’re not alone! Here are some of the most common concerns—and straightforward answers—to help you get it right.
How do I know if my soil needs drainage improvements?
Check for soggy spots after rain, moldy smells, or plants wilting despite regular watering. A simple squeeze test works too: Grab a handful of damp soil—if it forms a tight ball, drainage is likely poor. For a deeper test, dig a 6-inch hole and fill it with water; if it drains in <10 minutes, you’re good. Slower? Time for amendments!
Is there a best time of year to amend soil for drainage?
Spring or fall are ideal—soil is workable, and plants have time to adapt. Avoid extreme heat or frost, as these stress roots. For container gardens, you can amend soil anytime, but do it before planting. Pro tip: If you’re dealing with heavy clay, start amendments now and let nature work its magic over winter!
Can I use just sand to improve drainage? What’s the best mix?
Sand alone can worsen drainage by creating air pockets that repel water (like a sponge that won’t soak up). Instead, mix coarse sand, perlite, or compost with your existing soil in a 1:1 or 1:2 ratio (amendment:soil). For clay-heavy soil, try 50% compost + 30% sand + 20% perlite. Always till amendments into the top 6–12 inches.
My plants are still struggling after amending. What went wrong?
Common mistakes include:
- Not tilling deep enough—amendments only work if they reach root zones (6+ inches).
- Overdoing sand—it disrupts soil structure. Stick to 10–20% max.
- Ignoring organic matter—compost or peat moss helps retain some moisture while improving aeration.
- Skipping a test—recheck drainage after 2–4 weeks. If water still pools, add more perlite or gypsum.
Give it time! Roots adjust in 4–6 weeks.
What’s a budget-friendly way to amend soil for drainage?
Skip expensive store-bought mixes and use:
- Free: Leaf mold (decomposed leaves), pine fines (from mulch), or crushed gravel.
- Cheap: Coarse sand ($5/bag), perlite ($3/bag), or vermiculite ($4/bag).
- DIY compost: Mix kitchen scraps, yard waste, and straw. Turn monthly for fluffy, drain-friendly loam.
For clay soil, gypsum ($10/bag) is a game-changer—it breaks up compacted particles over time.
Wrapping up and next steps
Amending your soil for better drainage isn’t just about fixing a problem—it’s about creating a thriving foundation for your plants to flourish! 🌱 By incorporating air pockets through organic matter, sand, or grit, you’re not only improving water flow but also boosting root health and nutrient uptake.
The key is patience and consistency; start small, test your progress, and watch your garden transform.
Ready to take the next step? Grab your tools, pick a sunny patch of soil, and begin experimenting! Whether you’re a seasoned gardener or a beginner, every small change makes a big difference. Happy digging—your plants will thank you! 🌿