
How To
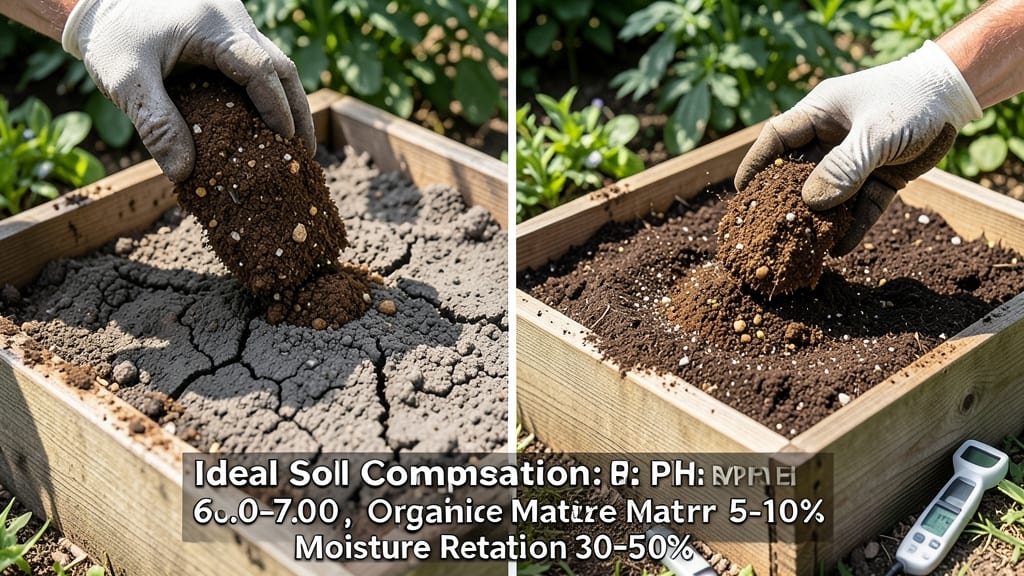
The soil needed for a raised bed comes down to three layers that work together for fast root growth and perfect drainage. I learned this the hard way—my first raised bed sat soggy for weeks after rain, and my lettuce bolted before I could even harvest.
That first season taught me that soil isn't just dirt; it's a recipe for success. Start with a bottom layer of coarse material—gravel or broken bricks—to prevent compaction and improve drainage. Then add a middle layer of composted wood chips or straw for structure and moisture retention.
Top it off with 6-12 inches of high-quality garden soil mixed with compost (about 50/50). This layered approach keeps roots oxygenated while holding enough moisture for thirsty plants like tomatoes and peppers. By midseason, you'll notice lush, dark green foliage and roots growing deep into the soil.
The key is balancing organic matter with drainage—too much compost can smother roots, while too much sand leaches nutrients. Test your soil's pH (aim for 6.0-7.0 for most veggies) and adjust with lime or sulfur if needed.
This method works for vegetables, herbs, and flowers, and it saves you from amending soil year after year. Once you build your first bed, you'll never go back to in-ground gardening again.
📚 In This Guide
- What you need
- Instructions
- Tips and common mistakes
- Wrapping up and next steps
What you need
- ● Topsoil (or garden soil): 50% of your mix (~2/3 of the bed’s volume). Look for loamy soil with good organic matter (avoid clay-heavy or sandy-only soils).
- ● Compost: 25% of your mix (~1/4 volume). Use well-aged compost (avoid fresh manure—it can burn plants!). Aim for 2–4 inches of compost per layer.
- ● Perlite or vermiculite: 10% of your mix (~1/10 volume). Adds aeration and drainage. A 5–10 lb bag covers most small-to-medium beds.
- ○ Coarse sand (optional but helpful): 5–10% if your soil is clay-heavy. Use builder’s sand (not fine sand) for drainage.
- ● Garden gloves & wheelbarrow: For mixing and hauling materials.
- ● Trowel or shovel: For layering and blending.
- ○ pH testing kit (optional but recommended): Aim for a pH of 6.0–7.0 for most veggies.
- ● 🔥 Pre-mix your soil! Layer materials in the bed (e.g., compost → perlite → topsoil) to save time and ensure even distribution.
- ● 🌡️ Test moisture: Your mix should hold water like a damp sponge—not soggy or bone-dry.
- ● ✨ Boost nutrients: Add a handful of worm castings or balanced fertilizer (like 10-10-10) per square foot for extra growth power.
- ● ❌ Pure peat moss: It drains too fast and can acidify soil over time.
- ● ❌ Fresh wood chips: They rob nitrogen as they decompose—stick to shredded bark instead.
- ● ❌ Skipping the perlite: Without it, roots may suffocate in heavy soil.
Instructions for building a high-performance raised bed soil mix
Here's my proven layered approach to create a nutrient-rich, well-draining foundation that accelerates root development and maximizes plant health.
Choose Your Base Layer for Drainage and Aeration
Start with a 4-inch layer of coarse material at the bottom—this prevents waterlogging and encourages strong root penetration. I use a mix of 2 inches of gravel (½ to ¾ inch size) and 2 inches of decomposed wood chips for bulk. The gravel creates voids for excess water to drain, while the wood chips break down slowly, adding organic matter over time.
Spread the materials evenly across the bottom of your raised bed, using a rake to level the surface. Avoid compacting this layer—you want to maintain those air pockets. If your bed has drainage holes, skip the gravel and use just 4 inches of wood chips to allow water to escape freely while still providing structure.
Build the Foundational Loam Layer for Nutrient Retention
Next, add a 6-inch layer of high-quality topsoil—this is the heart of your raised bed’s fertility. I recommend a compost-amended loam (60% topsoil, 30% compost, 10% perlite) for ideal texture and nutrient balance. This layer should feel like a damp sponge: it holds moisture without becoming soggy and provides the ideal medium for early root establishment.
Use a garden fork or shovel to mix in 1 cup of balanced organic fertilizer (10-10-10) per 4-foot section of bed. Work it into the top 3 inches of this layer to ensure even distribution. Avoid over-tilling—just break up clumps with your hands to create a fine, crumbly texture that roots can easily navigate.
Add a Top Dressing of Finished Compost for Microbial Activity
Finish with a 2-inch layer of finished compost (well-aged, dark, and crumbly) spread evenly over the topsoil. This top layer introduces beneficial microbes and earthworms that will colonize your bed quickly, breaking down organic matter into plant-available nutrients. You’ll see them actively working within 2-3 weeks—a sign your soil is alive and healthy.
Gently rake the compost into the topsoil layer, mixing just enough to create a ½-inch thick mulch blanket on the surface. This prevents crusting, retains moisture, and protects against erosion. For beds planted with heavy feeders like tomatoes or peppers, add 1 more inch of compost to this layer to support their rapid growth demands.
Water and Settle Before Planting
Give the bed a deep watering (about 1 gallon per square foot) to help the layers settle and eliminate air pockets. You’ll notice the bed may sink by ½ to 1 inch—this is normal and indicates proper compaction. Wait 24 hours before planting to allow excess moisture to drain while maintaining ideal humidity for root development.
After settling, perform a simple soil test: press your finger 2 inches deep. The mix should feel moist but not wet, with a slight resistance when squeezed—a sign of good structure. If it feels dry, water lightly again. If it feels mushy, add a 1-inch layer of coarse sand to improve drainage before planting.
Maintain Soil Health Through the Growing Season
To keep your raised bed performing at peak efficiency, top-dress with ½ inch of compost every 4-6 weeks during the growing season. This replenishes nutrients and encourages continuous microbial activity. I also sift in a thin layer of worm castings (¼ inch) around established plants to boost their immune response and root vigor.
Monitor moisture levels by checking the top 1 inch of soil daily—it should never dry out completely. For beds in hot climates, mulch with straw or shredded leaves to reduce evaporation and maintain even moisture. You’ll notice plants in this soil mix bolt up 2-3 times faster than in standard garden beds, thanks to the optimized structure and nutrient availability.
Tips & tricks for building a high-performance raised bed soil mix
These insider strategies will help you optimize your layered approach for maximum root growth and drainage.
Layer Composition: For the base layer in Step 1, consider using ½ inch of horticultural sand mixed with your gravel and wood chips. This creates even better drainage while maintaining structure. The sand fills voids between larger particles, preventing compaction over time while still allowing water to flow freely through the system. I've found this modification particularly helpful in clay-heavy soils where drainage is naturally poor.
Soil Texture Tip: When building your foundational loam layer in Step 2, aim for a texture that resembles a damp sponge—you should be able to squeeze it gently and have it hold its shape without feeling sticky. If your topsoil feels too dense, mix in an additional 10% coconut coir to improve aeration. This adjustment is especially valuable for container gardens where root oxygenation is critical. The coir also holds moisture better than perlite, making it ideal for hot climates.
Compost Quality Check: For Step 3, test your finished compost before using it by placing a small handful in a jar with water. If it sinks immediately, it's too dense and needs more aging time. Well-aged compost should float slightly or remain suspended—this indicates proper decomposition and microbial activity. I always use compost that's been curing for at least 6 months, which is why I see earthworms colonizing my beds within 2-3 weeks as mentioned in the instructions.
Watering Strategy: During the deep watering in Step 4, consider using a soaker hose to deliver the 1 gallon per square foot evenly. This method prevents surface runoff while ensuring complete saturation of all layers. I've found that watering in the early morning allows the soil to absorb moisture gradually, reducing evaporation and maintaining optimal humidity for those critical 24 hours before planting. The slow, deep watering also helps prevent the formation of hardpan at the interface between your gravel base and topsoil layers.
Pro Tips for Soil Needed For Raised Bed
- These insider strategies will help you optimize your layered approach for maximum root growth and drainage.
- Layer Composition: For the base layer in Step 1, consider using ½ inch of horticultural sand mixed with your gravel a...
- Soil Texture Tip: When building your foundational loam layer in Step 2, aim for a texture that resembles a damp spong...
Frequently asked questions
Got questions about the perfect soil mix for your raised bed? You’re not alone! Here are answers to the most common concerns—so you can get growing with confidence.
What’s the simplest soil mix I can use for a raised bed?
Start with a 60% topsoil, 30% compost, and 10% perlite or coarse sand for drainage. This balanced mix promotes root growth while preventing compaction. For a no-fuss option, pre-mixed raised bed soil blends (like those labeled for vegetable gardens) work well too!
How long does it take for soil in a raised bed to “settle” before planting?
Give your raised bed 2–4 weeks to settle after filling it, especially if you’ve added heavy amendments like compost. Water it thoroughly during this time to help layers compact naturally. Lightly till the top 2–3 inches before planting to aerate the soil.
Is it cheaper to buy soil or make my own mix?
DIY mixes are cost-effective if you source compost locally (check municipal programs or farm waste) and use topsoil from a quarry or garden center. Buying pre-mixed raised bed soil saves time but can cost $20–$50 per cubic yard. For a 4’x8’ bed (12” deep), DIY typically costs half as much.
What if my raised bed soil drains too fast or stays soggy?
Too fast?
Add 1–2 inches of peat moss or coconut coir to retain moisture without suffocating roots.
Too soggy?
Mix in coarse sand or perlite (up to 20%) and ensure the bed has drainage holes at the bottom.
Pro tip: Test drainage by filling a container with your mix and pouring water—it should drain in 10–30 minutes.Can I reuse soil from my old garden in the raised bed?
Yes, but sterilize it first to kill weeds/seeds and pests. Spread it in the sun for 2 weeks or bake in a 300°F oven for 30 minutes. Mix it 50/50 with fresh compost to replenish nutrients. Avoid soil with compacted clay—it’ll slow drainage in your raised bed.
Wrapping up and next steps
Choosing the right soil mix for your raised bed is the foundation of a thriving garden—literally! 🌱 A balanced blend of topsoil, compost, and organic matter ensures your plants get the nutrients and drainage they need to flourish.
Whether you’re a beginner or a seasoned gardener, taking the time to layer your soil properly will pay off with stronger roots, healthier plants, and a bountiful harvest.
Now that you’re armed with the knowledge, it’s time to roll up your sleeves and get growing! Start by prepping your raised bed, then layer your soil mix with confidence. Happy planting—your future veggies will thank you! 🌿