
How To
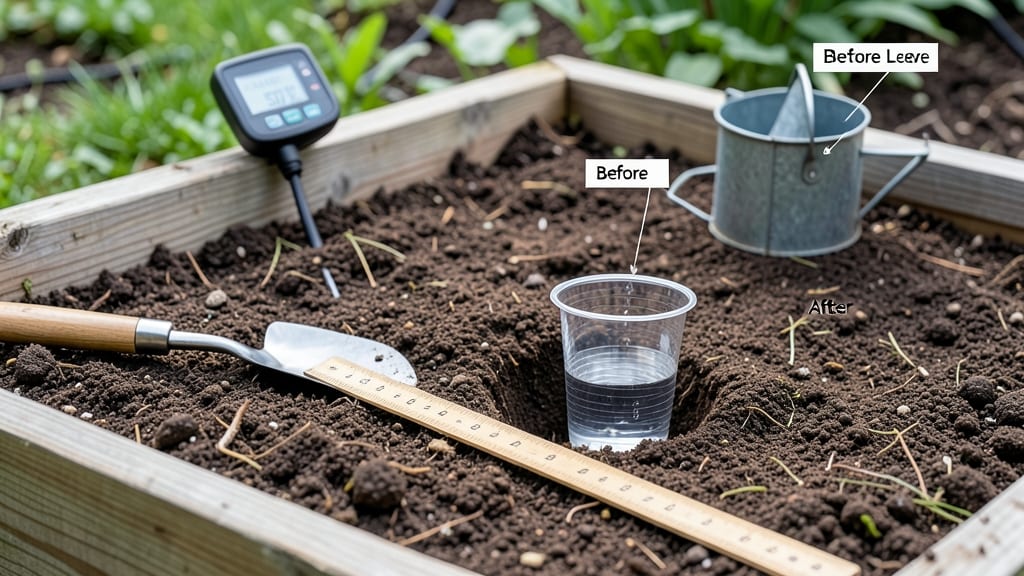
A soil drainage test can save your garden from soggy roots and struggling plants. The soil drainage test reveals whether your soil holds water like a sponge or drains like a sieve—both extremes hurt roots.
I’ve fixed drainage issues in clay-heavy yards and sandy desert plots using the same simple methods, and they work for any gardener.
The percolation test (digging a hole) and jar test (shaking soil with water) give you clear answers in under 30 minutes. My clay soil used to flood after rain, but adding 1 inch of compost and 10% coarse sand transformed it into a plant-friendly base.
You’ll know exactly what your soil needs before buying amendments.
Poor drainage causes yellowing leaves, root rot, and stunted growth—but fixing it is straightforward. Once you understand your soil’s behavior, you’ll choose the right plants and amendments for perfect root health. Let’s get your soil working for you, not against you.
You only need a trowel, water, and a clear container (like a mason jar) for the jar test. The percolation test requires a shovel and a watch—no fancy tools, just observation. I’ve tested everything from backyard plots to container mixes, and these methods never fail.
Start by digging a 6-inch-deep hole, filling it with water, then timing how long it takes to drain. If water sits for more than 6 hours, your soil drains too slowly.
For the jar test, fill it halfway with soil, add water, shake, and watch how quickly the water separates—clear water means good drainage.
Common fixes include mixing in organic matter (compost, peat moss) for clay soil or sand for sandy soil. Overwatering and compacted soil are the real culprits, so aerate regularly and avoid heavy foot traffic on garden beds. Your plants will thank you with stronger growth and fewer problems.
📚 In This Guide
- What you need
- Instructions
- Tips and common mistakes
- Wrapping up and next steps
What you need
- ● Soil sample: 1–2 cups (fresh, undisturbed soil from the garden or pot)
- ● Clear container: 1 large jar or cylindrical vessel (minimum 12 inches tall, 4–6 inches in diameter)
- ● Water: 1 gallon (room temperature, tap or distilled)
- ● Measuring cup: 1 (for precise water additions)
- ● Timer or stopwatch: 1 (to track drainage time accurately)
- ● Spoon or trowel: 1 (for layering soil)
- ● Ruler or tape measure: 1 (to monitor water levels)
- ● Plastic wrap or lid: 1 (to seal the container temporarily)
- ● Sand or gravel: Small amount (for comparative testing of drainage layers)
- ● Notebook & pen: To record observations (drainage speed, water retention)
- ● Permanent marker: For labeling your container
- ● Fine mesh screen: To strain soil particles post-test (if analyzing sediment)
How to perform a soil drainage test for healthy plant growth
This simple test reveals whether your soil drains properly before you plant a thing.
Choose Your Test Location
Select a spot where you plan to plant or where you suspect drainage issues. If testing multiple areas, mark each with a small stake or flag. Focus on spots that stay soggy after rain or where plants have struggled before. The test works equally well in garden beds, raised beds, or containers—just use the same method.
For containers, use the same pot you’ll plant in. For in-ground testing, dig a hole about 6 inches deep and 4 inches wide. This gives enough room to observe water movement without disturbing the surrounding soil. If you’re testing multiple spots, keep your test holes at least 12 inches apart to avoid cross-contamination between tests.
Fill the Hole with Water
Slowly pour 4 cups of water into the hole until it’s completely full. Use a measuring cup or a pitcher with marked measurements to ensure consistency. Avoid pouring too quickly—let the water seep in gradually so you can observe how it interacts with the soil. If the water pools on the surface, that’s your first sign of poor drainage.
Watch how the water behaves. If it drains completely within 30 minutes, your soil has good drainage. If it takes 1-2 hours to fully drain, it’s moderately well-draining but may need amendments like compost or sand. If water remains after 2 hours, your soil is too dense and needs immediate attention to prevent root rot.
Assess Drainage Speed and Soil Behavior
After pouring the water, press your finger 1 inch into the soil at the bottom of the hole. If it feels damp but not soggy, drainage is likely adequate. If it’s still wet or waterlogged after 2 hours, your soil is holding too much moisture. This is a red flag for plants that dislike wet roots, like tomatoes, peppers, or most perennials.
Pay attention to how the soil around the hole behaves. If water spreads outward and pools on the surface, your soil has poor structure and needs organic matter to improve porosity. If water drains straight down without spreading, your soil drains well but may still benefit from a 1-2 inch layer of mulch to retain moisture without suffocating roots.
Adjust Soil Based on Test Results
If your soil drains too quickly (water disappears in under 15 minutes), it’s likely sandy and lacks moisture retention. Amend it by mixing in 2-3 inches of compost or aged manure into the top 6 inches of soil. This improves water-holding capacity while still allowing excess moisture to drain.
For soil that drains too slowly (water lingers after 2 hours), dig the hole deeper (12 inches) and mix in equal parts compost and coarse sand or perlite. This creates air pockets that help water move through the soil while still providing nutrients. Avoid compacting the amended soil—keep it loose so roots can grow easily.
Monitor and Repeat as Needed
After amending the soil, wait 1-2 weeks to let the changes settle, then retest the same spot. Soil drainage can vary by season, so check again after heavy rains or in early spring when the ground is still damp from winter. If you’re planting in containers, perform the test in the pot you’ll use—drainage issues in pots can be just as problematic as in-ground problems.
Keep a small notebook nearby to record your findings. Note the date, location, and amendments used, along with how the soil performed in the test. Over time, you’ll spot patterns—like certain areas consistently needing more sand or others always staying too wet—and adjust your gardening approach accordingly. Perfect drainage isn’t about one-time fixes; it’s about ongoing observation.
Tips & tricks for perfect soil drainage testing
Here's what I've learned after testing dozens of garden spots—these tricks will help you get accurate results every time.
Test Location Precision: Choose your test spot carefully in Step 1. Avoid areas near irrigation lines or where water naturally collects after rain, as these can skew your results. For containers, test in the exact pot you plan to use—drainage holes and pot material affect how water moves through soil.
Water Pouring Technique: In Step 2, pour the 4 cups of water slowly and evenly to avoid creating channels in the soil. If water pools on the surface immediately, you've got a drainage issue that needs addressing right away. I like to use a small watering can with a gentle flow control for this step—it gives you better control than a pitcher.
Timing Observation: The 30-minute to 2-hour window in Step 2 is crucial. Set a timer when you pour the water so you don't have to guess when it's fully drained. I've seen tests where people thought water had disappeared only to find it had actually spread sideways through the soil rather than draining downward.
Soil Amendment Strategy: When adjusting soil in Step 4, mix amendments thoroughly into the top 6 inches for sandy soil or 12 inches for dense soil. Don't just sprinkle compost on top—this creates a false layer that won't improve drainage throughout the root zone. Use a garden fork or trowel to gently loosen the soil as you mix in amendments.
Pro Tips for Soil Drainage Test
- Here's what I've learned after testing dozens of garden spots—these tricks will help you get accurate results every t...
- Test Location Precision: Choose your test spot carefully in Step 1. Avoid areas near irrigation lines or where water ...
- Water Pouring Technique: In Step 2, pour the 4 cups of water slowly and evenly to avoid creating channels in the soil...
Frequently asked questions
Got questions about conducting a soil drainage test? You’re not alone! Here are some of the most common concerns—and their straightforward answers—to help you get it right.
How often should I test my soil drainage?
For most gardeners, testing drainage once a year (spring or fall) is ideal, especially after heavy rain or seasonal changes. If you’re troubleshooting poor plant health or preparing for new landscaping, test sooner—consistency is key!
How long does a drainage test take?
A basic layered test takes just 15–30 minutes from start to finish. The water absorption phase (where you observe drainage speed) is the most time-sensitive—plan for 5–10 minutes of active monitoring. Patience pays off!
What if my soil drains too fast or too slowly?
Too fast?
Amend with compost or peat moss to improve water retention. Too slow? Mix in sand or perlite to boost drainage. For extreme cases, consider raised beds or container gardening.
Can I reuse the same soil sample for multiple tests?
Yes! Store your sample in a dry, airtight container (like a plastic bag) for up to 2 weeks if you need to retest. Just let it dry out completely between tests to avoid skewed results. Pro tip: Label it to track locations!
Do I need professional help for accurate results?
Not necessarily! DIY tests are highly reliable for home gardens. For large-scale projects (e.g., construction), a lab test may be worth the investment—but for most plants, your kitchen or backyard is all you need.
Still stumped? Drop your question in the comments—we’re happy to help!
Wrapping up and next steps
Mastering the soil drainage test is your first step toward healthier, happier plants! 🌱 By following the layered method, you’re not just checking moisture—you’re unlocking the secrets to root vitality and preventing common issues like root rot.
Whether you’re a gardening newbie or a seasoned green thumb, this simple test empowers you to make smarter decisions for your garden.
Now that you’re equipped with the knowledge, take action! Grab your materials and test a patch of soil today—your plants will thank you with lush growth and vibrant blooms. Happy testing! 🌿