
How To
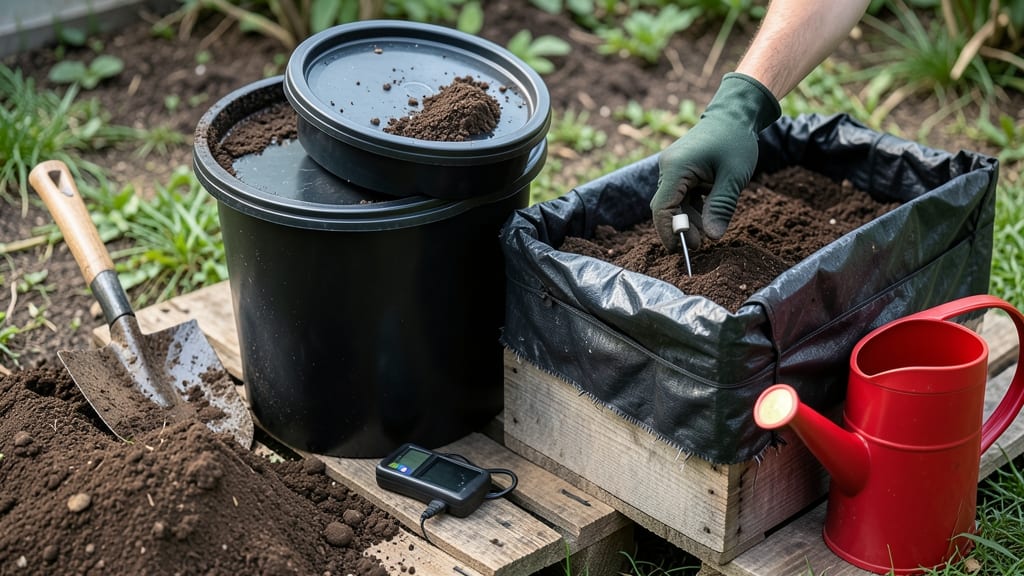
Storing soil outside without losing its quality is easier than you think. ✨ The key is blocking freeze, erosion, and weeds while keeping it aerated—my stored soil stays ready for spring planting without turning to compacted dirt or a weed jungle.
You'll need a sturdy container (tarps, barrels, or bags work), a tarp or lid to block rain, and a way to let air move through. I use 5-gallon buckets with holes drilled in the sides for small batches, and large plastic bins for bigger piles.
The goal is to keep it dry but not bone-dry—think slightly damp like a wrung-out sponge. By next season, your stored soil will still hold moisture, support roots, and resist compaction. Weed seeds stay dormant, nutrients last longer, and you avoid the hassle of last-minute soil prep.
Just refresh with compost before planting, and you're good to go. Works for gardeners with limited space, seasonal planters, or anyone who wants to save good soil for future projects. Here's how to do it right!
📚 In This Guide
- What you need
- Instructions
- Tips and common mistakes
- Wrapping up and next steps
What you need
- ● Storage Bags or Containers: Heavy-duty contractor bags (50–100 gallon size, 3–5 mil thickness) – 2–4 bags depending on soil volume.
- ● Plastic barrels (55-gallon, UV-resistant) – 1–2 barrels for bulk storage.
- ● Corrugated cardboard boxes (lined with plastic sheeting) – 1–3 boxes for small batches.
- ● Waterproof Tarps: 10–12 mil polyethylene tarp (10’x12’ or larger) – 1–2 tarps for covering piles.
- ○ Soil Conditioners (Optional but Helpful): Compost or aged manure (5–10% of soil volume) to retain moisture.
- ● Coconut coir or peat moss (for moisture retention in dry climates).
- ● Basic Tools: Shovel or garden fork (for moving soil).
- ● Heavy-duty scissors or box cutter (for cutting tarps/bags).
- ● Measuring tape (to ensure proper coverage).
- ● Safety Gear: Gloves (to protect hands from dirt and sharp edges).
- ● Dust mask (if soil is dusty or contains additives).
- ● Location Requirements: Flat, drainage-friendly surface (gravel, pallets, or raised platform).
- ● Shade or partial sunlight (to prevent overheating).
- ● Secure area (away from pets, wildlife, or foot traffic).
- ● 💡 Label everything! Use a marker to tag bags/containers with soil type (e.g., "Potting Mix – Spring 2024").
- ● 🌡️ Test moisture levels before storing—soil should be damp but not soggy (squeeze a handful; it should hold shape but not drip).
- ● 🎯 Elevate if possible: Use pallets or cinder blocks to keep soil off damp ground and improve airflow.
Step-by-step guide to storing soil outside safely
Here’s how I keep soil fresh and usable for months without compaction or freeze damage.
🪴 Step 1: Choose the Right Storage Location
Pick a spot that’s level, slightly elevated, and sheltered from heavy rain or wind. I use a raised wooden pallet under a covered porch or a sturdy tarp anchored with bricks—this keeps moisture out while allowing airflow. Avoid direct sunlight, which dries soil too quickly and creates a crust that’s hard to break up later.
If storing in bags, place them on a pallet or wooden boards to prevent moisture wicking from the ground. The goal is to mimic natural conditions without letting water pool or freeze solid. A covered area with partial shade works best for most climates.
💧 Step 2: Prepare Soil for Storage
Before storing, sift out any large debris like rocks or roots—these can harbor pests or rot over time. If your soil is too wet, spread it out in a thin layer (about 2 inches deep) and let it dry for 2-3 days under a shade cloth. You’ll know it’s ready when it crumbles easily in your hands but doesn’t fall apart completely.
For clay-heavy soil, mix in 10-20% coarse sand or perlite to improve drainage and prevent clumping. This small adjustment makes a huge difference when you’re ready to use it again. Avoid adding fresh organic matter like compost—it can heat up and attract pests during storage.
☀️ Step 3: Store in Breathable Containers or Piles
For small amounts, use heavy-duty contractor bags (like those rated for 50+ pounds) with multiple small holes punched in the sides. Fill them no more than 2/3 full to allow air circulation. For larger quantities, build a low mound (1-2 feet high) on a pallet and cover it loosely with a breathable tarp (like burlap or shade cloth) secured with weights.
If storing in bags, stack them vertically with 1-2 inches of space between each to prevent heat buildup. I label each bag with the date and soil type—this helps track how long it’s been stored. Never seal soil completely; trapped moisture leads to mold or anaerobic conditions that kill beneficial microbes.
⏰ Step 4: Protect Against Freeze and Erosion
In freezing climates, cover stored soil with 4-6 inches of straw or leaves to insulate it from temperature swings. This layer acts like a natural blanket, preventing freeze-thaw cycles that turn soil into a brick. For windy areas, secure the covering with bricks or cinder blocks—you don’t want it blowing away and exposing the soil.
Check stored soil every 4-6 weeks for moisture or pest signs. If it feels damp, unearth a small section and let it air out for a day. Overly dry soil can be revived by lightly misting it and mixing in a bit of hydrated peat moss to restore structure. Avoid adding water directly to large piles—it creates pockets of saturation.
🌱 Step 5: Reuse Stored Soil Properly
Before using stored soil, fluff it with a garden fork or your hands to break up any compaction. If it smells musty or looks gray, mix in 1 part fresh compost per 4 parts stored soil to revive its fertility. I also add a handful of worm castings for quick microbial activity—this jumpstarts the soil’s health after months of dormancy.
For containers or raised beds, blend stored soil with 20% fresh potting mix to ensure good drainage. You’ll notice a difference in texture immediately—stored soil alone can be dense, but the right mix gives plants the air and water they need to thrive from day one.
Tips & tricks for storing soil outside safely
Here's what I've learned after years of keeping my garden soil fresh through seasons—these small tweaks make all the difference.
Location Logic: The perfect spot combines three things: shelter from rain, airflow, and partial shade. I've found that a covered porch with a tarp overhead works best—it keeps moisture out while preventing the soil from drying into a brick. If you must store in direct sunlight, add a second tarp layer to diffuse light intensity. This prevents the crusting that makes soil nearly unusable later.
Prep Like a Pro: When drying overly wet soil, spread it in that 2-inch layer but don't skip the shade cloth—direct sun will bake it too quickly. Pro tip: Use a wire mesh screen instead of cloth for faster drying while still protecting from pests. And for clay soil, I've found perlite works better than sand—it stays loose longer and doesn't compact when wet.
Container Strategy: Those multiple small holes in contractor bags are crucial—poke them with a nail before filling. For extra security, I double them up with a few larger holes near the top for better airflow. When building mounds, keep them no taller than 2 feet—any higher and the center stays too compacted. I use a wooden frame to contain the mound shape for easier maintenance.
Winter Survival: The 4-6 inch straw layer is your best friend in freezing climates, but don't skip the bricks to weigh it down. I've seen wind blow away entire covers, exposing soil to freeze damage. In extreme cold, add a second insulating layer of cardboard underneath the straw—it creates an air pocket that prevents conductive heat loss to the ground.
Pro Tips for Store Soil Outside
- Here's what I've learned after years of keeping my garden soil fresh through seasons—these small tweaks make all the difference.
- Location Logic: The perfect spot combines three things: shelter from rain, airflow, and partial shade.
- Prep Like a Pro: When drying overly wet soil, spread it in that 2-inch layer but don't skip the shade cloth—direct sun will bake it too quickly.
Frequently asked questions
Got questions about storing soil outside? You’re not alone! Here are some common concerns—and straightforward answers—to keep your soil safe and ready for planting.
Can I store soil outside during winter?
Yes, but only if you take precautions. Use heavy-duty tarps or waterproof bags to shield soil from freezing and moisture. If temperatures drop below freezing, move it to a sheltered spot or insulate it with straw. Pro tip: Cover the top with mulch or a thick tarp to retain warmth.
How long can soil stay outside before it degrades?
With proper protection, soil can stay outside for 6–12 months without significant degradation. However, exposure to extreme weather (freezing, heavy rain, or direct sun) can compact it or alter its nutrients. Check it periodically for mold, pests, or excessive moisture.
What’s a cheaper alternative to buying new soil?
Repurpose composted yard waste, leaf litter, or sawdust (untreated!) to enrich stored soil. Mix in a slow-release fertilizer or aged manure to restore nutrients. If your soil is too compacted, aerate it with a garden fork before reuse.
How do I prevent pests or mold in stored soil?
Keep soil dry and well-ventilated. Add a layer of diatomaceous earth or wood ash to deter pests. If mold appears, spread the soil out to dry in the sun for a day. Avoid storing near woodpiles or standing water to minimize infestations.
What if my soil freezes or gets too wet?
If frozen, let it thaw naturally in a shaded area. For waterlogged soil, spread it in a thin layer and let it dry before restacking. To prevent future issues, store in elevated bins with drainage holes or use moisture-absorbing materials like cat litter at the bottom.
Wrapping up and next steps
Storing soil outside doesn’t have to be a challenge—with the right techniques, you can protect it from freeze, erosion, and moisture loss all season long! 🌱 Whether you’re prepping for gardening, construction, or landscaping, layering, covering, and proper drainage are your best friends.
Remember, a little effort now saves you from wasted resources and extra work later.
Ready to put your soil storage plan into action? Start small—pick one method (like tarps or pallets) and test it out this season. Over time, you’ll refine your approach and keep your soil in top shape for years to come. Happy storing! 🚀