
How To
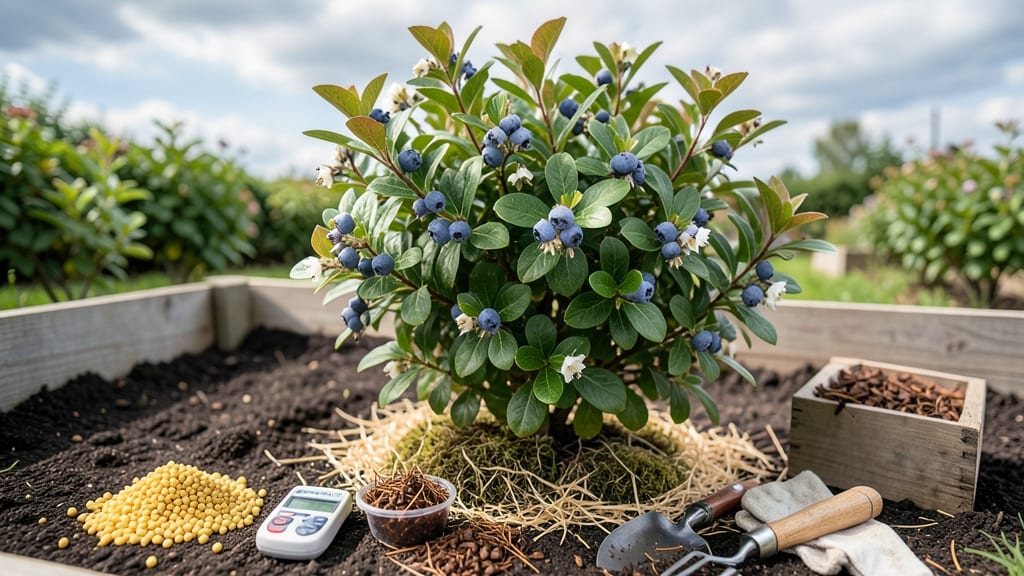
Your azaleas are begging for a pH change—clay soil just won’t cooperate. 🌿 Making acidic clay soil isn’t rocket science, but it does require the right approach to avoid compacting the soil further or over-acidifying it.
The key is balancing sulfur (for fast results) with peat moss (to improve texture and hold acidity long-term), while avoiding the common mistakes that leave plants struggling.
First, test your soil’s pH—aim for 5.0-6.0 for acid-loving plants like azaleas. If it’s above 6.5, you’ll need elemental sulfur (1-2 pounds per 100 square feet) mixed into the top 6 inches of soil.
For organic gardeners, peat moss or pine fines work too, but they take longer—3-6 months—to lower pH. The trick? Don’t rush it—clay soil reacts slowly, and too much sulfur at once can burn roots.
After amending, water thoroughly to activate the sulfur, then retest in 2-3 months. If the pH still isn’t dropping, try vinegar or aluminum sulfate (for quick fixes), but use sparingly—overdoing it can harm beneficial microbes.
The payoff? Lush, vibrant azaleas with deep purple blooms and blueberries so sweet they’ll make your neighbors jealous. Patience is key here.
Pro tip: Mix in compost or leaf mold to loosen clay while you adjust pH—this prevents compaction and helps roots spread. And if your soil stays stubbornly alkaline?
A raised bed with acidic soil mix might be your best bet for finicky plants. Let’s get that pH where it needs to be!
📚 In This Guide
- What you need
- Instructions
- Tips and common mistakes
- Wrapping up and next steps
What you need
- ● Elemental sulfur: 1-2 lbs per 100 sq ft (90-95% purity, finely ground for faster action).
- ● Peat moss: 2-3 cubic feet per 100 sq ft (sphagnum or horticultural-grade preferred).
- ● Garden fork or tiller: For aerating compacted clay soil (rent or borrow if needed).
- ● Garden gloves: Heavy-duty to protect hands from sulfur and soil grit.
- ● Watering can or hose: For moistening soil before and after amendments.
- ● pH test kit: Digital or liquid test strips to monitor acidity levels (aim for 4.5–5.5 for azaleas).
- ○ Compost or aged manure: Optional but recommended (1-2 inches mixed in) to improve soil structure and fertility.
- ● Soil screen or rake: To sift out large clay clumps post-tilling.
- ● Wheelbarrow: For hauling peat moss and sulfur efficiently.
- ● Broadcast spreader: For even sulfur distribution (especially useful for large gardens).
- ● Mulch (pine bark or pine needles): 2–4 inches to maintain acidity and suppress weeds.
Step-by-step guide to acidifying heavy clay soil for acid-loving plants
Transform your dense clay into a thriving acidic environment—here's how I lower pH permanently for azaleas, blueberries, and other acid-lovers.
🌱 Step 1: Test Your Current Soil pH and Identify Clay Characteristics
Before adding amendments, grab a soil test kit to confirm your pH—clay soils often measure 5.5-6.5 but need 4.5-5.5 for acid-loving plants. Dig a 6-inch deep hole and examine the soil: if it's sticky when wet and forms hard clods when dry, you're dealing with classic clay. This density means amendments will need 2-3 applications spaced 3 months apart for lasting results.
I like to test in multiple spots—clay soils can vary dramatically even within a small yard. If your test shows pH below 4.5, hold off on sulfur and mix in 1 part garden lime to 10 parts soil first. Acid-loving plants need low pH, not extreme acidity—think lemonade, not vinegar.
✂️ Step 2: Till in Elemental Sulfur for Gradual pH Reduction
Spread 10 pounds of elemental sulfur per 100 square feet evenly over the planting area. For a 4-foot diameter azalea bed, that's about 1.6 pounds. Use a broadcast spreader or hand-scatter while wearing a mask—sulfur dust is irritating. Work it into the top 6 inches of soil using a tiller or garden fork, breaking up any remaining clods.
Here's the thing—sulfur doesn't work overnight. It needs 4-12 weeks to convert into sulfuric acid through natural soil processes. You'll know it's working when you see fine, powdery residue on the soil surface (this is harmless). Avoid tilling again until you see new growth on your acid-loving plants—disturbing the soil too soon reduces effectiveness.
💧 Step 3: Incorporate Peat Moss for Organic Matter and Moisture Retention
Spread 3 inches of sphagnum peat moss over the tilled area and mix it into the top 4 inches of soil. Peat moss has a pH of 3.0-4.5, so it drops pH while also improving clay's dreadful drainage. For a 4-foot bed, you'll need about 2 cubic feet—this is where a wheelbarrow comes in handy. Wet the peat moss thoroughly before mixing to help it integrate smoothly.
Don't skip this step—peat moss does more than just acidify. It creates air pockets in that dense clay, helping roots breathe. You'll notice the soil feels lighter and darker after mixing. Water the area deeply (1 inch) immediately after to help the peat moss settle and begin breaking down. This is also when I add 1 pound of aluminum sulfate (optional but effective for quick pH drops).
☀️ Step 4: Mulch with Acidifying Organic Matter
Cover the amended soil with 3-4 inches of pine bark mulch or pine needles. These materials slowly release organic acids as they decompose. For a 4-foot bed, you'll need about 2 cubic feet—this is your long-term maintenance layer. Keep mulch 2 inches away from plant stems to prevent rot. The mulch will also suppress weeds and maintain moisture in that heavy clay.
Here's what to watch for: if your mulch starts to smell sour, it's decomposing too quickly—this means you need to reduce to 2 inches until the soil stabilizes. Replenish mulch twice yearly (spring and fall) to maintain pH. I like to top-dress with additional peat moss every 6 months for extra insurance against pH creep.
⏰ Step 5: Monitor and Adjust Over Time
Retest soil pH 3 months after amendments—this is when you'll see the most dramatic changes. If pH is still too high, repeat the sulfur application but reduce by 25% to avoid overshooting. For clay soils, patience is key—full acidification can take 6-12 months. You'll know you've succeeded when your azaleas produce vibrant blooms and blueberries develop plump, sweet fruit.
Real talk: clay soils have a mind of their own. If your pH drops too low (below 4.5), mix in 1 part garden lime to 20 parts soil and retest in 2 weeks. The goal is consistency—aim for 5.0-5.5 for most acid-lovers. I keep a soil journal with test dates and amendment records—it saves endless guesswork next season.
Tips & tricks for perfect acidic soil transformation
Here's what nobody tells you—these are the details that separate good from great when transforming your stubborn clay soil.
Soil Testing Precision: Don't just test one spot! Clay soils can vary dramatically even within a few feet. I test at least three locations—one in sun, one in shade, and one in the center of the bed. Record each reading separately; you might need different amendment amounts for different zones. The 6-inch depth test hole is critical because surface soil often has different characteristics than deeper layers where roots actually grow.
Sulfur Application Strategy: The 10 pounds per 100 square feet sulfur recommendation is a starting point, but real-world conditions matter. If your area gets heavy rainfall, increase by 20%—water helps convert sulfur to acid faster. For dry climates, reduce by 10% since moisture is needed for the chemical reaction. Always wear a mask when applying sulfur dust; it's not just unpleasant to breathe—it can irritate your lungs. Spread it on a calm day to prevent wind from carrying it away before you can incorporate it.
Peat Moss Integration Secret: Wetting the 3 inches of sphagnum peat moss before mixing is non-negotiable. Dry peat moss repels water and creates clumps that won't integrate properly. I soak mine in a wheelbarrow with 1 inch of water for 10 minutes before spreading—this helps it break down faster in the soil. The top 4 inches incorporation depth is key; deeper than that and you're just creating a peat layer that won't benefit roots. After mixing, give it that 1 inch of water immediately to trigger the decomposition process that releases those beneficial acids.
Mulch Maintenance Hack: That 3-4 inches of pine bark mulch isn't just for looks—it's your long-term pH insurance policy. I mark my mulch lines with landscape paint so I know exactly where to replenish. When you see the mulch breaking down to half its original thickness, it's time to add more. The 2 inches away from stems rule prevents rot, but I make an exception for established plants with thick trunks—they can handle mulch right up against their base. For extra insurance, I sprinkle 1/4 cup of aluminum sulfate (the optional amount) directly under the mulch layer when I replenish.
Pro Tips for Make Clay Soil Acidic
- Here's what nobody tells you—these are the details that separate good from great when transforming your stubborn clay soil.
- Soil Testing Precision: Don't just test one spot!
- Sulfur Application Strategy: The 10 pounds per 100 square feet sulfur recommendation is a starting point, but real-world conditions matter.
Frequently asked questions
Got questions about turning your clay soil acidic? You’re not alone! Here are some of the most common concerns—and straightforward answers—to help you get it right.
How long does it take for sulfur to lower soil pH?
Sulfur works gradually, typically taking 2–6 months to adjust clay soil pH, depending on moisture, temperature, and soil type. Test your soil every 2–3 months to monitor progress. Patience is key—rushing can harm beneficial microbes!
Can I use vinegar or citrus peels to acidify clay soil?
While vinegar or citrus peels can lower pH temporarily, they’re not ideal for clay soil. They raise soil acidity too quickly, risking nutrient imbalances or harming plants. Stick to elemental sulfur or peat moss for long-term, safe results.
When’s the best time of year to acidify clay soil?
Fall (after harvest) or early spring (before planting) are the best times. Avoid applying sulfur in extreme heat or freezing conditions, as it works best in moderate, moist soil. Plan ahead—it’s not a quick fix!
What if my soil is already too acidic (pH < 5.0)?
If your pH drops below 5.0, you’ve overdone it! To raise it gently, mix in lime (calcium carbonate) or wood ash (sparingly). Re-test soil after 3–4 months. Think of it like tuning a guitar—small adjustments matter!
Do I need to till sulfur into clay soil?
Yes! Tilling sulfur 2–4 inches deep ensures even distribution and speeds up the process. For heavy clay, consider broadcasting sulfur and watering it in thoroughly. Pro tip: Wear a mask—sulfur dust isn’t fun to breathe!
Wrapping up and next steps
Transforming your clay soil into an acidic haven for azaleas and other acid-loving plants is totally doable!
By adding elemental sulfur or peat moss, you’re giving your garden the perfect foundation for vibrant blooms and thriving roots. 🌱✨ Remember, patience and consistency are key—monitor your soil’s pH over time and adjust as needed.
Ready to see the magic happen? Grab your gloves, head to the garden, and start your project today. Your azaleas will thank you with lush foliage and stunning flowers—happy gardening! 🌸