
Tools
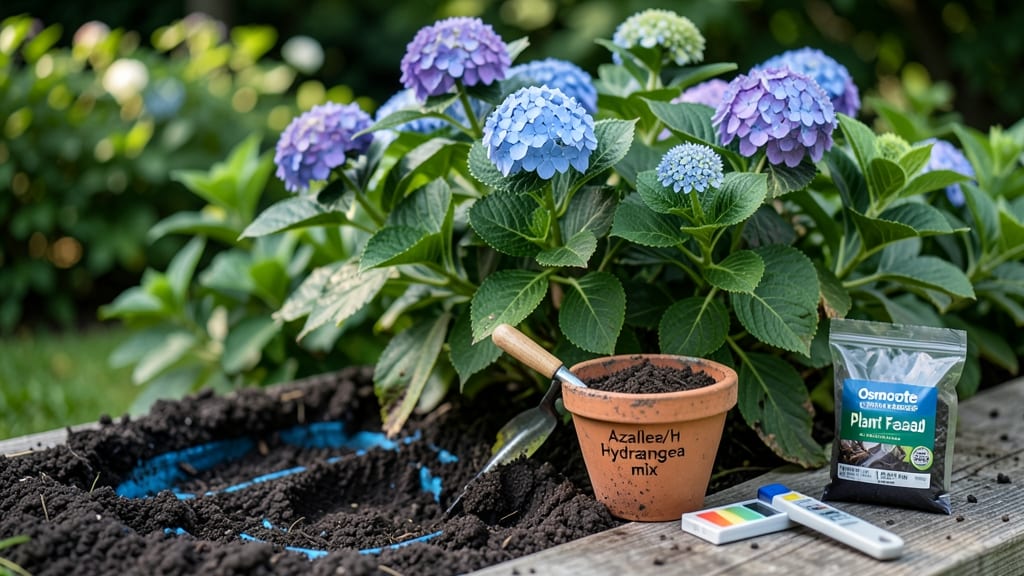
The secret to those jaw-dropping blue hydrangeas starts underground. 💙 Your garden soil for hydrangeas needs to be acidic enough to trigger the blue pigment in their flowers—something most gardeners overlook until their blooms turn pink.
I learned this the hard way after years of struggling with inconsistent colors, and now my plants put on a reliable show every summer.
You’ll need a mix that combines existing soil with 20-30% organic matter—think peat moss, pine bark fines, or well-aged compost—to lower the pH naturally. Most garden centers sell pre-mixed acidic blends, but DIY works too: just add sulfur or aluminum sulfate if your soil tests above 6.0.
The key is drainage—hydrangeas hate soggy roots, so amend heavy clay with perlite or coarse sand.
Once your soil is prepped, you’ll see the difference immediately: deep blue blooms by midsummer, strong stems that don’t flop, and leaves that stay vibrant all season. The best part?
This blend works for years—just top-dress annually with a thin layer of peat moss to maintain acidity. No more guessing games about why your hydrangeas keep changing colors.
Works for both in-ground and container gardens, though containers dry out faster and may need extra moisture checks. For northern climates, amend soil in early spring; in warmer zones, do it in fall before winter rains. Here’s how to test your progress—and troubleshoot if those blues still won’t show up.
📚 In This Guide
- What you need
- Instructions
- Tips and common mistakes
- Wrapping up and next steps
What you need
- ● Peat moss or coconut coir: 3 parts (improves acidity and drainage)
- ● Garden compost or well-rotted manure: 2 parts (adds organic nutrients)
- ● Perlite or coarse sand: 1 part (enhances aeration and prevents compaction)
- ○ Sulfur or aluminum sulfate: 1 tbsp per gallon of mix (boosts acidity, optional but helpful for blue blooms)
- ● Balanced fertilizer (10-10-10 or similar): 1 cup per 5 gallons (supports growth)
- ● Garden trowel or spade (for mixing and amending soil)
- ● Wheelbarrow or large container (to blend materials easily)
- ● pH testing kit (to monitor acidity levels, highly recommended)
- ● Gloves and protective eyewear (for handling sulfur and soil)
- ● Watering can or hose (to moisten the mix before planting)
How to prepare the perfect soil for hydrangeas
Hydrangeas thrive when their soil pH matches their color dreams—here's how to create the ideal acidic blend.
🌱 Step 1: Start With Quality Base Soil
Begin with a well-draining garden soil that's already rich in organic matter. I like to use a mix of existing garden soil and compost—about 50% garden soil and 30% compost—to give roots plenty of nutrients while keeping the texture loose. Avoid heavy clay soil, which holds too much moisture and suffocates roots.
Test your soil's current pH with a simple kit. Hydrangeas crave acidic soil between 5.2 and 5.5 for those signature blue blooms. If your soil tests higher, you'll need to acidify it further in the next steps. I always mix my base soil in a wheelbarrow first—it makes blending everything easier and prevents uneven spots.
💧 Step 2: Acidify the Mix for Blue Blooms
Add sphagnum peat moss or pine bark fines to lower the pH naturally. For every 4 gallons of base soil, mix in 1 gallon of peat moss. This keeps the soil light yet acidic. I also sprinkle in 1 cup of sulfur per 4 square feet—this is the secret to shifting pH gradually without shocking the plants.
Water the mix thoroughly after blending. The moisture helps activate the sulfur and peat moss, starting the pH adjustment process. Let it sit for 24 hours before planting. You'll know it's working when the soil smells earthy and slightly tangy—like a forest floor after rain.
☀️ Step 3: Amend for Drainage and Nutrition
Stir in 20% perlite or coarse sand to improve drainage. Hydrangeas hate soggy roots, and this prevents waterlogging while keeping the soil airy. I like to use 1 part perlite to 4 parts soil—just enough to loosen things up without making the mix too gritty.
Add a handful of hydrangea-specific fertilizer or a slow-release acid-loving plant fertilizer to the mix. Look for one with higher phosphorus (the middle number) to encourage blooming. I spread it evenly and mix it in so every shovel of soil has a boost. This ensures your hydrangeas get the nutrients they need right from the start.
⏰ Step 4: Test and Adjust Before Planting
After mixing, test the soil pH again with your kit. Aim for 5.2 to 5.5—this is the sweet spot for blue blooms. If it's still too high, add a little more sulfur or peat moss and re-test in a few days. Patience here pays off—rushing can burn roots.
Once the pH is perfect, fluff the soil one last time with a garden fork. Break up any clumps and rake the surface smooth. The texture should feel like a damp sponge—light enough to hold moisture but not so heavy it resists your fingers. This is your signal that the soil is ready for planting.
🌿 Step 5: Plant and Mulch for Long-Term Success
Dig holes twice as wide as the root ball but only as deep as the container. This encourages roots to spread outward instead of sitting too deep. Gently place the hydrangea in the hole, then backfill with your amended soil, pressing lightly around the roots to remove air pockets.
Top with 2-3 inches of pine bark mulch to keep the soil acidic and retain moisture. Avoid wood chips—they can raise pH over time. Water deeply after planting to settle the soil and encourage roots to grow into the new mix. You'll see the difference in bloom color within a season!
Tips & tricks for perfect hydrangea soil blends
These simple tricks will help you create the ideal acidic environment for vibrant blue hydrangeas—without the guesswork.
Soil Mixing Secret: In Step 1, when combining your 50% garden soil and 30% compost, I recommend adding a handful of leaf mold (optional but fantastic) to the wheelbarrow mix. This natural forest floor material boosts acidity gradually and improves moisture retention. If you don't have leaf mold, crushed pine needles work in a pinch—just use them sparingly. The key is maintaining that loose, airy texture while keeping the pH in check.
pH Adjusting Tip: For Step 2, don't be afraid to add that 1 cup of sulfur per 4 square feet—the instructions are spot-on. But here's the thing: sulfur works best when it's evenly distributed. I like to sprinkle it through the mix while turning the wheelbarrow, then give it a quick stir with a garden fork. This ensures every shovel of soil gets the same treatment. The 24-hour waiting period is crucial—this gives the sulfur time to fully activate and adjust the pH without shocking the roots.
Drainage Check: In Step 3, when you're adding that 20% perlite, do the squeeze test after mixing. Grab a handful of your amended soil and squeeze it gently—it should hold together but not be sticky. If it crumbles apart, add a little more compost; if it stays too compact, mix in an extra 5% perlite. This balance prevents waterlogging while keeping nutrients accessible to roots. The goal is soil that feels like a damp sponge, not concrete or sand.
Testing Wisdom: For Step 4's pH testing, I can't stress enough how important it is to test in multiple spots. Grab samples from different areas of your mix—some spots might be more acidic than others. If you're still not hitting that 5.2-5.5 range after adding sulfur, try a small amount of aluminum sulfate (about 1/2 cup per 4 square feet). It's a stronger acidifier but use it sparingly—too much can make your soil too acidic for the plants.
Pro Tips for Garden Soil For Hydrangeas
- These simple tricks will help you create the ideal acidic environment for vibrant blue hydrangeas—without the guesswork.
- Soil Mixing Secret: In Step 1, when combining your 50% garden soil and 30% compost, I recommend adding a handful of l...
- pH Adjusting Tip: For Step 2, don't be afraid to add that 1 cup of sulfur per 4 square feet—the instructions are spot...
Frequently asked questions
about garden soil for hydrangeas—because even the best bloomers need the right foundation!What pH level should hydrangea soil have for blue flowers?
For vibrant blue blooms, aim for a soil pH of 5.0–5.5. Test your soil with a kit (available at garden centers) and adjust with sulfur or peat moss if needed. Pink hydrangeas thrive in pH 6.0+, so tweak based on your color goal!
How often should I amend hydrangea soil?
Amend soil once a year in early spring or fall. Mix in 2–3 inches of organic matter (like compost or pine bark fines) to maintain acidity and nutrients. Pro tip: If your hydrangeas are in containers, refresh the soil every 2 years for peak performance!
Can I use regular garden soil for hydrangeas?
Regular soil is too alkaline for hydrangeas! Instead, blend it with 50% acidic amendments, like sphagnum peat moss, pine needles, or leaf mold. For containers, use a pre-mixed acid-loving plant soil to skip the guesswork.
Why are my hydrangea leaves yellowing despite the right soil?
Yellow leaves can signal overwatering, nutrient deficiencies (like iron), or root rot. Check drainage—hydrangeas hate soggy roots! Add chelated iron or Epsom salt (for magnesium) if soil tests confirm deficiencies. Pro tip: Mulch with pine straw to retain acidity and moisture.
What’s a quick fix for alkaline soil?
For fast results, top-dress with sulfur (follow package rates) or coffee grounds (1–2 inches, worked into the top 6 inches of soil). Re-test pH in 4–6 weeks and repeat if needed. Warning: Avoid overdoing it—hydrangeas prefer steady acidity, not drastic swings!
Wrapping up and next steps
Choosing the right garden soil for hydrangeas is your secret weapon for stunning, vibrant blooms! 🌸 With the perfect acid-loving blend—rich in organic matter, proper drainage, and a touch of aluminum sulfate—you’re setting your hydrangeas up for success.
The key? Test, amend, and mulch regularly to keep those petals popping with color.
Now that you’re armed with the know-how, grab your gloves and get planting! Start by preparing your garden beds this weekend and watch your hydrangeas thrive. Happy gardening—your future blue blooms will thank you! 🌿✨