
How To
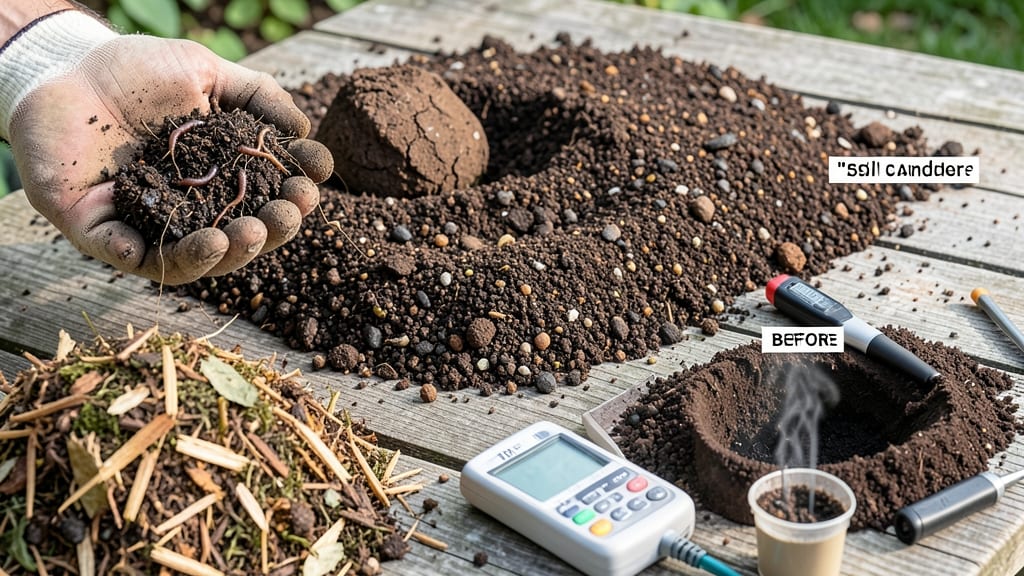
Soil conditioners transform your dirt into a thriving ecosystem for plants. 🌱 Think of them as the secret ingredient that turns dense, lifeless soil into fluffy, nutrient-rich growing medium—exactly what roots crave to spread and absorb water.
These amendments come in many forms: compost adds organic matter, peat moss improves moisture retention, and vermiculite keeps soil loose. Each one tackles a specific problem—whether it’s compacted soil, poor drainage, or nutrient starvation—so your plants grow stronger and healthier from day one.
With the right soil conditioner, you’ll see roots branching out faster, fewer wilting leaves, and plants that bounce back from drought or heavy rain. The difference is noticeable within weeks, especially for vegetables and flowers that demand rich, well-aerated soil. Perfect for garden beds, raised planters, or even potted plants.
The key is choosing the right mix for your soil type—whether it’s sandy, clay-heavy, or somewhere in between.
📚 In This Guide
- What you need
- Instructions
- Tips and common mistakes
- Wrapping up and next steps
What you need
- ● Organic Matter: Compost (2–3 gallons per 10 sq ft of soil)
- ● Peat moss or coconut coir (1–2 bags, 1–2 cubic feet each)
- ● Well-rotted manure (horse, cow, or chicken; 1–2 buckets)
- ○ Leaf mold or aged wood chips (optional but beneficial; 1–2 bags)
- ● Soil Amendments: Vermiculite or perlite (1–2 cups per 10 sq ft for aeration)
- ● Worm castings (1–2 cups per 10 sq ft for nutrients)
- ● Water: Hose or watering can (1–2 gallons per application)
- ● Garden fork or tiller (for mixing into soil)
- ● Garden gloves (to protect your hands)
- ● Wheelbarrow or large bucket (for transporting materials)
- ○ pH testing kit (optional but helpful for balancing soil)
- ● Biochar (1–2 cups per 10 sq ft for long-term carbon retention)
- ● Mineral supplements (e.g., crushed eggshells for calcium)
- ● Cover crop seeds (e.g., clover or vetch for nitrogen fixation)
- ● Soil moisture meter (to track water retention)
How to use soil conditioner for healthier garden soil
Transform your garden's foundation with soil conditioners that boost nutrient retention and root development.
🌱 Step 1: Test Your Current Soil Composition
Before adding any conditioner, grab a handful of moist soil and squeeze it gently. If it crumbles easily, you likely have sandy soil that drains too quickly. If it forms a tight ball that won't break apart, you're dealing with clay soil that compacts and suffocates roots. For loamy soil (the gold standard), it should hold shape briefly but crumble with light pressure.
Use a simple pH test kit to check your soil's acidity level. Most vegetables thrive in 6.0-7.0 pH range, while blueberries and azaleas prefer 4.5-5.5. Soil conditioners won't fix extreme pH issues, but they'll help create the ideal environment for amendments to work effectively. I recommend testing in multiple spots since pH can vary across your garden.
🌿 Step 2: Select the Right Soil Conditioner for Your Needs
For sandy soils, choose a conditioner rich in humic acids and peat moss to improve water retention. Products like coco coir or sphagnum peat work wonders by holding moisture near roots while still allowing excess to drain. Clay-heavy soils benefit most from composted bark or vermiculite, which create air pockets and prevent compaction.
If your garden has poor drainage, look for conditioners labeled "water-holding" that contain hydrogel crystals or hydrated lime. For nutrient-deficient soils, opt for well-aged compost or worm castings to provide slow-release organic matter. I always check the label for organic certification—synthetic conditioners may deliver quick results but can disrupt your soil's natural microbial balance over time.
💧 Step 3: Apply Conditioner at the Right Depth and Rate
Spread a 2-3 inch layer of your chosen conditioner over the soil surface, working it into the top 6 inches of soil. For vegetable gardens, I mix it into the planting beds before sowing seeds or transplanting. For lawns, use a slotted trowel to distribute it evenly without disturbing the grass roots. Water the area thoroughly after application to help the conditioner integrate with existing soil.
For container gardens, blend 1 part conditioner with 3 parts potting mix before planting. This creates an ideal medium where roots can access both moisture and air simultaneously. Remember, less is often more—overapplying can create anaerobic pockets where roots suffocate. I start with a conservative amount and adjust based on plant response over the first growing season.
☀️ Step 4: Monitor and Maintain Soil Health Long-Term
After application, check soil moisture daily during the first week. Healthy soil should feel like a damp sponge—moist but not soggy. You'll notice plants establish faster and show fewer signs of stress like yellowing leaves or stunted growth. For established gardens, reapply conditioner annually in spring or after harvesting heavy crops that deplete nutrients.
Compost tea can accelerate results when applied as a foliar spray or soil drench. I mix 1 cup compost with 5 gallons of water, let it steep for 24 hours, then strain before using. This introduces beneficial microbes that help break down the conditioner and make nutrients immediately available to plants. The key is consistency—soil health is a marathon, not a sprint.
Tips & tricks for perfect soil conditioning
Here's what nobody tells you about getting the most out of your soil amendments—these insights will transform your garden's foundation.
Soil Test Accuracy: When testing your soil's pH in Step 1, take samples from multiple spots in your garden—especially if you notice uneven plant growth. I've seen gardens where one side thrives while the other struggles because of hidden pH variations. Test at least three locations: sunny areas, shaded spots, and where you plan to plant heavy feeders like tomatoes or squash. The 6.0-7.0 range is ideal for most vegetables, but remember that blueberries and azaleas are exceptions—they crave that 4.5-5.5 acidity.
Conditioner Selection Strategy: In Step 2, don't just grab the first bag you see—read labels carefully for specific benefits. For example, coco coir improves water retention by 30-50%** compared to peat moss, but it breaks down faster. If you're working with heavy clay, mix composted bark with vermiculite (50/50 ratio) to create those critical air pockets. I've found that organic-certified products with hydrogel crystals can hold up to 10 times their weight in water, which is a game-changer for drought-prone gardens.
Application Depth Science: The 2-3 inch layer in Step 3 is your sweet spot—any deeper and you risk suffocating roots, any shallower and you won't see the full benefits. For vegetable beds, use a broadfork to loosen the top 6 inches before applying, creating channels for roots to grow downward. For lawns, work the conditioner into the soil with a slotted trowel at a 45-degree angle to avoid damaging grass roots. The key is thorough watering after application—this helps the conditioner integrate with existing soil and prevents it from forming a crust on top.
Long-Term Maintenance Secret: That annual reapplication in Step 4 is non-negotiable for established gardens, but don't wait until spring to check soil health. After harvesting heavy crops like corn or pumpkins, test your soil immediately—these plants deplete nutrients rapidly. For container gardens, blend a 1:3 ratio of conditioner to potting mix every 6-8 months to maintain that ideal balance. And here's a pro move: keep a soil journal tracking pH, moisture levels, and plant responses—you'll spot patterns that save you time and money in the long run.
Pro Tips for What Is Soil Conditioner
- Here's what nobody tells you about getting the most out of your soil amendments—these insights will transform your garden's foundation.
- Soil Test Accuracy: When testing your soil's pH in Step 1, take samples from multiple spots in your garden—especially if you notice uneven plant growth.
- Conditioner Selection Strategy: In Step 2, don't just grab the first bag you see—read labels carefully for specific benefits.
Frequently asked questions
Got questions about soil conditioners? You’re not alone!
Here are some of the most common queries—plus straightforward answers to help you make the best choices for your garden.
What exactly does a soil conditioner do?
A soil conditioner improves soil structure, drainage, and nutrient retention by adding organic matter like compost, peat moss, or coconut coir. It loosens compacted soil, helps roots grow deeper, and boosts microbial activity—basically, it turns poor soil into a thriving plant paradise!
How long does it take to see results after adding soil conditioner?
Results vary, but you’ll often notice improvements within 4–6 weeks. For best results, mix it into the top 6–12 inches of soil before planting. Over time, it breaks down, enriching the soil for months (or even years!). Patience pays off—think of it as a slow-cooked garden stew!
Are there cheaper alternatives to commercial soil conditioners?
DIY options include compost, leaf mold, well-rotted manure, or even grass clippings (just avoid weeds). Store-bought versions like peat moss or coco coir are convenient but pricier. Start small with homemade blends to save cash!
Can I use soil conditioner in extreme heat or cold?
Timing matters! Apply soil conditioner in spring or fall when temps are mild (50–75°F). Extreme heat can dry it out too fast, while freezing temps may slow decomposition. If you must apply in summer, water it in thoroughly and reapply mulch to retain moisture.
Why isn’t my soil improving after adding conditioner?
Check these fixes:
- Mix it in well—top-dressing won’t cut it!
- Test your soil—pH or nutrient imbalances may need addressing.
- Be patient—some conditioners (like compost) take longer to break down.
- Avoid overwatering—it can leach nutrients away.
Wrapping up and next steps
Soil conditioners are your secret weapon for unlocking healthier, more vibrant plants—whether you're a seasoned gardener or just starting out! 🌱 By improving soil structure, nutrient availability, and moisture retention, these organic boosters make gardening easier and more rewarding.
Whether you choose compost, peat moss, or bio-stimulants, the key is to tailor your approach to your soil’s needs and plants’ demands.
Ready to transform your garden? Start small—test your soil, pick a conditioner, and experiment with a patch of your yard or a few potted plants. Your future harvests will thank you! 🌿