
How To
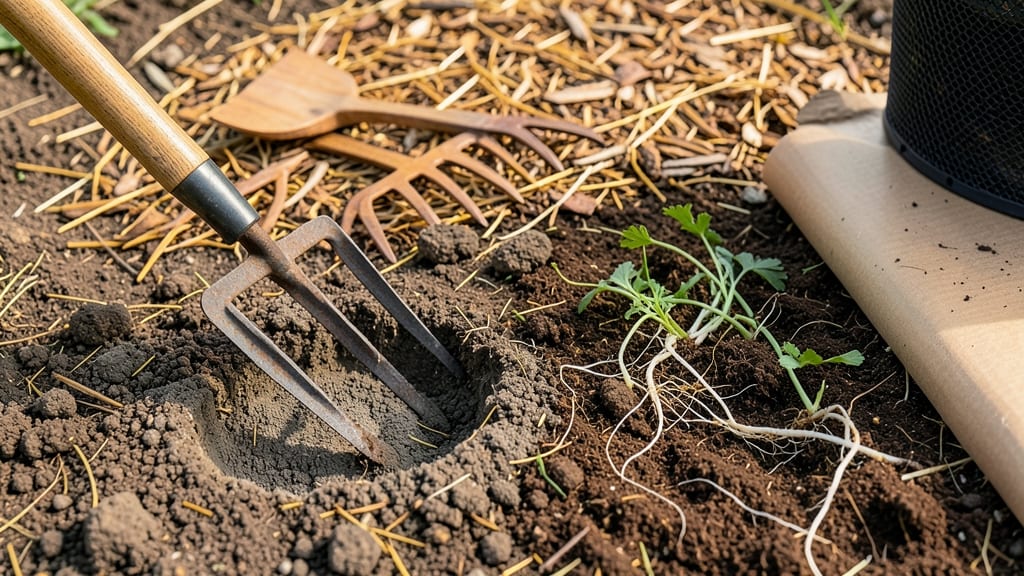
Your garden's struggling because the soil is too hard—roots can't breathe, water pools, and plants fight just to grow. 🌱 Reducing soil compaction doesn't require heavy machinery; it's about working with nature to loosen what's been packed down over time.
The right techniques can turn dense, clay-heavy soil into fluffy, fertile ground where roots thrive within weeks.
Start with organic matter—the fastest fix. Wood chips, compost, or well-rotted manure break up compacted layers naturally as they decompose. For deeper compaction, a simple hand fork or broadfork (not a shovel) can slice through the soil without disturbing roots too much.
I've seen gardens transform from muddy messes to crumbly beds just by adding 2-3 inches of compost and aerating once a year.
What you'll end up with is soil that holds moisture without drowning roots, supports strong plant growth, and stays workable even after heavy rain. The key is consistency: don't just aerate once and expect miracles.
Think of it like exercise for your soil—regular, gentle effort pays off in healthier plants and easier gardening.
Works for lawns, vegetable beds, or flower gardens—just adjust the tools to your space. A manual aerator for small plots, a broadfork for larger areas, or even deep-rooted cover crops like clover to break up soil naturally over time. Let's get those roots breathing again!
📚 In This Guide
- What you need
- Instructions
- Tips and common mistakes
- Wrapping up and next steps
What you need
- ● Core Aerator Machine: Manual or motorized (for small to medium gardens, a manual aerator with 12-16 tines works; for larger areas, a motorized core aerator (rental or purchase) is ideal).
- ● Note: Ensure the machine can penetrate 4-6 inches deep for effective compaction relief.
- ● Topsoil or Compost: 1-2 cubic yards (depending on garden size; aim for 0.5–1 inch depth after aeration).
- ● Type: Well-draining, organic-rich soil or compost (e.g., peat moss, coconut coir, or aged manure).
- ● Rake: Bow rake or leaf rake (for spreading topsoil/compost evenly).
- ● Watering Hose or Sprinkler: With adjustable nozzle for gentle watering post-aeration.
- ● Knee Pads or Gloves: For comfort (especially if aerating manually or spreading soil).
- ● Gypsum (Calcium Sulfate): 10–20 lbs (helps break up clay soils; mix into topsoil before spreading).
- ○ Soil pH Test Kit: To check soil health before/after aeration (optional but highly recommended for long-term success).
- ● Overseeder or Grass Seed: If repairing a lawn (10–15 lbs per 1,000 sq. ft. for thin areas).
- ● Lawn Roller (Lightweight): For smoothing topsoil/compost after spreading (use sparingly to avoid re-compacting!).
Step-by-step instructions for breaking up compacted garden soil
Here’s how I transform hardpan into loose, root-friendly soil—no heavy equipment needed.
🪴 Step 1: Test Your Soil’s Compaction Level
Press your thumb into the soil about 2 inches deep. If it feels rock-hard or resists penetration, you’ve got compaction. Dig a 6-inch-deep hole—if the soil layers look like stacked bricks, that’s your target area for aeration. I like to test in multiple spots because compaction often varies across the garden.
Moisten the soil slightly if it’s bone-dry—working with dry, crumbly soil is easier than fighting stubborn clay. A light misting with a hose is all you need. Avoid waterlogging, though; you want damp, not soggy. This step ensures your tools will glide through the soil instead of bouncing off.
✂️ Step 2: Use the Right Tools for Deep Aeration
For topsoil compaction (0-6 inches deep), I use a broadfork—its tines pry apart soil layers without turning it over. Insert the fork 6-8 inches deep at a slight angle, then rock it gently side to side. Withdraw and repeat in a grid pattern, about 6 inches apart. You’ll hear a satisfying crack as the soil breaks up.
For deeper compaction (6-12 inches), switch to a digging bar or long-handled shovel. Slide it straight down at a 45-degree angle, then twist to loosen the soil. Work in sections, stepping back to see how the soil structure improves. If you hit a layer that feels like concrete, take a break and water it—sometimes stubborn clay just needs moisture to relax.
🌱 Step 3: Add Organic Matter to Improve Soil Structure
Once the soil is broken up, mix in 2-3 inches of compost or aged manure into the top 6 inches. This isn’t just about nutrients—organic matter acts like a scaffold, holding soil particles apart so they don’t compact again. I like to use a garden fork to gently fold the compost into the loosened soil, creating pockets for roots to explore.
For clay-heavy soil, add 1 part sand per 3 parts soil to improve drainage, but avoid overdoing it—too much sand can create its own problems. Water the amended soil lightly to help the organic matter settle into place. You’ll notice the texture soften almost immediately, like transforming a brick wall into a loamy sponge.
💧 Step 4: Protect Your Work with Mulch and Light Foot Traffic
Spread a 2-3 inch layer of organic mulch (straw, wood chips, or shredded leaves) over the aerated area. Mulch keeps soil moist, discourages weeds, and prevents rain from pounding the surface back into compaction. I like to leave a 1-inch gap around plant stems to avoid rot. Replenish mulch every few months as it breaks down.
Walk on the soil as little as possible—every step compacts it again. If you must work in the area, wear flat-soled shoes or step on a board to distribute your weight. Over time, the organic matter will rebuild soil structure naturally, but the first year is critical. You’ll know you’re on the right track when rain soaks in instead of pooling, and plant roots grow deep and strong.
Tips & tricks for healthy soil aeration
These practical insights will help you transform stubborn hardpan into fertile, root-friendly garden beds with minimal effort.
Tool Selection: A broadfork is your best friend for topsoil work because its tines create vertical fractures without inverting the soil layers. For deeper compaction (6-12 inches), I've found that a digging bar with a flat, wide blade works better than a shovel—it slices through dense layers more cleanly. If you're working in rocky soil, consider a soil aerator attachment for your lawnmower for larger areas.
Moisture Matters: The instructions mention dampening dry soil, but here's the thing: clay soil needs extra attention. If your soil feels like concrete after watering, let it sit for 30 minutes before aerating—this gives moisture time to penetrate those dense layers. For sandy soil, you can work it immediately after a light misting. The goal is slightly damp, not soggy, soil that crumbles easily when pressed.
Layered Approach: Don't just focus on the top 6 inches! After breaking up the topsoil with your broadfork, step back and examine the soil profile. You'll often find another compacted layer around 6-12 inches—this is where roots struggle to penetrate. Use your digging bar to target these deeper layers systematically, working in a grid pattern just like the instructions suggest for topsoil.
Organic Matter Strategy: When mixing in that 2-3 inches of compost, think of it like adding scaffolding to a building. For heavy clay soils, I like to create "compost pockets" by digging small holes (about 4 inches deep) every 12 inches, filling them with compost, then backfilling with the loosened soil. This creates channels for roots and water to move through while preventing compaction from settling back.
Pro Tips for Reduce Soil Compaction
- These practical insights will help you transform stubborn hardpan into fertile, root-friendly garden beds with minima...
- Tool Selection: A broadfork is your best friend for topsoil work because its tines create vertical fractures without ...
- Moisture Matters: The instructions mention dampening dry soil, but here's the thing: clay soil needs extra attention....
Frequently asked questions
Got questions about tackling soil compaction? You’re not alone—this is a common challenge for gardeners and farmers alike. Below, we’ve answered the most pressing questions to help you get back to growing with confidence!
What are the first signs that my soil is compacted?
Watch for slow water drainage (puddles linger after rain), weeds thriving while plants struggle, or roots circling instead of growing deep. If your soil feels hard like a brick when dry or squishy when wet, compaction is likely the culprit. Test it: Push a screwdriver in—if it won’t go past 2 inches, your soil needs help!
How often should I aerate my soil to fix compaction?
For most gardens, once a year (spring or early fall) is ideal, but heavily trafficked areas (like lawns or veggie patches) may need bi-annual aeration. If you’re using deep-root techniques, combine aeration with organic matter (like compost) every 6–12 months for long-term relief. Think of it like fluffing a pillow—consistency keeps things comfy!
Can I reduce soil compaction without renting heavy equipment?
Try these DIY-friendly methods:
- Hand tools: Use a broadfork or digging fork to break up layers manually (great for small gardens).
- Animals: Goats or chickens can till and aerate naturally while fertilizing!
- Plants: Deep-rooted crops like comfrey or daisies help loosen soil over time.
What if aerating doesn’t seem to work after a few tries?
If your soil stays stubbornly compacted, check for underlying issues:
- High clay content? Amend with sand or compost to improve structure.
- Too much foot traffic? Limit walking on beds and use mulch or boards.
- Poor drainage? Test your soil’s pH and organic matter—sometimes, the fix isn’t just aeration!
Will aerating disrupt my existing plants or lawn?
Not if done right! For lawns, aerate when grass is actively growing (spring/fall) and water deeply 2 days before to reduce stress. For gardens, aerate between crops or after harvest. Pro tip: Avoid aerating when soil is waterlogged—wait until it’s moist but not soggy to minimize damage to roots.
Still stumped? Drop your specific soil type or garden setup in the comments—we’re happy to help tailor a solution!
Wrapping up and next steps
Reducing soil compaction doesn’t have to be a daunting task—with the right techniques like deep-root aeration, organic matter, and proper watering, you can restore your soil’s health and vitality. 🌱 Remember: consistency is key, and even small steps make a big difference over time.
Start today by testing your soil, then gradually implement these methods to create a thriving garden.
Ready to take action? Pick one technique from this guide and try it this weekend! Your plants—and future harvests—will thank you.