
How To
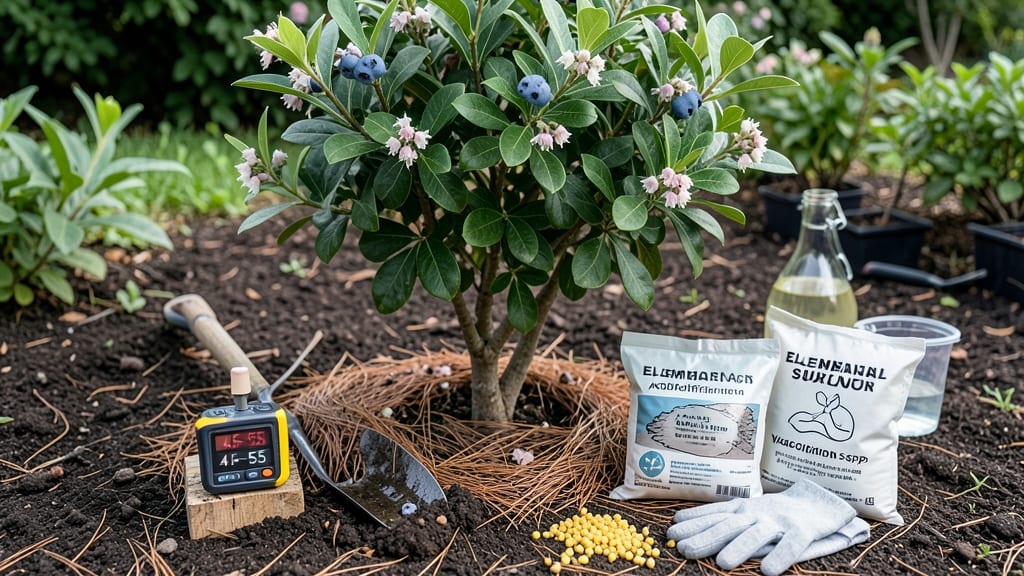
Lowering your soil's pH isn't as tricky as it sounds—especially when you're aiming for that perfect acidic environment azaleas and blueberries crave. 🌿 The sulfur and peat moss method gives you predictable, long-term results without the guesswork of organic amendments alone.
I’ve used this approach to transform my garden’s struggling rhododendrons into thriving, vibrant bushes that bloom like clockwork every spring.
This method works best when you start with a soil test—knowing your current pH prevents over-acidification, which can harm plants just as much as the wrong pH. Sulfur is the star player here: it slowly breaks down in the soil, releasing hydrogen ions that lower pH over time.
Peat moss adds organic matter and helps retain moisture, creating the ideal environment for acid-loving plants to thrive. The combination is simple but powerful, especially in well-draining soils.
By following these steps, you’ll see measurable pH changes within 3-6 months, with azaleas and similar plants responding with darker foliage and more abundant blooms. The key is patience and consistency—overdoing it won’t speed up the process, but it will create an inhospitable environment for your plants.
Think of it as a slow, steady transformation rather than an overnight fix.
This approach works for garden beds, raised planters, and even container gardens, making it versatile for any space. Once you’ve got the pH right, you’ll notice a dramatic difference in plant health and growth—especially for acid-loving varieties.
Let’s get your soil on the right track for a season of lush, vibrant plants.
📚 In This Guide
- What you need
- Instructions
- Tips and common mistakes
- Wrapping up and next steps
What you need
- ● Elemental Sulfur: 1–2 pounds (depending on soil size; pure sulfur is best)
- ● Peat Moss: 2–3 gallons (or sphagnum peat for higher acidity)
- ● Garden Gloves: 1 pair (to protect your hands from sulfur dust)
- ● Garden Rake or Tiller: 1 (for mixing soil thoroughly)
- ● pH Test Kit: 1 (digital or liquid test strips; critical for accuracy)
- ● Watering Can or Hose: 1 (for moistening soil before application)
- ● Measuring Scoop or Bucket: 1 (for precise sulfur/peat moss ratios)
- ● Soil pH Meter: For real-time monitoring (faster than test kits)
- ● Compost or Organic Matter: 1–2 gallons (boosts soil structure and microbial life)
- ● Face Mask: 1 (if sulfur is applied in powder form to avoid inhalation)
- ● Garden Calculator or Spreadsheet: For tracking pH changes over time
- ● Mulch (Pine Straw or Oak Leaves): 2–3 inches (helps maintain acidity long-term)
Step-by-step instructions for lowering soil pH with sulfur and peat moss
Azaleas and blueberries thrive when soil pH drops to 4.5-5.5—here's how to achieve that safely.
🌱 Step 1: Test Current Soil pH and Calculate Adjustments
Before adding anything, test your soil's pH using a home test kit or send a sample to your local extension office. Azaleas need 4.5-5.5 pH, so if your reading is 6.0 or higher, you'll need adjustments. For every 1.0 pH point you need to drop, calculate 2-3 pounds of elemental sulfur per 100 square feet—this is the gold standard for acidification.
I like to test in multiple spots since pH varies across the garden. If your soil is already below 5.5, skip sulfur and focus on peat moss to maintain acidity. The goal isn't to over-acidify—below 4.0 damages roots and prevents nutrient uptake.
💧 Step 2: Apply Elemental Sulfur and Mix Thoroughly
Spread the calculated amount of elemental sulfur evenly over the soil surface using a spreaders. For a 4-foot-wide azalea bed, that's roughly 1 pound per 4 feet of length. Water the area lightly to help sulfur particles move into the root zone—this isn't instant, so don't rush.
Use a garden fork or tiller to work sulfur into the top 6 inches of soil. This ensures contact with moisture, which activates the acidification process. If your soil is dry, water again after mixing. Sulfur works best in moist conditions, so plan this step after rain or during your regular watering schedule.
🌿 Step 3: Incorporate Peat Moss for Long-Term Acidity
Spread a 2-inch layer of sphagnum peat moss over the amended soil. Peat moss holds moisture while slowly releasing organic acids that maintain pH. For a 4-plant azalea bed, you'll need about 2 cubic feet—enough to cover the area evenly. Avoid piling it thickly, or it can compact and reduce aeration.
Lightly rake the peat moss into the top inch of soil. This isn't about burying it—just integrating it so it blends with the existing mix. Peat moss breaks down over time, so reapply every 2-3 years to sustain acidity. Pair this with a slow-release acid-loving plant fertilizer (like one formulated for azaleas) to replenish nutrients as pH stabilizes.
☀️ Step 4: Monitor pH and Water Regularly for 3-6 Months
Retest soil pH 3 months after treatment—this gives sulfur time to convert to sulfuric acid in the soil. If pH hasn't dropped enough, repeat the sulfur application at half the original rate. Over-acidification is harder to correct, so err on the side of caution. Keep the soil consistently moist during this period—dry conditions slow sulfur activation.
Azaleas show stress if pH swings too much, so watch for yellowing leaves (often a sign of incorrect pH or nutrient imbalance). If new growth looks weak, flush the soil with rainwater (avoid tap water, which can raise pH). Once pH stabilizes in the 4.5-5.5 range, your azaleas will reward you with vibrant blooms and lush foliage.
⏰ Step 5: Maintain Acidic Conditions Year-Round
Add a 1-inch layer of pine needles or oak leaves as mulch annually—they slowly acidify the soil as they decompose. Pine bark fines work too, but avoid cedar chips, which can make soil too acidic over time. Reapply peat moss every 2-3 years and retest pH in early spring before new growth begins.
Here's the thing—once you've established the right pH, maintenance is easier than correction. I check my azalea beds every spring and fall, adjusting only if pH creeps above 5.5. With consistent care, your soil will stay in the perfect range for decades, giving your acid-loving plants the ideal environment to thrive.
Tips & tricks for perfect acidic soil preparation
Here's what nobody tells you about getting your soil pH just right for acid-loving plants.
Precision in pH Testing: Test soil in multiple spots since pH varies across your garden. I've seen readings differ by 0.5 points just a few feet apart—especially in larger beds. Use a home test kit for quick results, but send samples to your local extension office for professional validation if your azaleas aren't thriving despite your efforts. The 4.5-5.5 range is critical, so don't guess.
Sulfur Application Strategy: When applying the 2-3 pounds of elemental sulfur per 100 square feet, focus on the root zone where your azaleas will grow. I like to spread it in a grid pattern for even distribution, then water lightly to help it penetrate. Remember, sulfur works best in moist conditions—this isn't a dry application. For a 4-foot-wide bed, that's roughly 1 pound per 4 feet of length, but always double-check your calculations.
Peat Moss Integration: The 2-inch layer of sphagnum peat moss should be spread evenly and lightly raked into the top inch of soil. Don't bury it completely—just integrate it so it blends naturally. This layer helps maintain moisture and slowly releases organic acids. I've found that pairing this with a slow-release acid-loving plant fertilizer gives plants the nutrients they need while keeping pH stable. Reapply peat moss every 2-3 years to sustain acidity.
Monitoring and Adjustments: After the initial 3 months, retest soil pH before making any adjustments. If pH hasn't dropped enough, apply half the original sulfur amount—never double it. Over-acidification below 4.0 damages roots and prevents nutrient uptake. Watch your azaleas for yellowing leaves, which often signals incorrect pH or nutrient imbalance. If new growth looks weak, flush the soil with rainwater to avoid raising pH with tap water.
Pro Tips for Make Soil Acidic
- Here's what nobody tells you about getting your soil pH just right for acid-loving plants.
- Precision in pH Testing: Test soil in multiple spots since pH varies across your garden. I've seen readings differ by...
- Sulfur Application Strategy: When applying the 2-3 pounds of elemental sulfur per 100 square feet, focus on the root ...
Frequently asked questions
Got questions about making your soil acidic? Here are some of the most common ones—plus straightforward answers to help you garden like a pro!
How long does it take for sulfur or peat moss to lower soil pH?
Sulfur works gradually—expect a 1–2 pH point drop over 2–4 months in ideal conditions (warm, moist soil). Peat moss shows faster results, lowering pH by 0.5–1 point within weeks but requires regular reapplication. Test soil every 3–6 months to monitor progress!
Can I over-acidify my soil? How do I fix it if I do?
Yes! Over-acidifying (pH < 4.5) can harm plants by locking out nutrients. If this happens, amend with garden lime (calcium carbonate) or wood ash—sprinkle lightly, water, and retest soil in 2–4 weeks. Start with ½ pound per 100 sq ft and adjust based on pH readings.
Is peat moss the best option for acid-loving plants?
Peat moss is effective but controversial due to sustainability concerns. Alternatives include pine bark fines, pine needles, or composted leaves, which slowly acidify soil. For a long-term solution, mix elemental sulfur (0.5–1 lb per 100 sq ft) into the top 6 inches of soil.
When’s the best time to adjust soil pH?
Fall is ideal—2–3 months before planting gives sulfur/peat moss time to work. Avoid applying in freezing temps (sulfur is less effective) or during drought (water is needed for activation). For container plants, amend soil before repotting in early spring.
Will acidifying soil harm my lawn or vegetables?
Most vegetables and lawn grasses prefer slightly acidic to neutral soil (pH 6.0–7.0). Acidifying below pH 5.5 can stunt growth or cause nutrient deficiencies (e.g., calcium/magnesium lockout). Stick to acid-loving plants like azaleas, blueberries, or hydrangeas—or use sulfur sparingly for general garden beds.
Pro Tip:
Test first!
Use a soil pH test kit ($10–$20) before amending. Many garden centers sell them, or send a sample to a lab for precise results. Know your starting pH to avoid overdoing it—precision saves time and money!
Wrapping up and next steps
Transforming your soil into the perfect acidic haven for azaleas doesn’t have to be complicated—just follow the steps we’ve shared! By using sulfur and peat moss, you’re giving your plants the ideal growing conditions to thrive. 🌸 With patience and consistency, your garden will flourish in no time.
Ready to see the results? Start by testing your soil’s pH again in a few months to ensure it’s staying where you want it. Happy gardening—your azaleas will thank you! 🌱✨