
Propagation
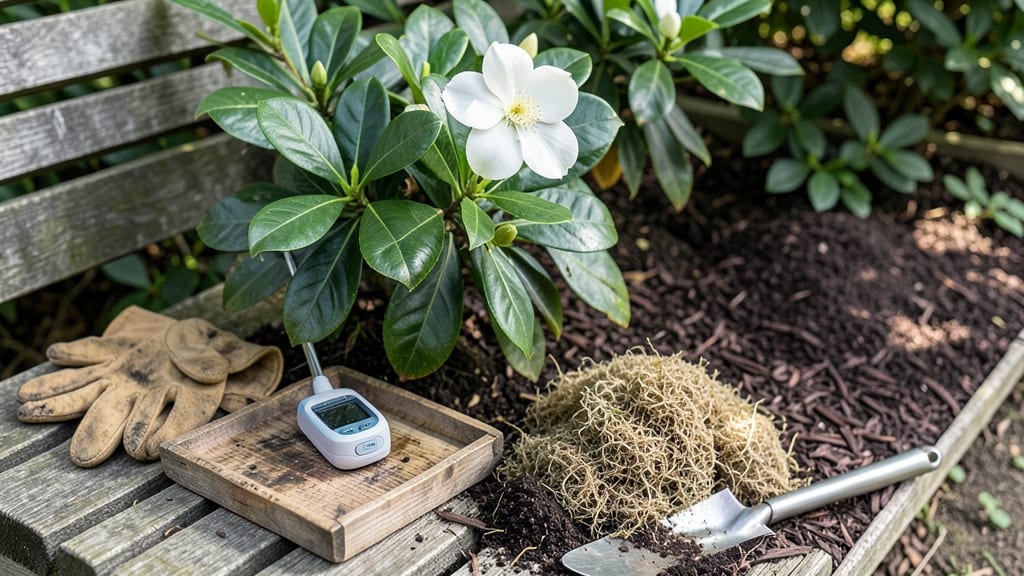
Your gardenia’s fragrant blooms depend on the gardenia soil requirements so acidic it could make a lemon jealous. 🌿 I’ve watched gardenias wilt in alkaline soil—until I learned the secret mix that turns them into the star of summer.
The right soil isn’t just about pH; it’s about drainage, organic matter, and a texture so loose the roots can breathe.
Think of gardenia soil as a three-part cocktail: 60% peat moss or pine bark (for acidity), 30% compost or leaf mold (for nutrients), and 10% perlite or sand (to prevent soggy roots).
The pH should sit between 5.5 and 6.5—any higher, and the plant throws a tantrum by dropping leaves. For containers, pre-mix your soil; for in-ground, amend the native dirt with 2-3 inches of peat moss before planting.
When you nail the soil, you’ll see thicker stems, glossier leaves, and blooms that smell like a tropical vacation. The key is testing your soil first (a simple pH kit works) and adjusting before planting.
Even a slight shift from 7.0 to 6.0 can revive a struggling gardenia. And if your plant looks sad? It’s probably thirsty for more acid.
Pro tip: Mulch with pine needles to keep the soil acidic long-term. For containers, flush the mix with vinegar-water (1:3 ratio) every few months to reset the pH. Whether you’re planting in the ground or a pot, this soil strategy works—just don’t skimp on the peat.
📚 In This Guide
- What you need
- Instructions
- Tips and common mistakes
- Wrapping up and next steps
What you need
- ● Peat moss or coconut coir: 50% of the mix (4 parts for a 5-part blend). Opt for sphagnum peat for best acidity retention.
- ● Perlite or pumice: 20% (1 part). Ensures aeration—never skip this for root health!
- ● Pine bark fines: 20% (1 part). Adds structure and mimics acidic forest floors.
- ● Sand (coarse horticultural): 10% (½ part). Only if your soil is clay-heavy—test drainage first!
- ● Slow-release fertilizer (acid-loving blend): 1 tsp per gallon of mix. Look for 10-10-10 or 8-3-9 ratios.
- ○ Lime substitute (optional but critical): Use sulfur powder (1 tsp/gallon) to maintain pH 5.5–6.5.
- ● Garden trowel or spade – For mixing and transplanting.
- ● pH testing kit – Digital probes are most accurate!
- ● Gloves & dust mask – Perlite/pumice can be gritty.
- ● 5-gallon bucket or wheelbarrow – For blending.
- ● Watering can with rose nozzle – Gentle watering prevents soil compaction.
- ○ Optional: Composted pine needles (5% mix-in) for extra acidity.
How to create the perfect acidic, loose soil mix for gardenias
Here’s the foolproof method I’ve used to coax fragrant blooms from finicky gardenias—no more struggling with poor drainage or pH issues.
🌱 Step 1: Start With a Base of Acidic Potting Mix
Gardenias demand a soil pH between 5.0 and 6.5—any higher, and they refuse to bloom. Begin with 3 parts peat moss or coconut coir (both naturally acidic) and 1 part perlite or pumice for aeration. Mix these thoroughly in a wheelbarrow or large container until the texture is light and fluffy.
This blend mimics their native tropical forest floors, where roots thrive in loose, well-draining soil. Avoid garden soil—it’s too dense and alkaline. If you’re amending existing soil, test its pH first with a meter; gardenias won’t tolerate anything above 6.0.
💧 Step 2: Amend for Drainage and Moisture Retention
Gardenias hate soggy roots but also dry out too quickly. To strike the balance, add 1 part sand (preferably coarse horticultural sand) and 1 part composted pine bark fines to your mix. The sand prevents compaction, while the bark fines hold moisture without suffocating roots.
Work these amendments into the peat-perlite base until the soil resembles a damp sponge—it should crumble easily when squeezed but hold together. For containers, fill 75% of the pot with this mix first, leaving room for the plant’s root ball.
✂️ Step 3: Adjust pH and Fertilize for Blooming
Even with the right base, gardenias often need a pH boost. Sprinkle 1 tablespoon of sulfur per gallon of mix (or use 1 tablespoon of gardenia-specific acidifier) and stir thoroughly. Water the mix until it’s evenly moist, then let it sit for 24 hours—this ensures the pH adjustment takes hold.
Next, fold in 1 tablespoon of slow-release acid-loving plant fertilizer (look for a high-phosphorus, low-nitrogen formula like 7-9-5). This encourages blooming rather than leafy growth. If repotting, add a handful of sphagnum moss around the roots for extra acidity and moisture retention.
☀️ Step 4: Plant and Monitor Soil Conditions
Gently loosen the gardenia’s root ball before placing it in the prepared pot or bed. Backfill with your custom mix, pressing lightly to eliminate air pockets—never pack it down. Water deeply until water runs out the drainage holes, then let the top 1 inch of soil dry before watering again.
Here’s the thing—gardenias wilt dramatically when thirsty but bounce back fast. If leaves yellow, it’s often iron deficiency from alkaline soil, not overwatering. A foliar spray of chelated iron (applied every 2 weeks) can revive them quickly. Keep the soil consistently moist but never soggy—this is their #1 care requirement.
⏰ Step 5: Maintain Soil Health Year-Round
Every 3-4 months, top-dress with ½ inch of fresh composted pine bark and a sprinkle of sulfur to maintain acidity. In spring, mix in 1 tablespoon of acid fertilizer to fuel blooming. Mulch with 2 inches of pine needles or wood chips to preserve moisture and suppress weeds—just keep it 2 inches away from the stem to prevent rot.
Watch for white, powdery growth on leaves—this is powdery mildew, a sign the air isn’t circulating well. Prune crowded branches immediately and increase airflow. Gardenias reward precise care with heavy, intoxicating blooms—but only if you keep their soil conditions spot-on.
Tips & tricks for perfect acidic soil mix for gardenias
Here's what I've learned the hard way about keeping your gardenias thriving—and blooming—with the right soil foundation.
The pH Factor: That 24-hour wait after adding sulfur or acidifier isn't just arbitrary—it's when the pH adjustment actually takes effect. I've seen gardeners skip this step and wonder why their plants still refuse to bloom. Test your mix after 24 hours using a pH meter to confirm it's between 5.0 and 6.5. If it's still too high, you may need to add a bit more sulfur and wait another 24 hours. Remember, gardenias are finicky about this range!
Texture Test: When mixing your soil components, squeeze a handful—it should feel like a damp sponge that holds its shape but crumbles easily when pressed. If it's too dense, add more perlite or pumice. If it falls apart completely, incorporate more peat moss or coconut coir. This texture mimics their native forest floor environment where roots can breathe but still retain moisture. The right texture is the difference between struggling plants and those covered in fragrant blooms.
Layering Technique: For container gardenias, I recommend building your soil mix in layers. Start with a 1-inch layer of coarse perlite at the bottom for drainage, then add your custom mix. This prevents waterlogging while maintaining that perfect moisture balance. When repotting, always use a container with drainage holes—gardenias will sulk dramatically if their roots sit in soggy conditions.
Maintenance Shortcut: Instead of remembering to top-dress every 3-4 months, set a calendar reminder for every spring and fall. These are the two critical times when your gardenias need that acidity boost and nutrient refresh. I keep a small bag of sulfur and composted pine bark in my gardening shed labeled "Gardenia Mix" so I never forget. A little preventive maintenance goes a long way with these divas!
Pro Tips for Gardenia Soil Requirements
- Here's what I've learned the hard way about keeping your gardenias thriving—and blooming—with the right soil foundation.
- The pH Factor: That 24-hour wait after adding sulfur or acidifier isn't just arbitrary—it's when the pH adjustment ac...
- Texture Test: When mixing your soil components, squeeze a handful—it should feel like a damp sponge that holds its sh...
Frequently asked questions
Got questions about keeping your gardenia happy in the dirt? Here are some of the most common concerns—plus quick fixes to keep those fragrant blooms thriving!
What pH level does gardenia soil need?
Gardenias love acidic soil with a pH between 5.0 and 6.5. Test your soil with a kit—if it’s too alkaline (above 7.0), amend it with sulfur or peat moss. Yellow leaves? That’s often a sign your soil’s too alkaline!
How often should I water gardenias in acidic soil?
Keep the soil consistently moist but never soggy. Water deeply 2–3 times per week (more in heatwaves) and ensure pots have drainage holes. Wilting or brown edges? You’re either over- or under-watering. Aim for dampness like a wrung-out sponge!
Can I grow gardenias in regular garden soil?
Regular soil is usually too alkaline and compact for gardenias. Mix in 50% peat moss, pine bark fines, or coconut coir with 50% garden soil to mimic their native acidic, airy environment. For containers, use a pre-mixed acidic potting blend.
Why are my gardenia leaves yellowing despite acidic soil?
Yellow leaves can mean overwatering, nutrient deficiency (like iron), or root rot. Check for:
- Mushy stems (root rot—reduce watering!)
- Crispy edges (underwatering or fluoride buildup from tap water)
- Pale new growth (iron deficiency—try chelated iron fertilizer).
What’s a quick fix for soil that’s too alkaline?
Sprinkle elemental sulfur (1 tsp per gallon of soil) or mix in pine needles/finely shredded bark to lower pH gradually. For fast results, add cotton compost or sphagnum peat moss. Re-test soil in 4–6 weeks—patience is key!
Wrapping up and next steps
Gardenias thrive when their soil needs are met—think acidic, well-draining, and rich in organic matter. With the right mix (like peat moss, perlite, and compost), you’ll unlock those fragrant blooms you adore! 🌸 Don’t let soil stress hold you back—your gardenia’s beauty is just a handful of amendments away.
Ready to transform your plant’s health? Start by testing your soil’s pH and tweaking the mix. Grab your supplies and give your gardenia the perfect home—your efforts will bloom into stunning results!