
Flowers
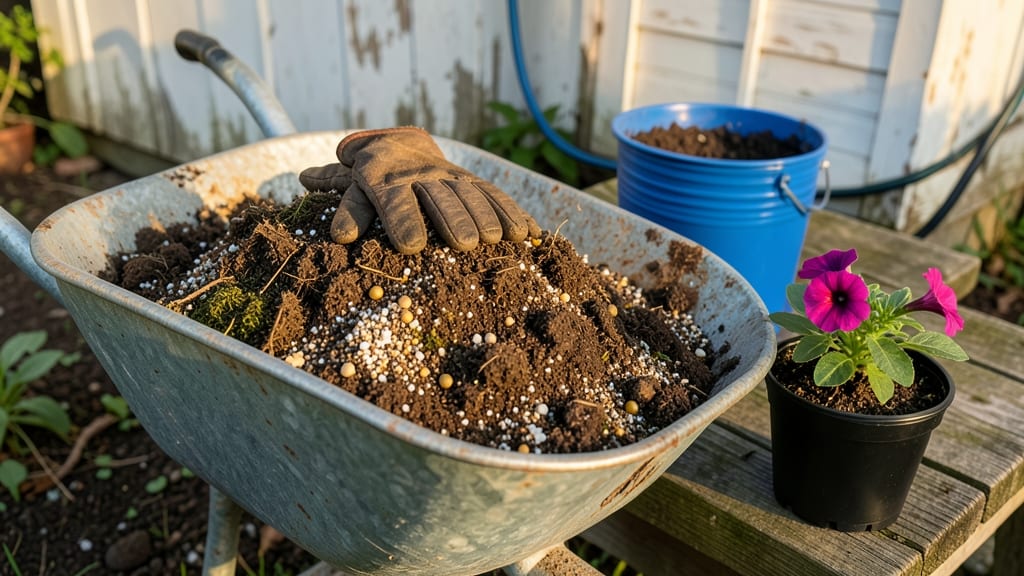
The right flower soil mix transforms wimpy stems into vibrant, long-lasting blooms—and I’ve finally cracked the code after years of wilting petunias and sad snapdragons. 🌸 The secret isn’t buying the most expensive bag; it’s creating a light, airy loam that mimics the forest floor where flowers thrive naturally.
Too many gardeners drown their plants in dense, clay-heavy soil, but flowers need room to breathe, especially their delicate roots.
Start with 50% peat moss or coconut coir for moisture retention, then add 30% perlite or coarse sand to prevent compaction, and finish with 20% compost or aged manure for nutrients. This mix drains fast enough to avoid root rot but holds enough water to keep blooms hydrated for days.
For heavy clay soil, simply fork in a 2-inch layer of this blend before planting—your perennials will thank you by next spring.
What you’ll end up with is a garden where every bloom stays perky, stems stay strong, and flowers last weeks longer than in store-bought soil. The difference is immediate: petunias won’t flop, geraniums won’t get leggy, and bulbs will push through soil like they’re racing to the surface.
Even my black thumb can’t kill these plants when they’ve got the right foundation.
This same mix works for containers, raised beds, or in-ground plantings, though bulbs benefit from adding a little extra sand for even better drainage. The best part? You can make it in 30 minutes with supplies you already have—or buy pre-mixed aerated loam if you’re in a hurry.
Let’s get those roots happy and those blooms popping!
📚 In This Guide
- What you need
- Instructions
- Tips and common mistakes
- Wrapping up and next steps
What you need
- ● Garden loam: 50% of the mix (2 parts per 1 part of other components). Use high-quality, well-draining loam soil with a slightly acidic to neutral pH (6.0–7.0). Pro tip: Avoid heavy clay soil—it compacts easily!
- ● Perlite or vermiculite: 20% of the mix (1 part). Perlite adds aeration, while vermiculite retains moisture. 💡 Perlite is best for cacti/succulents; vermiculite works for moisture-loving flowers like hydrangeas.
- ● Compost or aged manure: 20% of the mix (1 part). Boosts nutrients without overwhelming roots. ✨ Worm castings are a premium (but pricier) alternative!
- ● Coarse sand or horticultural grit: 10% of the mix (½ part). Improves drainage—opt for builder’s sand (not fine beach sand).
- ● Garden trowel or shovel – For mixing and transferring soil.
- ● Wheelbarrow or large bucket – To blend components evenly (aim for a 5-gallon capacity minimum).
- ● Garden gloves – Protect your hands from grit and compost.
- ○ pH testing kit (optional but helpful) – Ensures your mix is ideal for your flowers (e.g., azaleas need acidic soil).
- ○ Mulch (optional) – Top with pine bark or straw to retain moisture and suppress weeds.
How to create a custom flower soil mix for lush, long-lasting blooms
Here’s the aerated loam blend I swear by—it’s the secret to vibrant flowers that thrive in containers or garden beds.
🌱 Step 1: Combine Base Materials for Drainage and Aeration
Start with 50% high-quality potting soil—this is your foundation. I use a peat-based mix because it holds moisture without suffocating roots. Add 30% perlite to create air pockets; this prevents compaction and lets roots breathe. Sift the perlite first to remove any large chunks that could disrupt the mix’s consistency.
Next, incorporate 20% coarse sand—not fine beach sand, but horticultural-grade sand with grit. This improves drainage while retaining enough moisture for blooms. Mix everything by hand or with a garden trowel, breaking up any clumps in the potting soil. The goal is a uniform texture that feels light yet crumbly, like a damp sponge.
🌿 Step 2: Boost Nutrients With Organic Amendments
Add 1 cup of compost per 5 gallons of mix to introduce beneficial microbes and slow-release nutrients. I like worm castings for their gentle, balanced fertility—flowers respond beautifully to this without burning. Stir thoroughly to distribute the compost evenly, then let the blend sit for 10 minutes to allow the organic matter to integrate.
For extra vigor, sprinkle in 1 tablespoon of balanced organic fertilizer (10-10-10) per 5 gallons. This ensures your mix has immediate nutrients for root establishment. Avoid synthetic fertilizers here—they can disrupt the soil’s natural balance and may cause salt buildup over time.
💧 Step 3: Hydrate and Condition the Mix
Gradually add water while mixing until the blend reaches moist but not soggy consistency. It should hold together when squeezed but not drip. Overwatering now will compact the mix, so add water in small increments, stirring as you go. You’ll know it’s right when the soil forms a loose clump that crumbles easily at the touch.
Let the mix rest for 24 hours before use. This allows any excess moisture to evaporate and lets the components settle. If the mix feels too dense after resting, fluff it again with a fork to restore aeration. This step is critical—skipping it can lead to poor drainage and root rot later.
☀️ Step 4: Test and Adjust for Your Plants’ Needs
Fill a small container with your mix and plant a test flower, like a marigold or petunia. Observe how it performs over 2 weeks: if the soil dries out too quickly, add 10% more peat moss to the blend. If it stays too wet, increase the perlite to 40% for better drainage. Adjustments this early save headaches down the line.
For heavy bloomers like roses or hydrangeas, add 1 part coconut coir to the mix—it retains moisture while improving structure. Lighten the mix for succulents or cacti by boosting perlite to 50% and reducing sand. The key is tailoring the blend to your specific flowers’ preferences.
✂️ Step 5: Store and Use for Long-Lasting Blooms
Keep your custom mix in a sealed container or heavy-duty plastic bag to retain moisture and prevent contamination. Label it with the date and amendments used—this helps track performance over time. Store in a cool, dry place, like a garage or shed, away from direct sunlight.
Use the mix within 3 months for best results. Over time, organic matter breaks down, so refresh the blend by adding 5% compost before reuse. This ensures your flowers continue to thrive with vibrant, long-lasting blooms season after season.
Tips & tricks for perfect flower soil mix
Took me years of trial-and-error to perfect this blend—here are the secrets that make all the difference.
Texture is Everything: After mixing your 50% potting soil, 30% perlite, and 20% coarse sand in Step 1, run your fingers through the blend. It should feel like crumbled cake—not dense like clay or dusty like flour. If it sticks together too much, add a little more perlite. If it crumbles too easily, work in a spoonful of coarse sand. This texture ensures roots get both air and moisture without drowning.
Compost Quality Matters: In Step 2, don't skimp on the 1 cup of compost per 5 gallons—this is where the magic happens. I've ruined batches using store-bought compost with additives. Instead, use well-aged homemade compost or worm castings. Look for dark, crumbly material with no visible chunks or foul odors. The 10-minute rest period lets these beneficial microbes activate before you use the mix.
Testing is Non-Negotiable: The 2-week test in Step 4 isn't just optional—it's your quality control. Plant a fast-growing indicator like marigolds or petunias. If leaves yellow within days, you've got drainage issues (add more perlite). If they wilt quickly, your mix holds too much water (reduce peat moss). This simple test prevents costly mistakes with expensive plants later.
Storage Wisdom: When storing your mix for up to 3 months, don't just toss it in a random container. Use heavy-duty plastic bags with zip locks and squeeze out all the air before sealing. Label with the date and contents—trust me, you'll forget what's in that bag six months later. Store in a cool, dark place like a basement or garage, not your shed where temps fluctuate wildly. The 5% compost refresh before reuse keeps your mix performing at peak levels.
Pro Tips for Flower Soil Mix
- Took me years of trial-and-error to perfect this blend—here are the secrets that make all the difference.
- Texture is Everything: After mixing your 50% potting soil, 30% perlite, and 20% coarse sand in Step 1, run your fingers through the blend.
- Compost Quality Matters: In Step 2, don't skimp on the 1 cup of compost per 5 gallons—this is where the magic happens.
Frequently asked questions
Got questions about crafting the perfect flower soil mix?
You’re not alone! Here are answers to the most common queries to help you grow lush, thriving blooms with confidence.
What’s the best ratio for a flower soil mix at home?
A balanced mix typically uses 60% aerated loam or garden soil, 20% compost or aged manure, and 20% perlite or coarse sand for drainage. Adjust ratios based on your plants—succulents need more sand, while heavy feeders (like roses) thrive with extra compost. Always customize for your climate!
How long before I can plant flowers in my homemade mix?
Let your mix settle for 1–2 weeks before planting to allow beneficial microbes to activate. If using fresh compost, wait 3–4 weeks to avoid ammonia burns. For urgent plantings, cover the mix with mulch to speed up decomposition and stabilize moisture.
Can I reuse old flower soil mix?
Reusing mix is possible, but sterilize it first by baking at 200°F (93°C) for 30 minutes or treating with a 1:10 hydrogen peroxide solution. Remove debris, add fresh compost (10–20%), and adjust texture with perlite if compacted. Avoid reuse if pests or diseases were present.
What’s a quick fix if my mix is too dense or clay-heavy?
Amend dense soil by mixing in 2–3 inches of coarse sand or perlite per gallon of mix. For clay, add peat moss or coconut coir (20–30%) to improve aeration. Work amendments into the top 6–8 inches of soil and water thoroughly to help them integrate.
Why are my flowers wilting even with a "perfect" soil mix?
Wilting can stem from overwatering, poor drainage, or nutrient burnout. Check for soggy roots (adjust drainage) or yellowing leaves (flush with water to leach excess salts). Ensure pots have drainage holes, and fertilize lightly every 4–6 weeks. If roots are mushy, repot in fresh mix immediately!
Wrapping up and next steps
Creating the perfect flower soil mix with aerated loam is your secret weapon for thriving blooms and healthy roots! 🌸 By balancing organic matter, drainage, and nutrients, you’re setting your garden up for success—whether you’re a seasoned gardener or just starting.
Remember, the right mix makes all the difference in keeping your flowers vibrant and resilient.
Ready to transform your garden? Grab your supplies, follow the steps, and watch your flowers flourish like never before. Happy gardening! 🌱