
How To
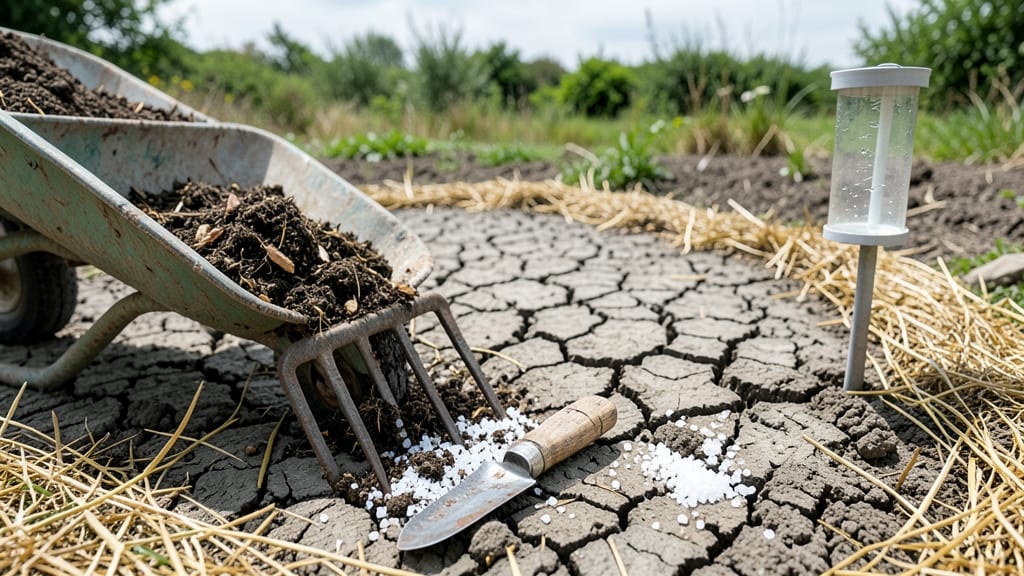
Your lawn might look fine, but if plants struggle to grow or water pools instead of soaking in, compacted soil treatment is your first step to healthier roots. 🌱 I've seen this happen after years of foot traffic, heavy rain, or even just walking the dog—what looks like normal soil is actually a brick-like barrier stopping roots from breathing.
The good news? You don’t need heavy machinery. A simple broadfork or even a sturdy shovel can break up the compacted layers, letting air and water reach plant roots again.
The key is working when soil is moist but not soggy—spring or fall are perfect times to tackle this before planting season. Once you aerate, mix in 2-3 inches of compost to keep the soil loose and fertile.
Your plants will reward you with stronger growth, better water absorption, and fewer struggles—no more wilting despite regular watering. The difference shows up within weeks. This method works for lawns, garden beds, and even container soil that’s been packed down over time.
Start small, and soon your whole yard will feel lighter and more alive.
📚 In This Guide
- What you need
- Instructions
- Tips and common mistakes
- Wrapping up and next steps
What you need
- ● Core Aerator or Spike Aerator: Manual or powered (for larger areas)
- ● Spike aerators: 12–18 inches long, with ½-inch diameter spikes
- ● Core aerators: 2–3 inches diameter tines, 4–6 inches deep
- ● Soil Loosener/Subsoiler: Heavy-duty tiller or subsoiler attachment (for deep compaction, 6–12 inches deep)
- ● Gypsum or Soil Conditioner: 20–50 lbs per 1,000 sq. ft. (check soil test for exact needs)
- ● Organic Matter: Compost (2–4 inches spread evenly)
- ○ Peat moss or coconut coir (optional, for sandy soils)
- ● Water: Hose with sprinkler attachment (for post-treatment hydration)
- ○ Soil Test Kit: Optional but recommended (to identify pH/nutrient deficiencies)
- ● Weather Check: Perform aeration on a dry but workable day (avoid mud or hardpan)
- ● Mower Height: Set lawnmower blades to 1–2 inches high 24 hours prior
- ● Clear Obstacles: Remove rocks, debris, or toys from the treatment area
- ● Personal Protective Equipment (PPE):strong> Gloves (gardening or work-grade)
- ● Knee pads (for manual aeration)
- ● Dust mask (if working with gypsum or heavy soil)
Step-by-step soil aeration for reviving compacted garden beds
Here's how I break down the process—no heavy machinery needed, just elbow grease and the right tools.
🪴 Step 1: Test Soil Compaction Before You Begin
Press your thumb into the soil about 2 inches deep. If it feels like packing clay or leaves a clean imprint, you've got compaction. I also do a simple "pencil test"—stick a wooden dowel in and pull it out. If soil clumps cling to it like glue, aeration is your next move.
Walk your garden beds before starting. Focus on areas where plants struggle—wilting, yellowing leaves, or stunted growth often signal compacted roots below. Mark these spots with flags so you know exactly where to concentrate your efforts.
✂️ Step 2: Choose Your Aeration Method
For small gardens, I grab a hand fork—the kind with short, sturdy tines. Push it in vertically at a 45-degree angle, then twist slightly to break up the soil. Work in a grid pattern, spacing holes about 6 inches apart. This creates channels for roots to grow downward instead of spreading horizontally.
If you're dealing with larger areas, rent a manual aerator with spiked wheels. Roll it over the bed while stepping firmly on the handles. You'll hear the satisfying crunch of compacted layers giving way—this is your signal to keep going until the entire area feels loose.
💧 Step 3: Loosen and Amend the Soil
After aerating, rake the surface to remove any large clumps. Now's the time to mix in 2-3 inches of compost or aged manure into the top 6 inches of soil. This isn't just about adding organic matter—it's about creating air pockets that roots can use. I like to work the compost in with my hands or a broadfork to avoid compacting it again.
For really tough clay soil, add 1 inch of coarse sand or perlite to improve drainage. Water the area deeply after amending—this helps settle the new material and washes away any fine particles that might clog the aerated channels.
☀️ Step 4: Plant and Monitor for Improvement
Replant or sow seeds immediately after aerating while the soil is loose. You'll notice roots grow deeper and faster in aerated soil—within 2-3 weeks, new shoots will emerge stronger than before. Keep an eye on moisture levels; aerated soil drains faster, so you may need to water 20-30% more frequently at first.
If you see any areas where compaction returns (like tire tracks or footpaths), repeat the aeration process there. Regular maintenance—like mulching with 2-3 inches of straw or wood chips—will keep soil fluffy long-term. I do a quick aeration check every spring before planting season to catch any new compaction early.
Tips & tricks for perfect soil aeration
Here's what I've learned after years of fixing compacted garden beds—these tricks will help you get it right the first time.
Tool Selection: I can't stress enough how important the right tool is. For hand forks, look for ones with short, sturdy tines that are at least 6-8 inches long. The tines should be 1/4-inch thick—thinner ones bend when you hit rocks or roots. If you're using a manual aerator, make sure the spikes are 3-4 inches long to penetrate deeply enough to break up compacted layers.
The Right Angle Matters: When using a hand fork, push it in at a 45-degree angle rather than straight down. This creates diagonal channels that encourage roots to grow deeper. I learned this the hard way—trying to push straight down just pushes the soil aside without breaking it up. The twist motion is key too: after pushing in, twist the fork slightly to create a wider channel.
Post-Aeration Care: After aerating, resist the urge to walk on the bed immediately—the soil is fragile. I always wait 24 hours before planting or walking on it to let the channels settle. This also gives you time to properly amend the soil before planting. Watering lightly after aeration helps settle the soil without compacting it again.
Seasonal Timing: The best time to aerate is in early spring or early fall when the soil is moist but not waterlogged. Avoid aerating during extreme heat or drought—those conditions can stress newly exposed roots. I've found that aerating in spring gives plants the whole growing season to benefit from the improved soil structure.
Pro Tips for Compacted Soil Treatment
- Here's what I've learned after years of fixing compacted garden beds—these tricks will help you get it right the firs...
- Tool Selection: I can't stress enough how important the right tool is. For hand forks, look for ones with short, stur...
- The Right Angle Matters: When using a hand fork, push it in at a 45-degree angle rather than straight down. This crea...
Frequently asked questions
What’s the best time of year to treat compacted soil?
The ideal time is early spring or fall when soil is moist but not waterlogged. Avoid treating during freezing temperatures or droughts—roots need energy to recover, and extreme conditions can stress plants further. For lawns, aim for 4-6 weeks before peak growing season for best results.
Can I use a garden fork or shovel instead of a soil aerator?
Yes! Manual tools like spading forks or broadforks work well for small areas (under 500 sq. ft.). Poke holes 6-12 inches deep, spacing them 6-8 inches apart. For larger lawns, rent an aerator—it’s faster and ensures even compaction relief. Pro tip: Add compost or organic matter into the holes afterward!
My lawn looks worse after aeration—what went wrong?
Don’t panic! This is normal if the soil was severely compacted. The roots are adjusting to the sudden relief. Water lightly daily for 7-10 days and avoid heavy foot traffic. If you see fungus or pests, apply a pre-emergent herbicide or fungicide. Over time, roots will strengthen—patience is key!
How often should I aerate compacted soil?
For heavily compacted soil, aerate once a year for the first 2 years, then every 1-2 years as maintenance. If your soil stays hard (test by pushing a screwdriver in—if it won’t go past 1 inch, it’s compacted), consider topdressing with compost between treatments to improve structure long-term.
Are there chemical treatments for compacted soil?
Chemicals like gypsum or lime can temporarily loosen soil by reducing clay binding, but they’re not a fix-all. For lasting results, combine aeration with organic matter (compost, peat moss). Chemicals may help in high-clay soils, but always test your soil first to avoid overcorrecting pH or nutrient imbalances.
Wrapping up and next steps
Compacted soil can feel like a challenge, but with the right aeration techniques, you can breathe new life into your roots and lawn! 🌱 Whether you’re using core aeration, manual tools, or organic amendments, the key is consistency and patience.
Your efforts will pay off with healthier plants and a thriving garden.
Ready to take action? Start small—test a patch of soil first, then expand based on what works. Your green space deserves revival! 🌿