
Neem Oil
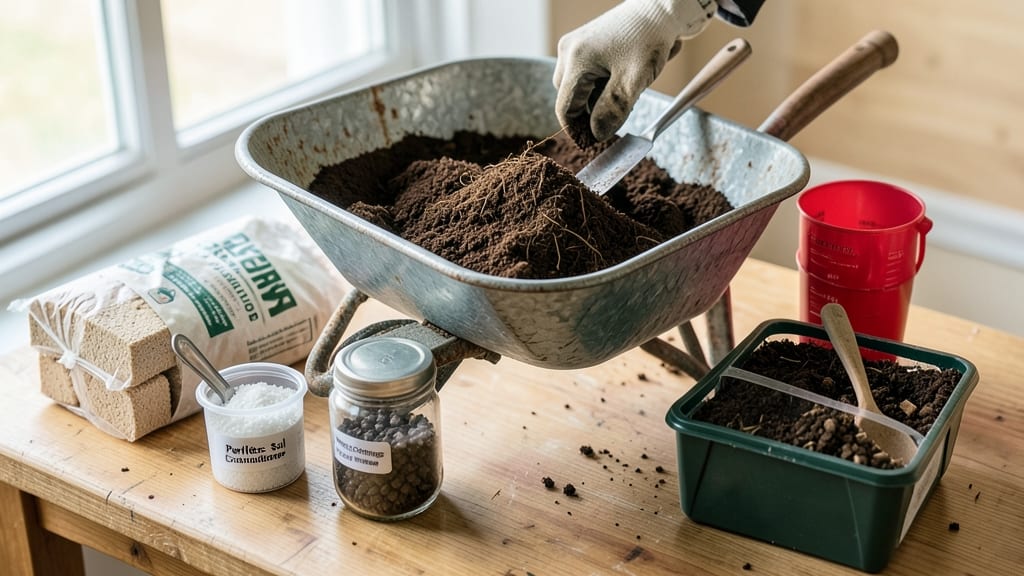
A moisture-retentive coco coir soil mix transforms container gardens into thriving ecosystems. 🌱 I perfected this blend after struggling with dry potting soil that left my herbs wilted by noon—until I discovered coco coir's ability to hold water while preventing root rot.
The secret lies in balancing coco coir's moisture capacity with perlite for aeration, creating a medium that keeps roots happy without drowning them. This recipe works for everything from delicate seedlings to heavy feeders like tomatoes.
A 50% coco coir base (hydrated) combines with 25% perlite for drainage and 25% compost for nutrients. For extra fertility, fold in a handful of worm castings or slow-release fertilizer. The result?
Soil that stays damp for days while encouraging strong root growth—no more guessing whether your plants are thirsty or overwatered. You'll notice the difference immediately: seedlings germinate faster, container plants bloom longer, and even finicky tropicals thrive.
The mix stays moist but never soggy, reducing the risk of fungal issues while giving plants the hydration they crave. For succulents or cacti, cut the coco coir to 30% and add 40% coarse sand instead.
Perfect for beginners and seasoned gardeners alike—this blend adapts to nearly any plant type. Let's get your containers growing like never before.
📚 In This Guide
- What you need
- Instructions
- Tips and common mistakes
- Wrapping up and next steps
What you need
- ● Coco coir (bricks or chips): 1 part (e.g., 2 lbs for a 5-gallon mix). Look for 100% coco coir (no peat or additives) for the best water retention.
- ● Potting soil (lightweight blend): 2 parts (e.g., 4 lbs). Choose a well-draining mix labeled for containers.
- ● Perlite or pumice: 1 part (e.g., 1 lb). 1/8-inch granules work best for aeration.
- ● Worm castings or compost: 1/4 part (e.g., 0.5 lbs). Boosts nutrients and microbial activity.
- ○ Slow-release fertilizer (optional but recommended): 1 tbsp per 5 gallons. Pick a balanced 10-10-10 or organic option.
- ● Large mixing container: A 5-gallon bucket or wheelbarrow (clean and sanitized).
- ● Garden gloves & mask: Protect your hands and lungs from dust (especially when hydrating coco coir).
- ● Water source: A hose or bucket to rehydrate coco coir bricks (if using).
- ● Measuring tools: A scale or volume measurements (cups/spoons) for precision.
- ○ pH testing kit (optional): Adjust to 6.0–7.0 if needed (lime or sulfur).
- ● Pre-hydrate coco coir: Soak bricks in water for 15–20 minutes before mixing to avoid clumping.
- ● Sterilize tools: Rinse containers with 10% bleach solution or vinegar to prevent mold.
- ● Adjust ratios: For heavy feeders (tomatoes, peppers), add 10% more worm castings.
Step-by-Step instructions for crafting a moisture-retentive coco coir mix
This blend keeps roots hydrated while preventing soggy soil—perfect for thirsty container plants.
🌱 Step 1: Measure and Hydrate the Coco Coir Base
Start with 4 quarts of dry coco coir—the base of your moisture-retentive mix. I always pre-soak it in warm water for 20-30 minutes until it expands to double its original volume. This hydration step is critical: dry coco coir absorbs water like a sponge, but proper soaking prevents clumping later. Drain excess water through a colander, squeezing gently to remove moisture without compacting the fibers.
Here's the thing—don't skip this soaking. Coco coir expands dramatically when hydrated, and skipping it leads to uneven moisture distribution. You'll see it transform from stiff, compressed bricks into fluffy, airy fibers ready for mixing. If it still feels dry after squeezing, add a splash more water and repeat.
🌿 Step 2: Incorporate Perlite and Vermiculite for Structure
Add 1 quart of perlite and 1 quart of vermiculite to the hydrated coco coir. These amendments create air pockets while maintaining moisture retention—perfect for container gardens where roots need both oxygen and hydration. Use your hands to distribute them evenly through the coco coir, breaking up any remaining clumps. You'll notice the mix lightens in texture, becoming less dense and more crumbly.
Don't overmix at this stage. Just distribute until you see a uniform grayish-brown color throughout. The perlite will look like tiny white pebbles, while the vermiculite appears as flaky, light brown flakes. This blend prevents compaction, which is why coco coir alone often fails in containers—it gets too dense and suffocates roots.
💧 Step 3: Add Organic Matter for Nutrient Retention
Stir in 2 cups of worm castings and 1 cup of compost to boost microbial activity and nutrient availability. These ingredients improve the mix's ability to hold moisture while feeding beneficial soil organisms. Work them in thoroughly, ensuring even distribution—you should see dark, crumbly bits dispersed throughout the lighter coco coir base.
This is where the magic happens for moisture retention. Worm castings act like tiny water reservoirs, slowly releasing moisture to roots over time. If your mix feels too gritty after adding these, sprinkle in 1 tablespoon of coconut coir dust (the fine particles left after expanding coco coir) to bind everything together without compacting.
☀️ Step 4: Adjust pH and Test Moisture Dynamics
For most container plants, your mix is now ready—but if growing acid-loving plants like blueberries, add 1 teaspoon of sulfur to lower pH slightly. Mix thoroughly, then test the moisture dynamics by squeezing a handful. It should hold together when pressed but not drip water. If it feels too dry, add 2-3 tablespoons of water and remix.
Here's how to check if you've nailed the moisture balance: Fill a container with your mix, water it thoroughly, then wait 30 minutes. Stick your finger 1 inch deep—it should feel damp but not wet. This blend stays moist longer than traditional potting mixes while preventing root rot, which is exactly what makes coco coir so valuable for container gardens.
⏰ Step 5: Store or Use Immediately for Optimal Freshness
Use your mix within 2-3 weeks for best results, or store it in a sealed container in a cool, dry place. Coco coir-based mixes degrade faster than peat-based ones, so freshness matters. If storing long-term, add 1 tablespoon of food-grade diatomaceous earth per quart to deter fungal growth without harming plants.
Real talk: I've had this mix last up to 4 weeks in a sealed bucket, but after that, the structure breaks down and moisture retention suffers. For best performance, make small batches as needed. You'll know it's still good when it holds its fluffy texture and smells earthy—not musty or sour.
Tips & tricks for perfect coco coir soil mix
Between us, these small adjustments make all the difference between a mediocre soil blend and one that keeps your container plants thriving for weeks. Here's what nobody tells you—
Hydration is Everything: The 20-30 minute soaking time in Step 1 might seem arbitrary, but it's non-negotiable. I've seen coco coir clump into unusable bricks when rushed—this is why you want that gentle squeeze test after draining. If your mix still feels dry after squeezing, add just enough water to make it feel like a damp sponge, not a wet rag. This ensures even moisture distribution without creating anaerobic pockets where roots can rot.
Texture Control: In Step 2, when mixing perlite and vermiculite, think of them as the soil's skeleton system. The perlite creates those crucial air pockets, while vermiculite acts like a moisture sponge. If your mix feels too gritty after adding organic matter in Step 3, that coconut coir dust is your secret weapon—just a tablespoon binds everything without compacting. This is why your blend stays fluffy and workable, unlike heavy peat mixes that turn to concrete when dry.
Moisture Testing Made Easy: The 30-minute moisture test in Step 4 is your quality control moment. After watering your container, stick your finger 1 inch deep—it should feel like a wrung-out sponge, not a dripping wet washcloth. This is the sweet spot for moisture retention without suffocating roots. I've learned this the hard way: too wet and you get root rot; too dry and your plants wilt faster than a houseplant on a sunny windowsill.
Pro Tips for Coco Coir Soil Mix Recipe
- Between us, these small adjustments make all the difference between a mediocre soil blend and one that keeps your con...
- Hydration is Everything: The 20-30 minute soaking time in Step 1 might seem arbitrary, but it's non-negotiable. I've ...
- Texture Control: In Step 2, when mixing perlite and vermiculite, think of them as the soil's skeleton system. The per...
Frequently asked questions
Got questions about your coco coir soil mix?
You’re not alone! Here are answers to the most common ones to help you grow with confidence.
How long does coco coir soil mix stay moist?
A well-balanced coco coir mix retains moisture for 5–7 days without watering, depending on humidity and plant needs. For longer retention, add 10–20% perlite or vermiculite to improve aeration. Monitor soil with your finger—if the top inch feels dry, it’s time to water!
Can I reuse old coco coir mix?
Reusing coco coir is possible, but it’s best for short-term reuse (1–2 months) in the same container. Over time, it breaks down and loses structure. To refresh it, sterilize with heat (160°F for 30 mins) or mix in 20% fresh coco coir or compost. Avoid reuse if mold or pests appear!
What’s a good alternative if I can’t find coco coir?
If coco coir is unavailable, try these moisture-retentive alternatives:
- Peat moss (traditional but less sustainable)
- Worm castings (30–50%) for nutrients + moisture
- Sphagnum moss (holds water well but dries faster)
- Composted bark (add perlite for aeration)
Why does my coco coir mix smell bad?
A sour or rotten smell usually means overwatering, poor drainage, or anaerobic bacteria. Fix it by:
- Letting the mix dry out completely (skip watering for 3–5 days).
- Adding 1 cup of perlite or coarse sand per gallon to improve airflow.
- Fluffing the soil gently to aerate.
Is coco coir mix better for seedlings or mature plants?
Coco coir is ideal for seedlings because it holds moisture without suffocating roots, but mature plants need a lighter mix for aeration. For adults, blend coco coir with:
- 40% coco coir (moisture retention)
- 30% perlite/pumice (drainage)
- 20% compost (nutrients)
- 10% worm castings (gentle feeding)
Wrapping up and next steps
Creating your own coco coir soil mix is a game-changer for thriving container gardens! 🌱 With its moisture-retentive properties and eco-friendly benefits, this blend ensures healthier plants while reducing waste. Whether you're a seasoned gardener or just starting out, this recipe is simple, cost-effective, and perfect for nurturing lush greenery.
Now that you’re equipped with the perfect mix, it’s time to get growing! Start small with a few pots, experiment with different plant types, and watch your green thumb shine. Happy gardening—your plants will thank you! 🌿✨