
How To
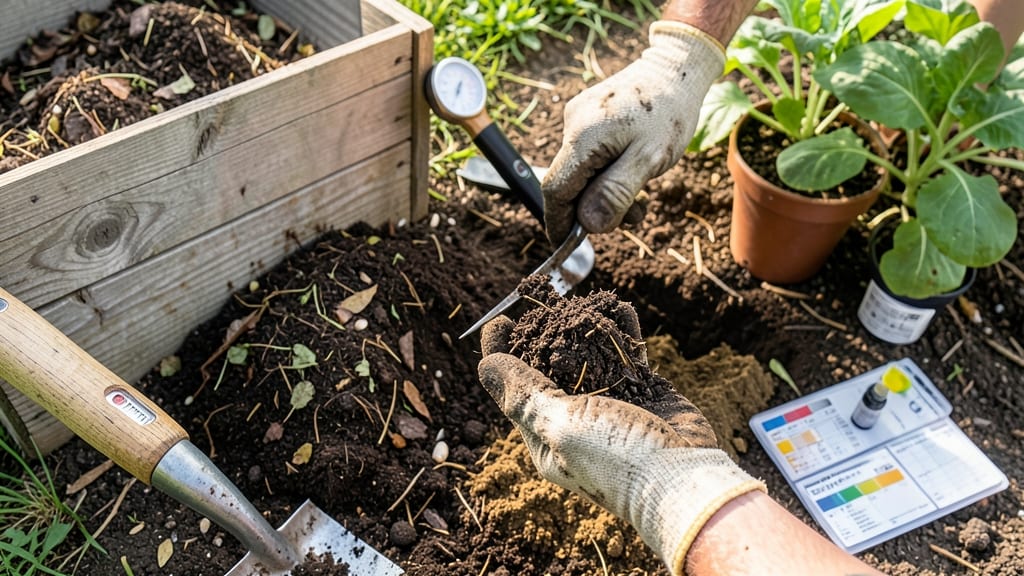
Transforming hard, lifeless soil into a thriving garden bed starts with amending soil with compost—and it takes less time than you think. ✨ I’ve turned my heavy clay into a dreamy loam just by working in a few inches of finished compost each season, and the difference in plant growth is night-and-day.
The science is simple: compost adds organic matter, improves drainage, and feeds soil microbes that plants actually crave.
You only need three basic tools: a garden fork, a shovel, and a wheelbarrow (or bucket) for mixing. For most vegetable gardens, aim for 2-3 inches of compost worked into the top 6-8 inches of soil. Heavy clay?
Mix in 50% compost by volume. Sandy soil? Use 30% to hold moisture without suffocating roots. The key is blending it thoroughly—don’t just top-dress, or you’ll end up with a compost layer and compacted soil underneath.
Once mixed, your soil will feel lighter, crumbly, and rich—like a spa day for plant roots. Tomatoes and peppers thrive in this loam, while flowers like zinnias and marigolds explode with color. The best part? You’ll cut down on watering, fertilizing, and even weeding over time.
For year-round benefits, add a 1-inch layer of compost on top of beds after harvests or in early spring, then lightly till it in.
Pro tip: If your compost still has big chunks, sift it first for even distribution. And if you’re working in fall, focus on cover crops like clover to build soil over winter—compost alone won’t fix everything.
Start small with a 4’x4’ patch to see the difference before tackling the whole garden. Your plants will thank you at harvest time.
📚 In This Guide
- What you need
- Instructions
- Tips and common mistakes
- Wrapping up and next steps
What you need
- ● Compost: 5–10 gallons per 100 sq. ft. (Use well-aged, dark, crumbly compost with a 2:1 carbon-to-nitrogen ratio for best results.)
- ● Garden soil: Enough to mix evenly with compost (1:1 ratio recommended).
- ● Garden gloves: Heavy-duty, waterproof gloves (to protect your hands from sharp debris and bacteria).
- ● Garden fork or tiller: For loosening compacted soil (manual fork for small areas, electric tiller for larger plots).
- ● Watering can or hose: With a gentle spray nozzle (to moisten soil before and after amending).
- ○ Soil pH test kit: To check soil acidity/alkalinity (optional but helpful for fine-tuning amendments).
- ● Compost thermometer: If using fresh compost (ensure it’s cooled to <70°F before applying).
- ● Wheelbarrow or large bin: For mixing materials (saves time and effort!).
- ● Kneeling pad: For comfort during long sessions (your back will thank you!).
- ○ Organic matter boosters: Optional—like worm castings (1–2 lbs per 100 sq. ft.) or biochar (1–2 cups per sq. yd.) for extra nutrients.
How to amend garden soil with compost for richer loam
Here's the foolproof method I use to transform heavy clay or sandy soil into fertile loam in a single season.
🌱 Step 1: Test Your Soil's Current Condition
Before adding compost, grab a handful of damp soil and squeeze it. If it crumbles easily, you have sandy soil that needs moisture retention. If it forms a hard clump that won't break, you're dealing with clay that needs aeration. I like to do this test in both sunny and shady spots—their needs often differ.
Dig a small hole about 6 inches deep and examine the layers. Darker soil with visible organic matter? You're already ahead. Pale, gritty layers? That's your cue to add more compost. The goal is to create a loamy texture—like a well-worn baseball glove—that holds moisture but drains well.
🪴 Step 2: Calculate Compost Amount Based on Soil Type
For sandy soil, mix in 3 inches of compost per 12 inches of topsoil. The compost's fine particles will fill the large gaps between sand grains. In clay soil, spread 2 inches of compost over the surface and lightly scratch it in—this prevents compaction while improving drainage.
Real talk: Don't go overboard. Too much compost can create a soupy mess that suffocates roots. I always start with the recommended amounts and adjust next season based on plant performance. Spread the compost evenly using a rake, working it into the top 6 inches of soil.
☀️ Step 3: Incorporate Compost Using the Right Technique
Use a broadfork or garden fork to loosen the top 6-8 inches of soil before adding compost. This prevents creating a hardpan layer where roots can't penetrate. Work the compost into the soil until it looks like chocolate cake batter—dark, crumbly, and evenly distributed.
For large garden beds, I divide the area into 4-foot sections and work one at a time. This keeps the compost from drying out while you work. Water the amended soil lightly after mixing to help the compost break down and settle into place. You'll see worms and beneficial microbes appear within days—that's your sign the soil is waking up.
💧 Step 4: Maintain Moisture and Monitor Plant Response
Keep the amended soil consistently moist for the first 2-3 weeks—this jumpstarts microbial activity. You'll notice the soil feels lighter and warmer to the touch. Mulch the surface with 1-2 inches of straw or shredded leaves to retain moisture and prevent crusting.
Plant a test crop like radishes or lettuce to gauge improvement. If they thrive with fewer fertilizers, your compost amendment worked. If growth is still sluggish, add another 1 inch of compost next season. The transformation takes time, but you'll see dramatic changes in just a few months.
⏰ Step 5: Schedule Annual Maintenance for Long-Term Benefits
Every spring, top-dress garden beds with ½ inch of compost and lightly scratch it in. This maintains fertility without overloading the soil. I also recommend a 3-year rotation for heavy clay: Year 1 focuses on drainage, Year 2 builds organic matter, and Year 3 refines structure with additional compost.
Pay attention to how different plants respond. Tomatoes might love the improved soil while your peppers prefer it slightly drier. Adjust your approach based on what thrives. With consistent care, your soil will transform from lifeless dirt to a thriving ecosystem that supports robust plant growth year after year.
Tips & tricks for perfect soil amendments
Here's what nobody tells you about transforming your garden soil—these are the small details that make all the difference between good soil and great soil.
Soil Texture Test: When you grab that handful of damp soil in Step 1, pay attention to how it feels when dry too. Sandy soil should feel gritty like sugar, while clay feels smooth but hard when pressed. If your soil feels sticky when wet but cracks when dry, you're dealing with classic clay that needs the 2-inch compost layer from Step 2. The texture test is your soil's personality profile—know it well!
Compost Layering Strategy: For large garden beds, I like to create a "compost sandwich" before incorporating: spread 1 inch of compost, lightly fork in, then add another 1-2 inches before the final mix. This ensures even distribution without creating compost pockets that can mat down. Think of it like fluffing a pillow—you want that compost evenly dispersed throughout the top 6 inches.
Section Workflow: That 4-foot section recommendation in Step 3 isn't arbitrary—it's based on how quickly compost dries out. Work in smaller sections when temperatures exceed 80°F, or you'll spend more time rewetting than amending. I keep a small watering can nearby to give each section a quick mist before moving on. This keeps the compost active and prevents crusting.
Plant Response Indicator: When planting your test crop in Step 4, watch for these three signs of improvement: faster germination, deeper green leaves, and stronger stems. If your radishes emerge within 5 days instead of 10, you're on the right track. The soil should also smell fresh rather than musty or metallic—this is your nose confirming the compost is working its magic.
Pro Tips for Amending Soil With Compost
- Here's what nobody tells you about transforming your garden soil—these are the small details that make all the differ...
- Soil Texture Test: When you grab that handful of damp soil in Step 1, pay attention to how it feels when dry too. San...
- Compost Layering Strategy: For large garden beds, I like to create a "compost sandwich" before incorporating: spread ...
Frequently asked questions
Got questions about transforming your soil with compost? You’re not alone! Here are some of the most common queries—plus straightforward answers to get you growing like a pro.
How soon can I plant after amending soil with compost?
Once you’ve mixed compost into your soil, wait at least 2–4 weeks before planting. This gives microbes time to break down organic matter and improve soil structure. For heavy clay or sandy soil, extend it to 6–8 weeks for optimal results. Test your soil’s moisture and texture—if it crumbles easily, you’re good to go!
Is there a best time of year to amend soil with compost?
Fall and early spring are the golden windows for amending soil. In fall, compost integrates over winter, enriching soil for spring planting. In spring, it jumpstarts nutrient availability. Avoid amending right before heavy rains, which can wash nutrients away. Pro tip: Top-dress (spread compost on top) in late summer for a slow-release boost!
Can I use homemade compost instead of store-bought?
Homemade compost is often more nutrient-dense and cost-effective. Just ensure it’s fully decomposed (dark, crumbly, and earthy-smelling) with a 2:1 ratio of browns (leaves, straw) to greens (vegetable scraps, grass clippings). Store-bought compost is convenient but may contain additives—check labels if you’re growing edibles.
Will compost attract pests like ants or rodents?
Fresh, unfinished compost can attract pests, but well-aged, mature compost is safe and beneficial. To deter critters:
- Use hot composting (140°F+ for 3+ days) to kill weed seeds and pathogens.
- Avoid adding meat, dairy, or oily foods—stick to plant-based scraps.
- Store compost in a well-aerated bin (not a sealed pile) to reduce odor and pests.
What if my compost smells bad after mixing it into the soil?
A foul odor usually means your compost wasn’t fully decomposed or has too much nitrogen (greens). To fix it:
- Add dry leaves, straw, or wood chips to balance moisture and carbon.
- Turn the soil-compost mix to aerate it and speed up decomposition.
- If the smell persists, wait 2–4 weeks—it’ll stabilize as microbes do their work.
Wrapping up and next steps
Amending soil with compost isn’t just a gardening hack—it’s a science-backed game-changer that boosts plant health, reduces waste, and even saves you time. Whether you’re a seasoned green thumb or just starting, turning your soil into nutrient-rich loam in minutes is totally doable with the right approach. 🌱
Ready to transform your garden? Start small: test your soil, gather your compost, and dive in! Every shovel full is a step toward healthier plants—and a greener planet. Happy gardening! 🌿