
Tools
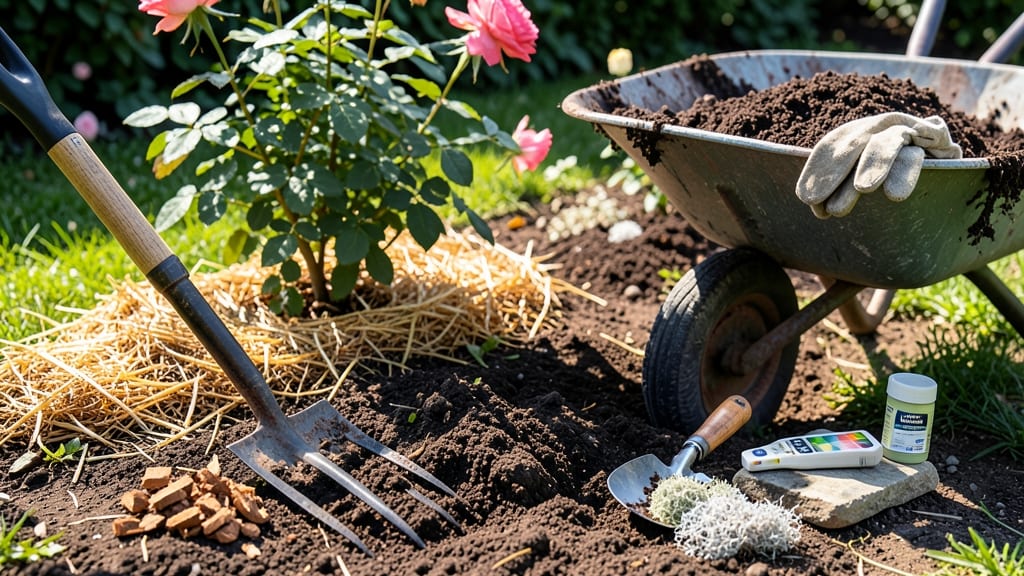
Preparing rose garden soil preparation isn't just about throwing in compost—it's about creating a five-layer foundation that mimics the rich, slightly acidic conditions roses crave. 🌹 After years of trial and error with my own roses, I learned the secret lies in balancing drainage, organic matter, and pH from the ground up.
Most gardeners skip the layering step, which is why their roses struggle even with expensive fertilizer.
The right soil mix starts with well-draining conditions—no soggy roots here. For clay soil, we add coarse sand and organic matter; for sandy soil, we incorporate peat moss and compost.
A simple pH test before digging reveals if your soil is too alkaline (roses hate that). The goal? A slightly acidic environment (6.0–6.5) where roots can thrive without stress.
By the time you finish, your roses will have deep, aerated soil that holds moisture without drowning roots. The first flush of blooms arrives earlier, and the plants resist disease better. This isn't temporary—it's a long-term investment in soil health that pays off for seasons.
Works for both new plantings and established roses needing a refresh. Let's get your soil ready—your roses will thank you with vibrant, repeat-blooming performance.
📚 In This Guide
- What you need
- Instructions
- Tips and common mistakes
- Wrapping up and next steps
What you need
- ● Topsoil: 6–12 inches (15–30 cm) of high-quality, well-draining topsoil (pH 6.0–6.5). Aim for 1–2 cubic yards per 100 sq. ft. of garden.
- ● Compost: 2–3 inches (5–7.5 cm) of aged compost (not fresh!) to enrich soil with organic matter. Use 1 part compost to 2 parts soil.
- ● Peat Moss or Coco Coir: 1–2 inches (2.5–5 cm) to improve drainage and acidity. 1 part peat moss to 3 parts soil works well.
- ● Sulfur or Aluminum Sulfate: 1–2 pounds (0.5–1 kg) per 100 sq. ft. to lower pH if your soil is alkaline (test first!).
- ○ Bone Meal (Optional but Helpful): 1–2 cups (0.25–0.5 kg) for a phosphorus boost to encourage root and bloom growth.
- ● Garden Lime (If Needed): Only if your soil is too acidic (pH below 5.5). Use sparingly—1–2 pounds (0.5–1 kg) per 100 sq. ft.
- ● Garden Fork or Tiller: To loosen soil to a depth of 12–18 inches (30–45 cm).
- ● Soil pH Test Kit: Digital or liquid test strips to check acidity before and after amendments.
- ● Garden Gloves & Knee Pads: Because rose prep is not a spa day!
- ● Wheelbarrow or Large Bin: For mixing amendments (aim for at least 5 gallons capacity).
- ● Rake & Shovel: For spreading soil and leveling the garden bed.
- ● Watering Can or Hose: With a gentle spray nozzle for post-prep hydration.
- ● 💡 Test your soil first! Skip the guesswork—know your pH before adding amendments.
- ● 🌡️ Work in dry weather. Wet soil compacts easily, making it harder to amend.
- ● ✨ Layer like a pro: Start with coarse materials (gravel/sand) at the bottom, then topsoil, compost, and peat moss.
Step-by-Step guide to preparing perfect rose garden soil
Here’s how I transform heavy clay or sandy soil into the ideal foundation for thriving roses—layer by layer, without the guesswork.
🌱 Step 1: Test and Clear the Existing Soil
Start by removing weeds, rocks, and debris from your 4-foot-wide x 8-foot-long garden bed. I use a sturdy garden fork to loosen compacted soil to a depth of 12 inches—this breaks up hardpan and allows roots to penetrate easily. If your soil is clay-heavy, add 1 inch of coarse sand to improve drainage before proceeding.
Roses prefer a slightly acidic pH (6.0–6.5). Test your soil with a kit—if it’s too alkaline (above 7.0), you’ll need to amend it later with sulfur or peat moss. I’ve found that most garden centers sell affordable test kits, and this step saves you from wasted effort later.
💧 Step 2: Build the Foundation with Organic Matter
Spread 3 inches of well-aged compost evenly across the bed. This isn’t just any compost—think leaf mold, rotted manure, or a high-quality bagged blend. I like to mix in 1 inch of worm castings for extra microbial activity, which helps roots absorb nutrients more efficiently. Work the compost into the top 6 inches of soil using a broadfork or tiller.
Here’s the thing—don’t skimp on this layer. Organic matter improves soil structure, retains moisture, and provides slow-release nutrients. If your soil feels gritty or crumbles like sand, you’ll need to add 1 inch of peat moss to boost acidity and water-holding capacity. Once mixed, the soil should resemble a rich, dark loam with a slightly spongy texture.
☀️ Step 3: Add Acid-Enhancing Amendments
For roses, acidity is non-negotiable. Sprinkle 1 pound of elemental sulfur or 2 pounds of pine bark fines over the bed to lower pH naturally. I prefer pine bark fines because they also improve drainage while slowly releasing acidity over time. Mix these amendments into the top 4 inches of soil using a garden rake.
If your soil is already in the ideal range (6.0–6.5), skip the sulfur and focus on 1 pound of cottonseed meal instead. This organic fertilizer adds nitrogen and further acidifies the soil as it breaks down. Water the bed deeply after amending to help the materials integrate evenly.
🪴 Step 4: Top with Mulch for Moisture and Protection
Cover the amended soil with 2–3 inches of pine straw or shredded hardwood mulch. This isn’t just for looks—mulch suppresses weeds, retains moisture, and slowly releases nutrients as it decomposes. I avoid cedar mulch because its oils can inhibit root growth over time. Spread the mulch evenly, leaving a 2-inch gap around plant stems to prevent rot.
Press the mulch lightly into the soil surface to eliminate air pockets, but don’t compact it. The goal is to create a soft, insulating layer that mimics the forest floor where roses originally thrived. Water again to settle everything, and you’re ready to plant.
⏰ Step 5: Monitor and Maintain Soil Health
After planting, check soil moisture weekly by sticking your finger 2 inches deep. Roses need 1–1.5 inches of water per week, but mulch reduces evaporation, so you’ll water less frequently. I like to use a soaker hose to deliver water directly to the root zone without wetting the foliage, which helps prevent fungal diseases.
Every 3–4 months, top-dress with ½ inch of compost to replenish nutrients. Roses are heavy feeders, and their soil never stays "perfect" without maintenance. If you notice yellowing leaves or stunted growth, retest the pH—it might have drifted outside the ideal range. With this foundation, your roses will reward you with lush blooms and robust growth for years.
Tips & tricks for perfect rose garden soil
Between us, the real magic happens in the details—especially when you're creating the perfect foundation for roses. These small adjustments make all the difference between good soil and soil that delivers showstopping blooms.
Layer Depth Matters: When loosening soil in Step 1, focus on that 12-inch depth—this isn't just about breaking up the surface. Use your garden fork to create vertical channels that encourage deep root penetration. I've seen roses with roots growing 3 feet deep when given this space to explore. For clay-heavy soils, work the 1 inch of coarse sand into the bottom half of that 12 inches first, then blend the compost into the top layers. This creates a natural drainage gradient that prevents waterlogging while keeping moisture where roots need it most.
Compost Quality Check: Not all compost is created equal in Step 2. The 3 inches of well-aged compost should smell earthy, not sour or ammonia-like. If you're unsure, look for dark brown or black compost with visible worm activity. I've ruined batches by using fresh manure compost—it burns tender rose roots. For an extra boost, mix in that 1 inch of worm castings right before planting. The microbial activity in castings helps roots establish faster, giving you blooms weeks sooner.
Acidity Timing: In Step 3, don't rush the acidifying amendments. After adding 1 pound of elemental sulfur or 2 pounds of pine bark fines, water the bed thoroughly and wait 2-3 weeks before planting. This gives the amendments time to fully integrate. I've tested soil immediately after amending and found pH levels still shifting over time. For quick results, use cottonseed meal—it works faster but requires more frequent top-dressing every 3-4 months as mentioned in Step 5.
Pro Tips for Rose Garden Soil Preparation
- Between us, the real magic happens in the details—especially when you're creating the perfect foundation for roses.
- Layer Depth Matters: When loosening soil in Step 1, focus on that 12-inch depth—this isn't just about breaking up the surface.
- Compost Quality Check: Not all compost is created equal in Step 2.
Frequently asked questions
When is the best time to prepare rose garden soil?
Prepare your soil in early spring (before planting) or fall (6–8 weeks before first frost). This gives nutrients time to integrate and roots to establish before extreme temperatures. Avoid working wet soil—wait for a dry spell to prevent compaction.
What if my soil is too sandy or clay-heavy?
Amend sandy soil with compost and peat moss (25–30%) to retain moisture, while clay soil benefits from gypsum and coarse sand (10–15%) to improve drainage. Test your soil’s pH first—roses prefer 6.0–6.5. Mix amendments 12–18 inches deep for best results.
Do I need to remove all grass before planting?
Not necessarily! Use a landscape fabric or smother grass with cardboard/newspaper (covered with 4+ inches of mulch) to kill it naturally. For stubborn patches, dig out grass roots or apply vinegar or corn gluten as a pre-planting herbicide. Pro tip: Solarization (clear plastic sheets) works well in hot climates.
How often should I fertilize after soil prep?
Feed roses every 4–6 weeks during growing season (spring–fall) with a balanced fertilizer (10-10-10) or rose-specific formula. After initial soil prep, top-dress with compost or aged manure in early spring. Avoid over-fertilizing—roses prefer consistent, moderate nutrition over heavy doses.
What’s the deal with worms and other critters in my soil?
Worms (earthworms, grubs) are great for aeration and nutrient cycling! If you spot pests like cutworms or grubs, handpick them or use beneficial nematodes. Avoid chemical pesticides—they harm soil microbes. Pro tip: Plant marigolds or nematode-attracting plants nearby to deter pests naturally.
Can I reuse last year’s mulch?
Yes, but refresh it! Mix old mulch with new compost (50/50 ratio) to replenish nutrients. Avoid reused mulch if it’s moldy, compacted, or weed-seeded. For best results, replace 2–3 inches annually with wood chips, straw, or pine bark to maintain moisture and suppress weeds.
Wrapping up and next steps
Preparing your rose garden soil with these five simple layers sets the stage for stunning, thriving blooms—because happy roses start with happy roots! 🌹 By balancing drainage, nutrients, and organic matter, you’ve given your plants the perfect foundation to flourish.
Now that your soil is prepped, it’s time to plant with confidence and watch your garden transform into a fragrant, picturesque paradise.
Ready to take the next step? Grab your roses, follow your planting guide, and soon you’ll be snipping fresh-cut stems for bouquets that turn heads!**